 Web Forms
Web forms look like a questionnaire and collect information from people for a Workflow instance. Because a web form is a publicly accessible web page with a form built in, you can loop customers, partners, or vendors into your automation. When a web form is submitted, all entries are available as fields in the process.

Web forms are either sent in an action, like the Email: Send a Form action or can be a trigger to start a new Workflow with a Web form trigger. In both cases, the form answers are turned into fields.
Examples of use 
A web form or web form trigger is useful for collecting input from customers, partners, vendors and employees who are not users within your PagerDuty Workflow Automation team. For users on your PagerDuty Workflow Automation team, the Assign task to a person action is a simple alternative.
Example
- Olivia wants to give her customers a way to submit product feature requests. She creates a web form with fields like “name”, “what feature’s would you like to see?” and “email”. She then hooks the web form up to a Workflow that analyzes the feedback, and creates Github issues. Customers can now go to the web form, fill it out, and trigger this Workflow on their own.
When a web form trigger is completed, the trigger initiates an instance of that Workflow using the information entered into the form. This is often used as an intake mechanism for requests, tickets, or issues that can then be addressed through a Workflow.
How web forms work
Fields filled out in a web form, like Name, Date, Claim Type, or Claim Image in the example above, are available as fields in a process.
Web forms are used in three ways:
- As triggers
- Sent with the Email: Send an email action
- Sent with the SMS Text: Send a form via text action.
How a web form trigger works
With a web form trigger, the web form is hosted on a publicly accessible link, like example-team.pushbot.com/form/submit-new-claim-trigger, and any time it’s submitted, an associated Workflow starts.

How to create a web form trigger
Creating a web form trigger has two steps: first follow the steps to create a web form trigger. After the web form trigger is created, follow the steps below to add fields to the web form.
- Follow the steps to create a web form trigger.
- After you have added the trigger, navigate to the builder page for the Workflow. If you’re not already there, select the Workflow and select
 in the upper-right corner to get to the Workflow Builder page.
 - Click open the Triggers and Fields section to head to your Form Fields
-
Select Add a Field.
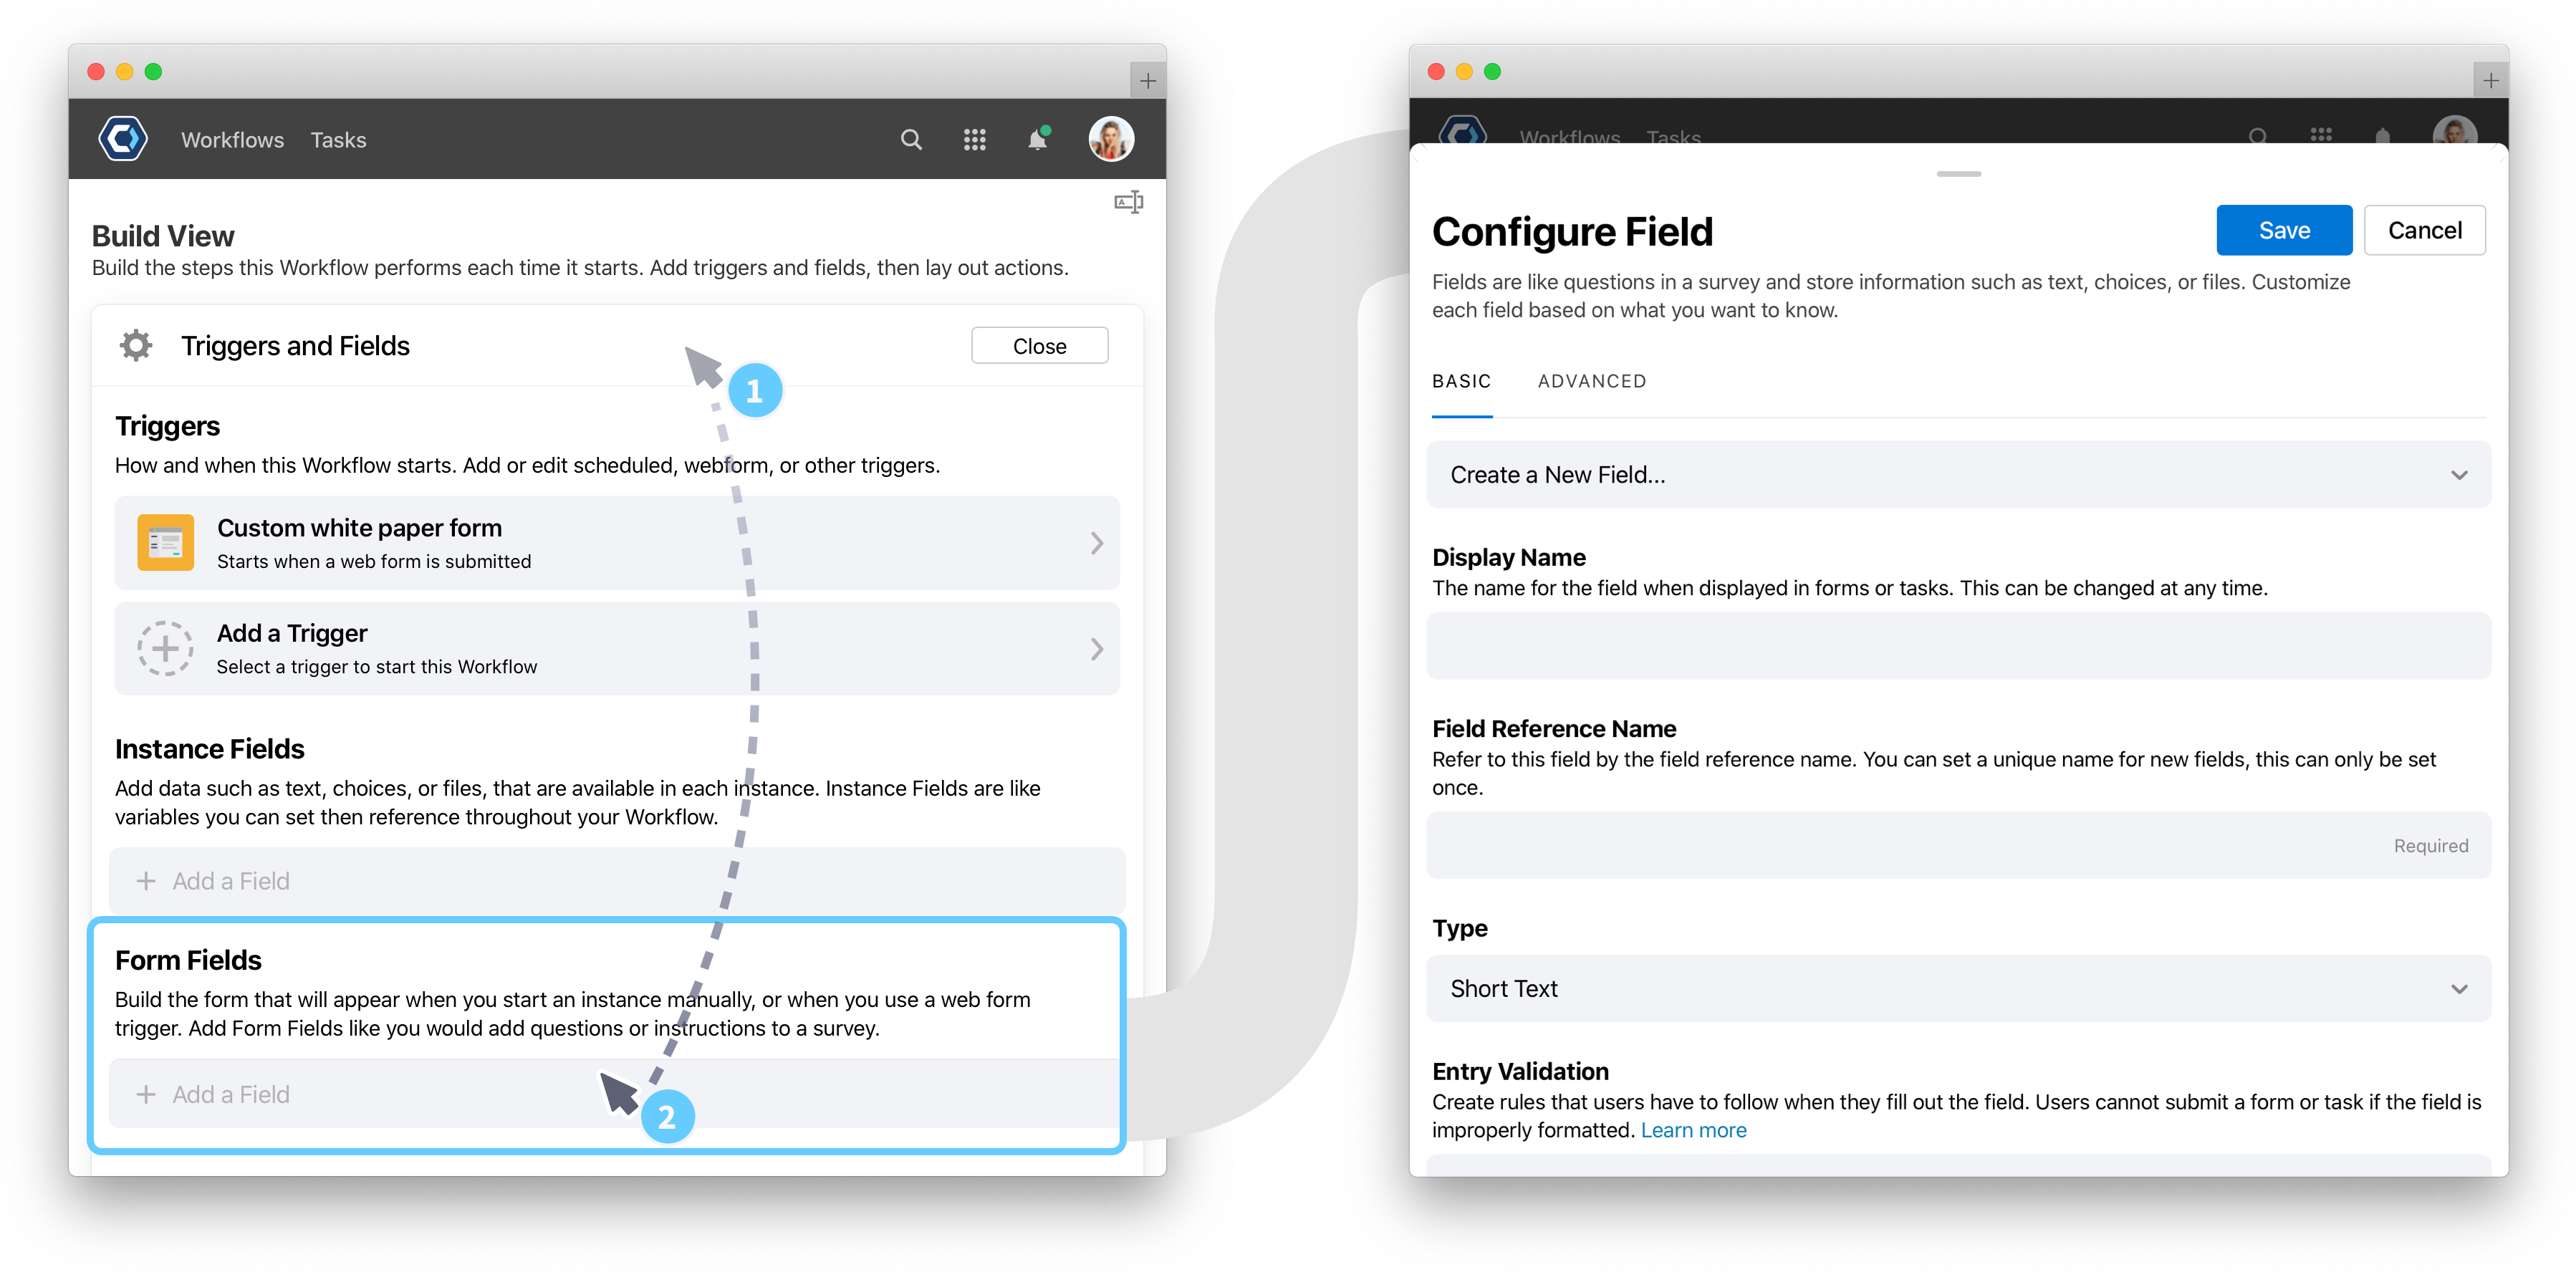
- Add fields to the action in the order they should appear on the form
- Select each field to configure field specific settings, like type or description. See How to configure fields for more details.
- When finished, select
 .
.
How to share a web form
Web forms are either hosted on a publicly accessible link, like example-team.pushbot.com/form/submit-a-new-claim-trigger, or can be embedded straight into a web page.
To get started sharing a web form, select  at the top of the Workflow Settings page for the Workflow whose web form trigger you’d like to share. You can only share web forms after adding a webform trigger.
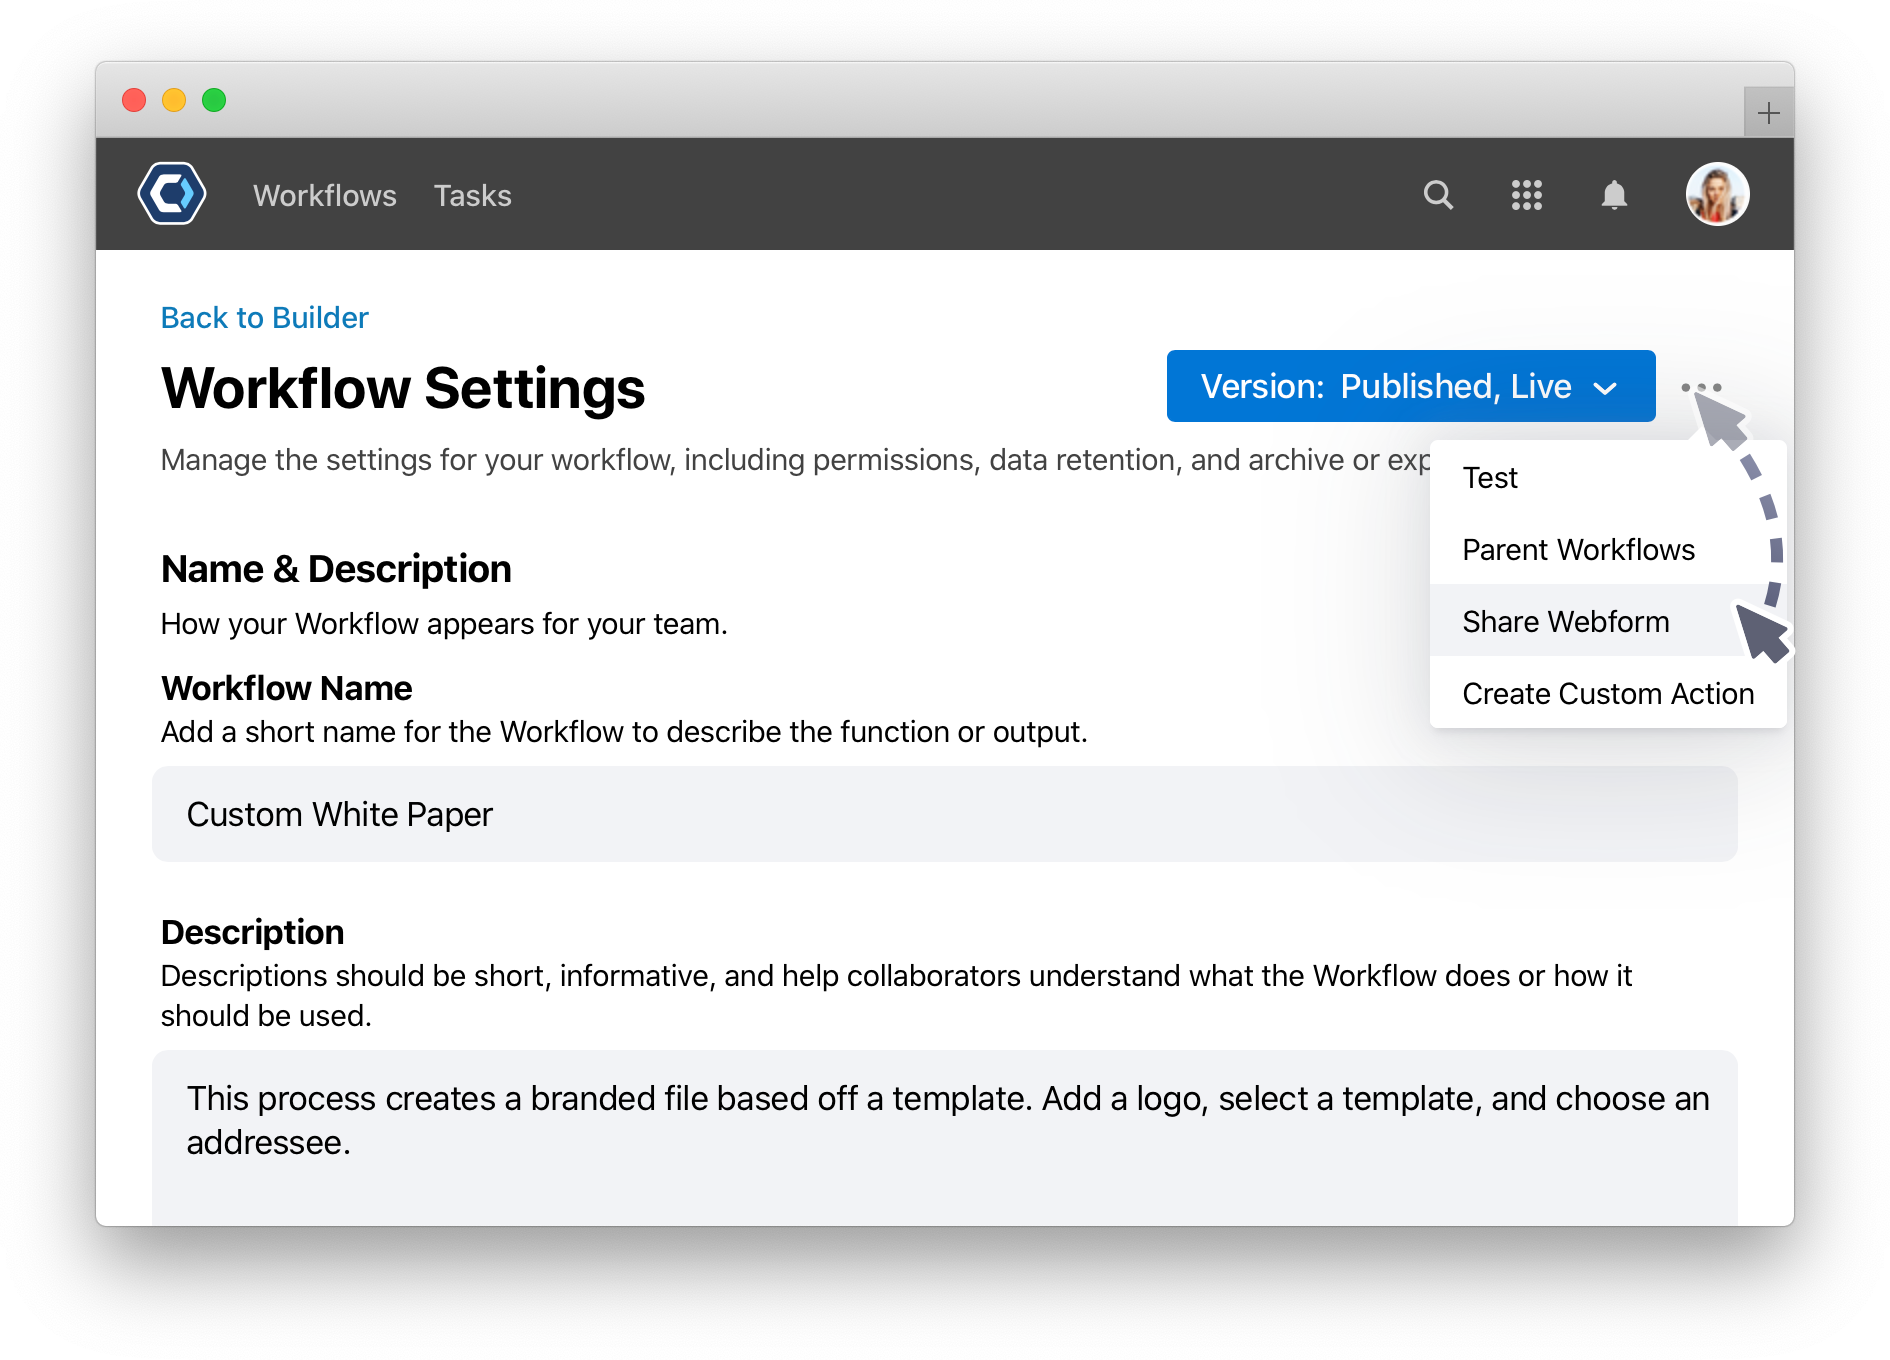
From the share web form screen, select the Link or Embed tab to choose how you’d like to share the form.
Share a link to a web form
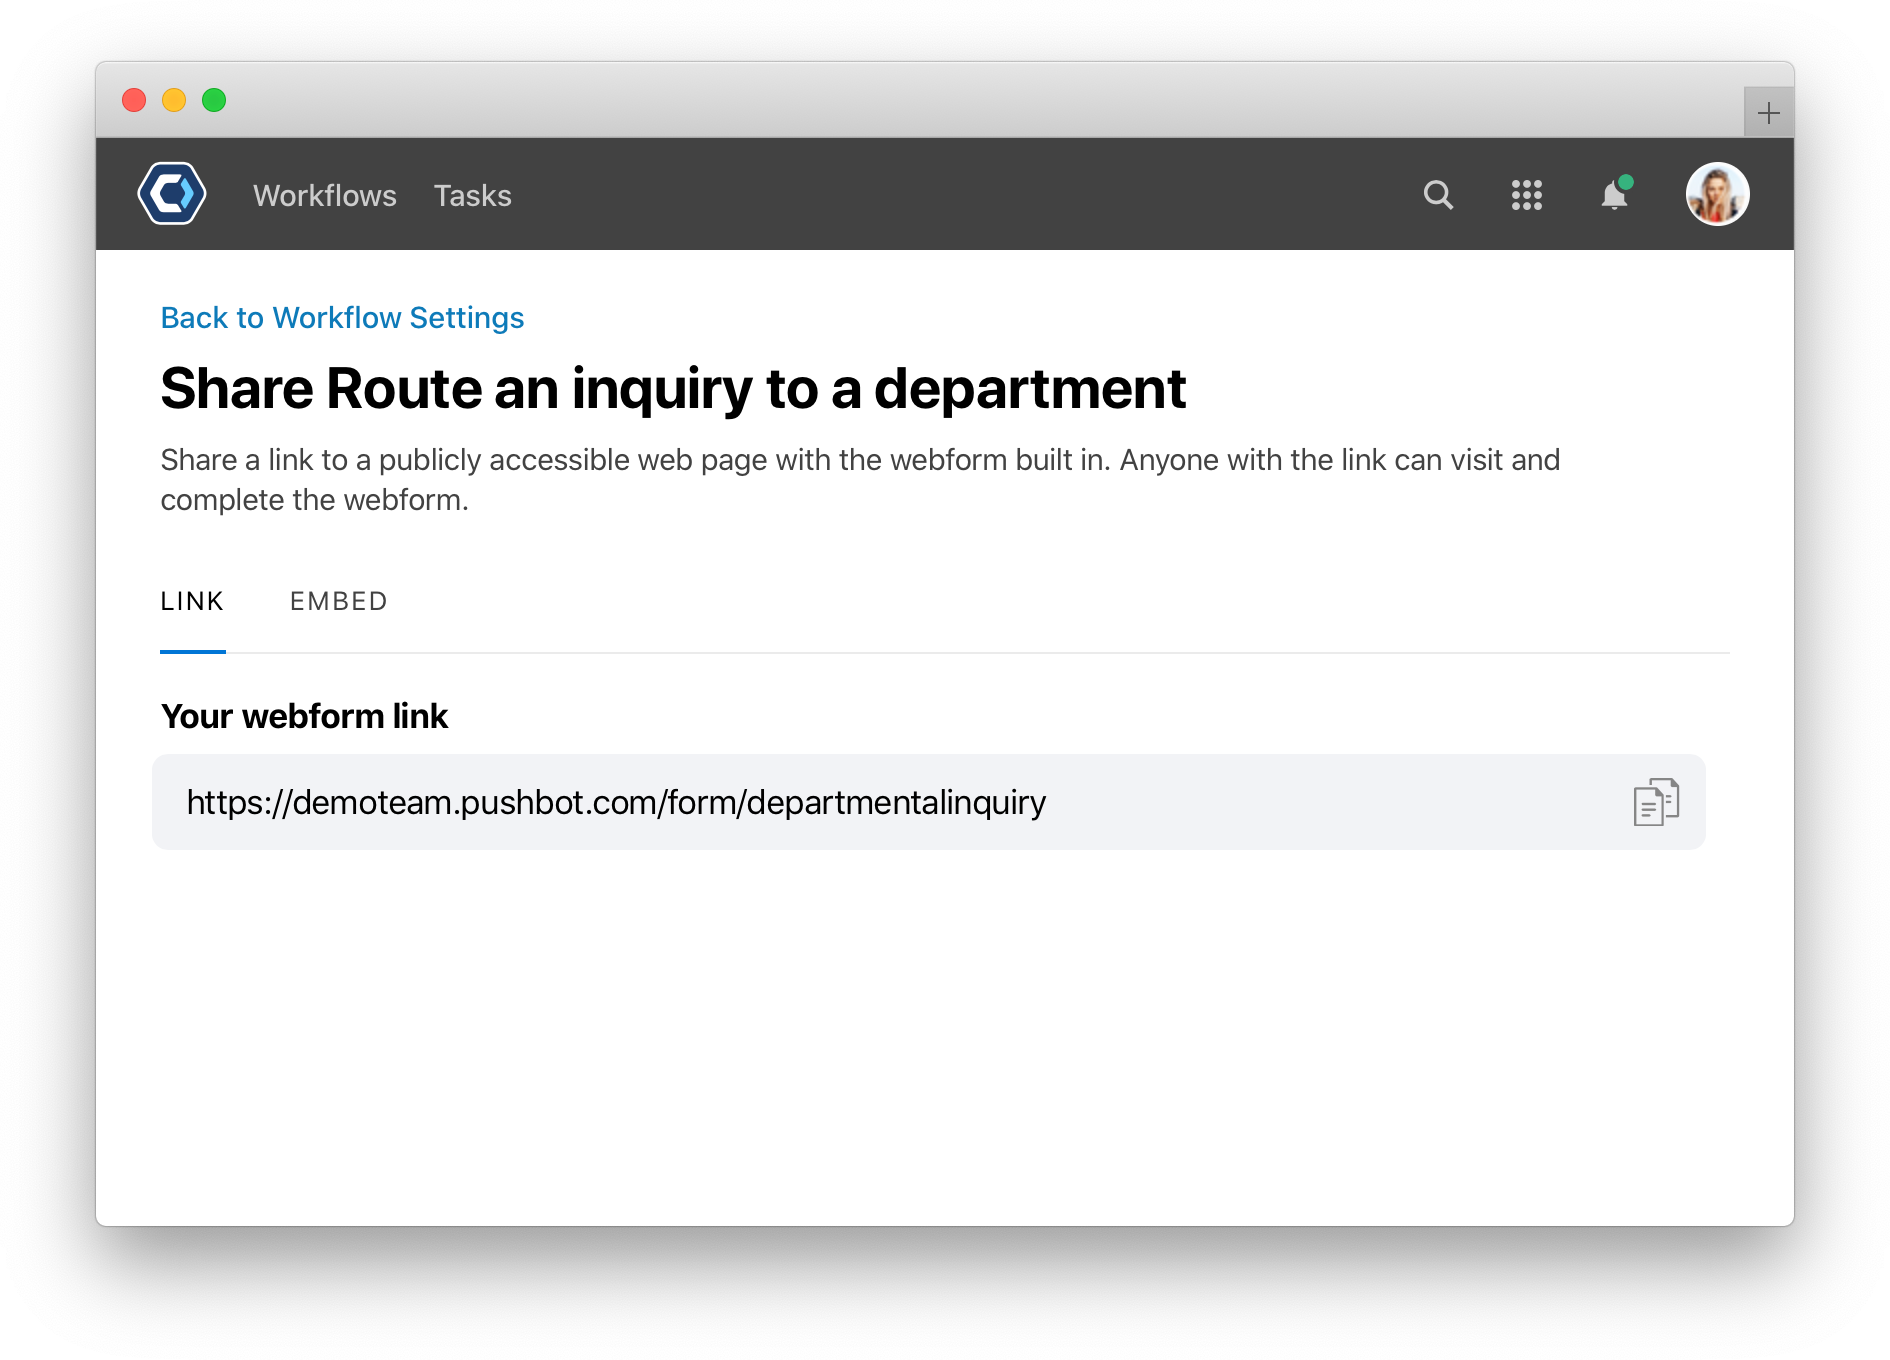
The webform link on the link tab is a publicly accessible link that can be shared with anybody. Copy and paste it from here and add it to an email, instant message, or anywhere else.
Embed a web form into your site
From the embed tab, you can generate a piece of code and embed a PagerDuty Workflow Automation web form directly within your own website. Just add the copied code to your website’s HTML to embed the web form into the content of your website, where it will be available directly from the page.
For security purposes, you can only embed forms on allowed domains. Team admins can set these allowed domains from the admin team center, from the web form settings menu. Everyone can view a list of allowed domains using the link at the bottom of the embed page.
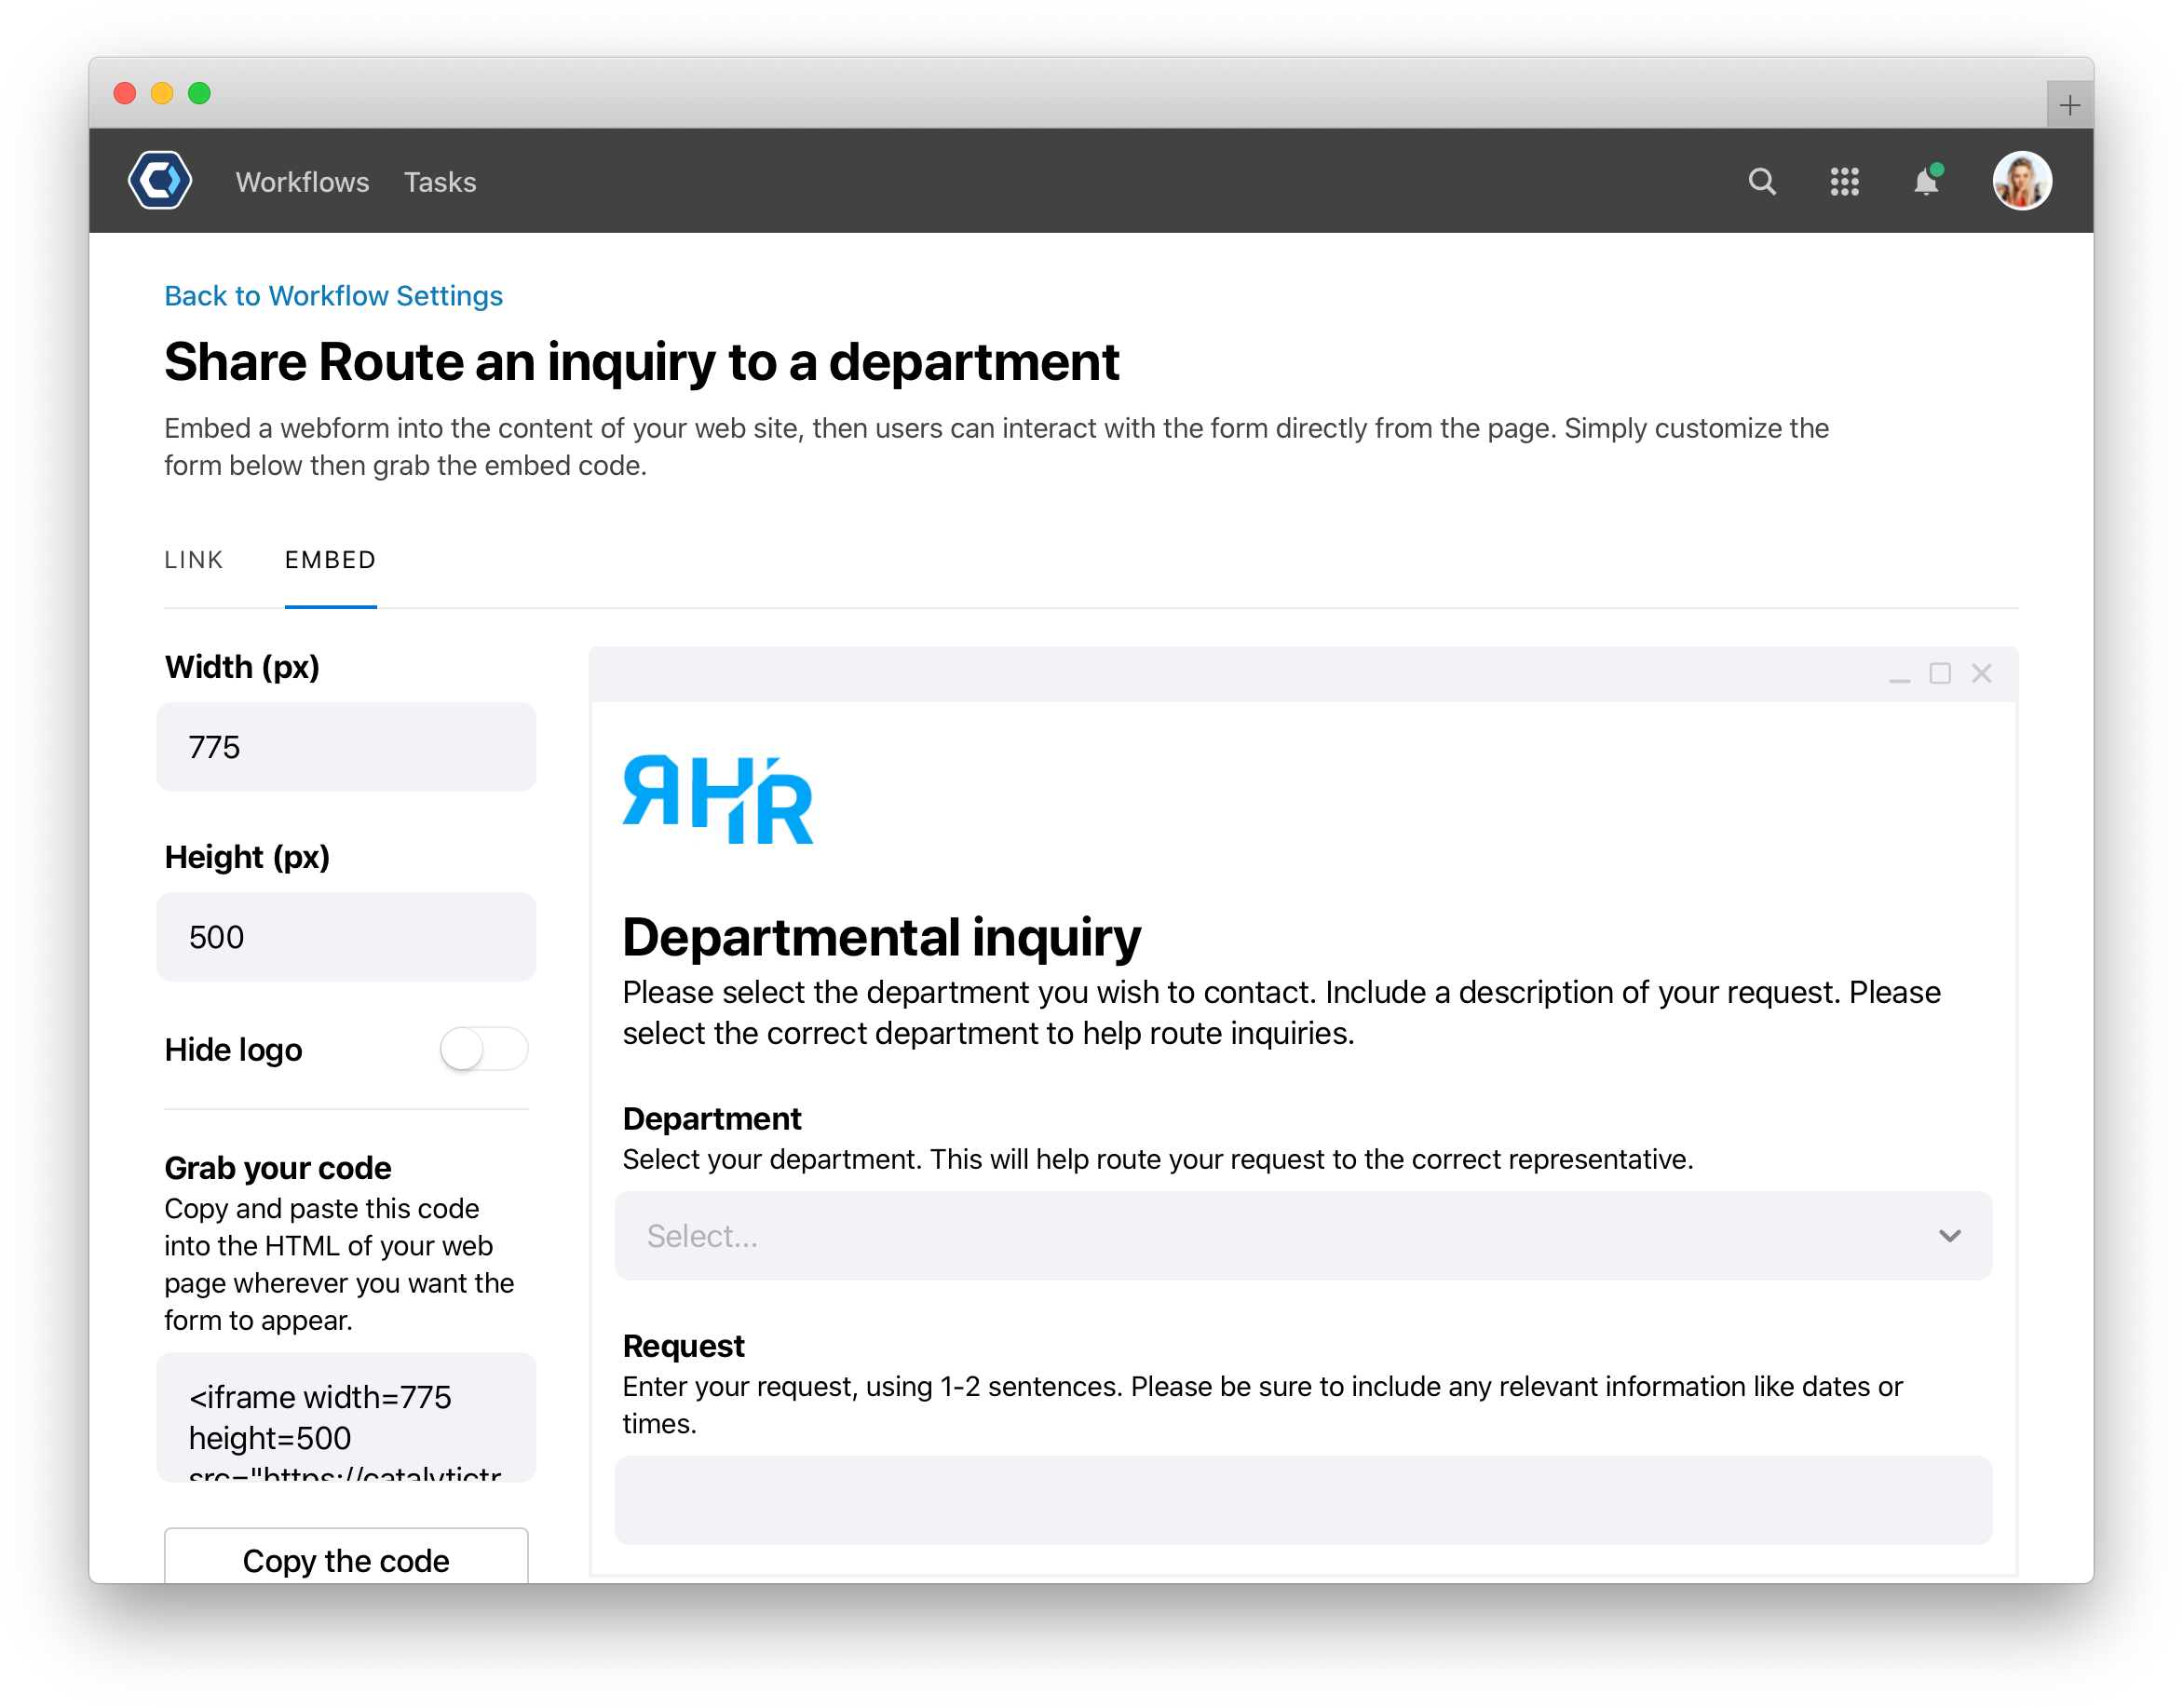
On this page, you can see a sample form and set the embedded form dimensions. Adjust the width and height to customize how your embedded form will appear on your website—the preview on the right hand side updates dynamically to show how the form will look. After setting up the form, copy the code into the HTML of your web page where you want the form to appear.
💡 Tip: If you make edits to the height, width, or logo after the code is copied or embedded, copy the code again as changes do not apply to previously embedded forms.
Manage which domains can host embedded web forms
For security purposes, you can only embed forms on allowed domains. Admins can add allowed domains from the Admin Team Center. From the web form settings screen, enter the trusted domains where web forms are allowed—web forms will only appear if hosted on an included domain.
- Enter the domains allowed to host embedded web forms. The domain is the part of the URL before
.com. Such aswww.pagerduty.com. - The results save automatically.
To remove a domain, select the  on an added domain.
How a web form sent by an action works
With a web form sent by email or SMS, the web form is a unique address sent directly to a recipient. It can only be filled out once. Once it is submitted, the task completes.

How to create a web form sent by an action
- Add an Email: Send a form action to any Workflow
- Click the action to configure it.
-
From the configure task page, select Add a field in the Form Fields section.

- Continue adding fields to the action in the order they should appear on the form
- Select each field to configure field specific settings, like type or description. See How to configure fields for more details.
- Configure the rest of the action as usual. See Email: Send a form or SMS Text: Send a form via text for more information.
Additional ways to customize web forms
Web forms have some functionality available if you customize the web form URL. The following examples involve making edits to a standard web form link. You can experiment and test these features out yourself at https://training.pushbot.com/form/webformsandbox or any web form you use.
💡 Tip: For each following customization options, add a ? before the first option, and an & between any additional options.
Set unique redirect URLS when a web form is submitted
Configure your webform to redirect to a specific URL after it has been submitted if there’s an error, or if there’s a 404 error. This is useful to redirect users to another form, a specific internal website, or to the “next step” if they’re in a process. You can use ref-success, ref-error, and ref-404.
ref-success={{url}}- redirects users if their submission is successful.ref-error={{url}}- redirects users if there is an error after they submit the form.ref-404={{url}}- redirects users if there is a 404 page not found error after they submit the form.
Add a ? before the first options, and a & between any additional options. For example, `
- Add one redirection, https://training.pushbot.com/form/webformsandbox?ref-success=https://www.pagerduty.com
- Or multiple, https://training.pushbot.com/form/webformsandbox?ref-success=https://www.pagerduty.com&ref-error=https://www.pagerduty/resources
Hide the Submit button on a web form
Hide the submit button on a web form to create a mini-website. This is great for hosting information like a schedule, list of links, instructions, or event details.
To hide the submit button, just append disable-submit=true at the end of any web form URL. For example https://training.pushbot.com/form/webformsandbox?disable-submit=true.
Add a ? before the first customization, and a & between any additional customizations.
💡Tip: Even if you disable the submit button, conditional fields still work—this means you can make mini-websites which conditionally display content based on fields. See add a field condition walkthrough for more.
Auto-populate web form fields with URLs
During setup of an action or Workflow, you can set defaults for each field so every web form has fields pre-populated. But for added customization, you can create custom web form URLs so each web form is auto-populated with dynamic data.
For example, you could generate 3 custom web form URLs for three company regions, then distribute the regional link to the recipients in each region. When the recipient accesses the web form, a Region field can be pre-filled with EMEA or APAC.
This small touch can reduce error rate in a web form by auto-populating important survey information like office, date, email address, or region. Read more about setting this up from the Auto-populate fields with URLs article.
How to set permissions on a web form
Set permissions on a web form to limit who can find, view, or submit the web form. You can set permissions from the web form configuration page. Permissions are set per-Web form. You can set permissions for web form actions and web form triggers.
Permissions can be set as public, internal, confidential, or email recipients.
- Public: Visible to anyone.
- Internal: Visible to team members only.
- Confidential: Visible to designated users only. You can select which users to share the web form with.
- Email Recipients: Visible to email recipients only. Only available for web form actions.
How web forms save progress
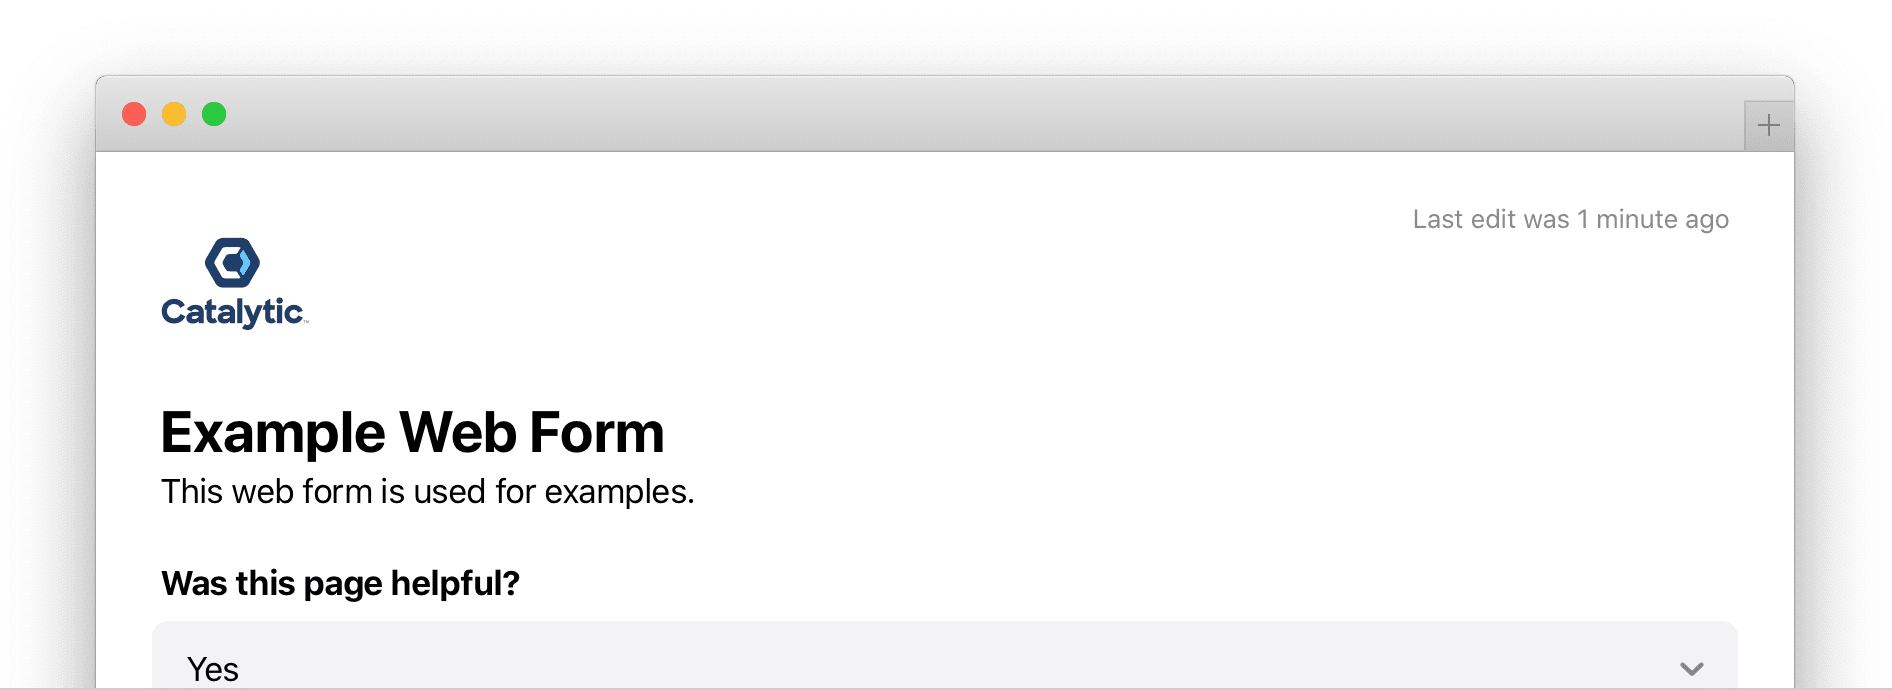
Web forms save any changes in your browser until submitted. This means if you accidentally close a tab or quit your web browser, you can return to the web form and pick up where you left off. While working in a web form, you’ll see the last time you edited the form in the top right corner.
While working in a web form, PagerDuty Workflow Automation does not store any of the data or changes, all entries or edits are stored locally on your computer within your browser. This feature depends on your browser’s localStorage, which can vary between browsers. Here are few things to keep in mind:
- Your browser stores data temporarily in localStorage, and sessionStorage.
- Because it is stored in a user’s browser, it is unique to each user.
- Browsers typically clear localStorage when you restart your computer, or “reset” your browser (or clear the history). This is a reliable and commonly used place to save in progress data like this.
- Incognito or private windows may interfere with this feature; we recommend working in a normal browser window to take full advantage of saving web form progress.
Thanks for your feedback
We update the Help Center daily, so expect changes soon.
Link Copied
Paste this URL anywhere to link straight to the section.