 Customize and add features to web forms
You can add extra functionality to web forms by customizing the web form URL. The following examples involve making edits to the web form link provided from each web form trigger. You can experiment and test these features out yourself at https://training.pushbot.com/form/webformsandbox or any web form you use.
💡 Tip: For each following customization options, add a ? before the first option, and an & between any additional options.
Set unique redirect URLS when a web form is submitted 
Configure your webform to redirect to a specific URL after it has been submitted, and even custom URLS if there’s an error, or 404 error. This is useful to redirect users to another form, a specific internal website, or to the “next step” if they’re in a process.
There are three options, add these to the end of a web form url, such as https://training.pushbot.com/form/webformsandbox.
ref-success={{url}}- redirects users if their submission is successful.ref-error={{url}}- redirects users if there is an error after they submit the form.ref-404={{url}}- redirects users if there is a 404 page not found error after they submit the form.
Add a ? before the first options, and a & between any additional options. For example,
- Add one redirection, https://training.pushbot.com/form/webformsandbox?ref-success=https://www.pagerduty.com
- Or multiple, https://training.pushbot.com/form/webformsandbox?ref-success=https://www.pagerduty.com&ref-error=https://www.pagerduty/resources
Hide the Submit button on a web form
Hide the submit button on a web form to create a mini-website. This is great for hosting information like a schedule, list of links, instructions, or event details.
To hide the submit button, just append disable-submit=true at the end of any web form URL. For example https://training.pushbot.com/form/webformsandbox?disable-submit=true.
Add a ? before the first customization, and a & between any additional customizations.
💡Tip: Even if you disable the submit button, conditional fields still work—this means you can make mini-websites which conditionally display content based on fields. See add a field condition walkthrough for more.
Add images to your web forms
You can use Markdown to add inline images to your web forms. To do this, you need to add an instruction type Instance Field.
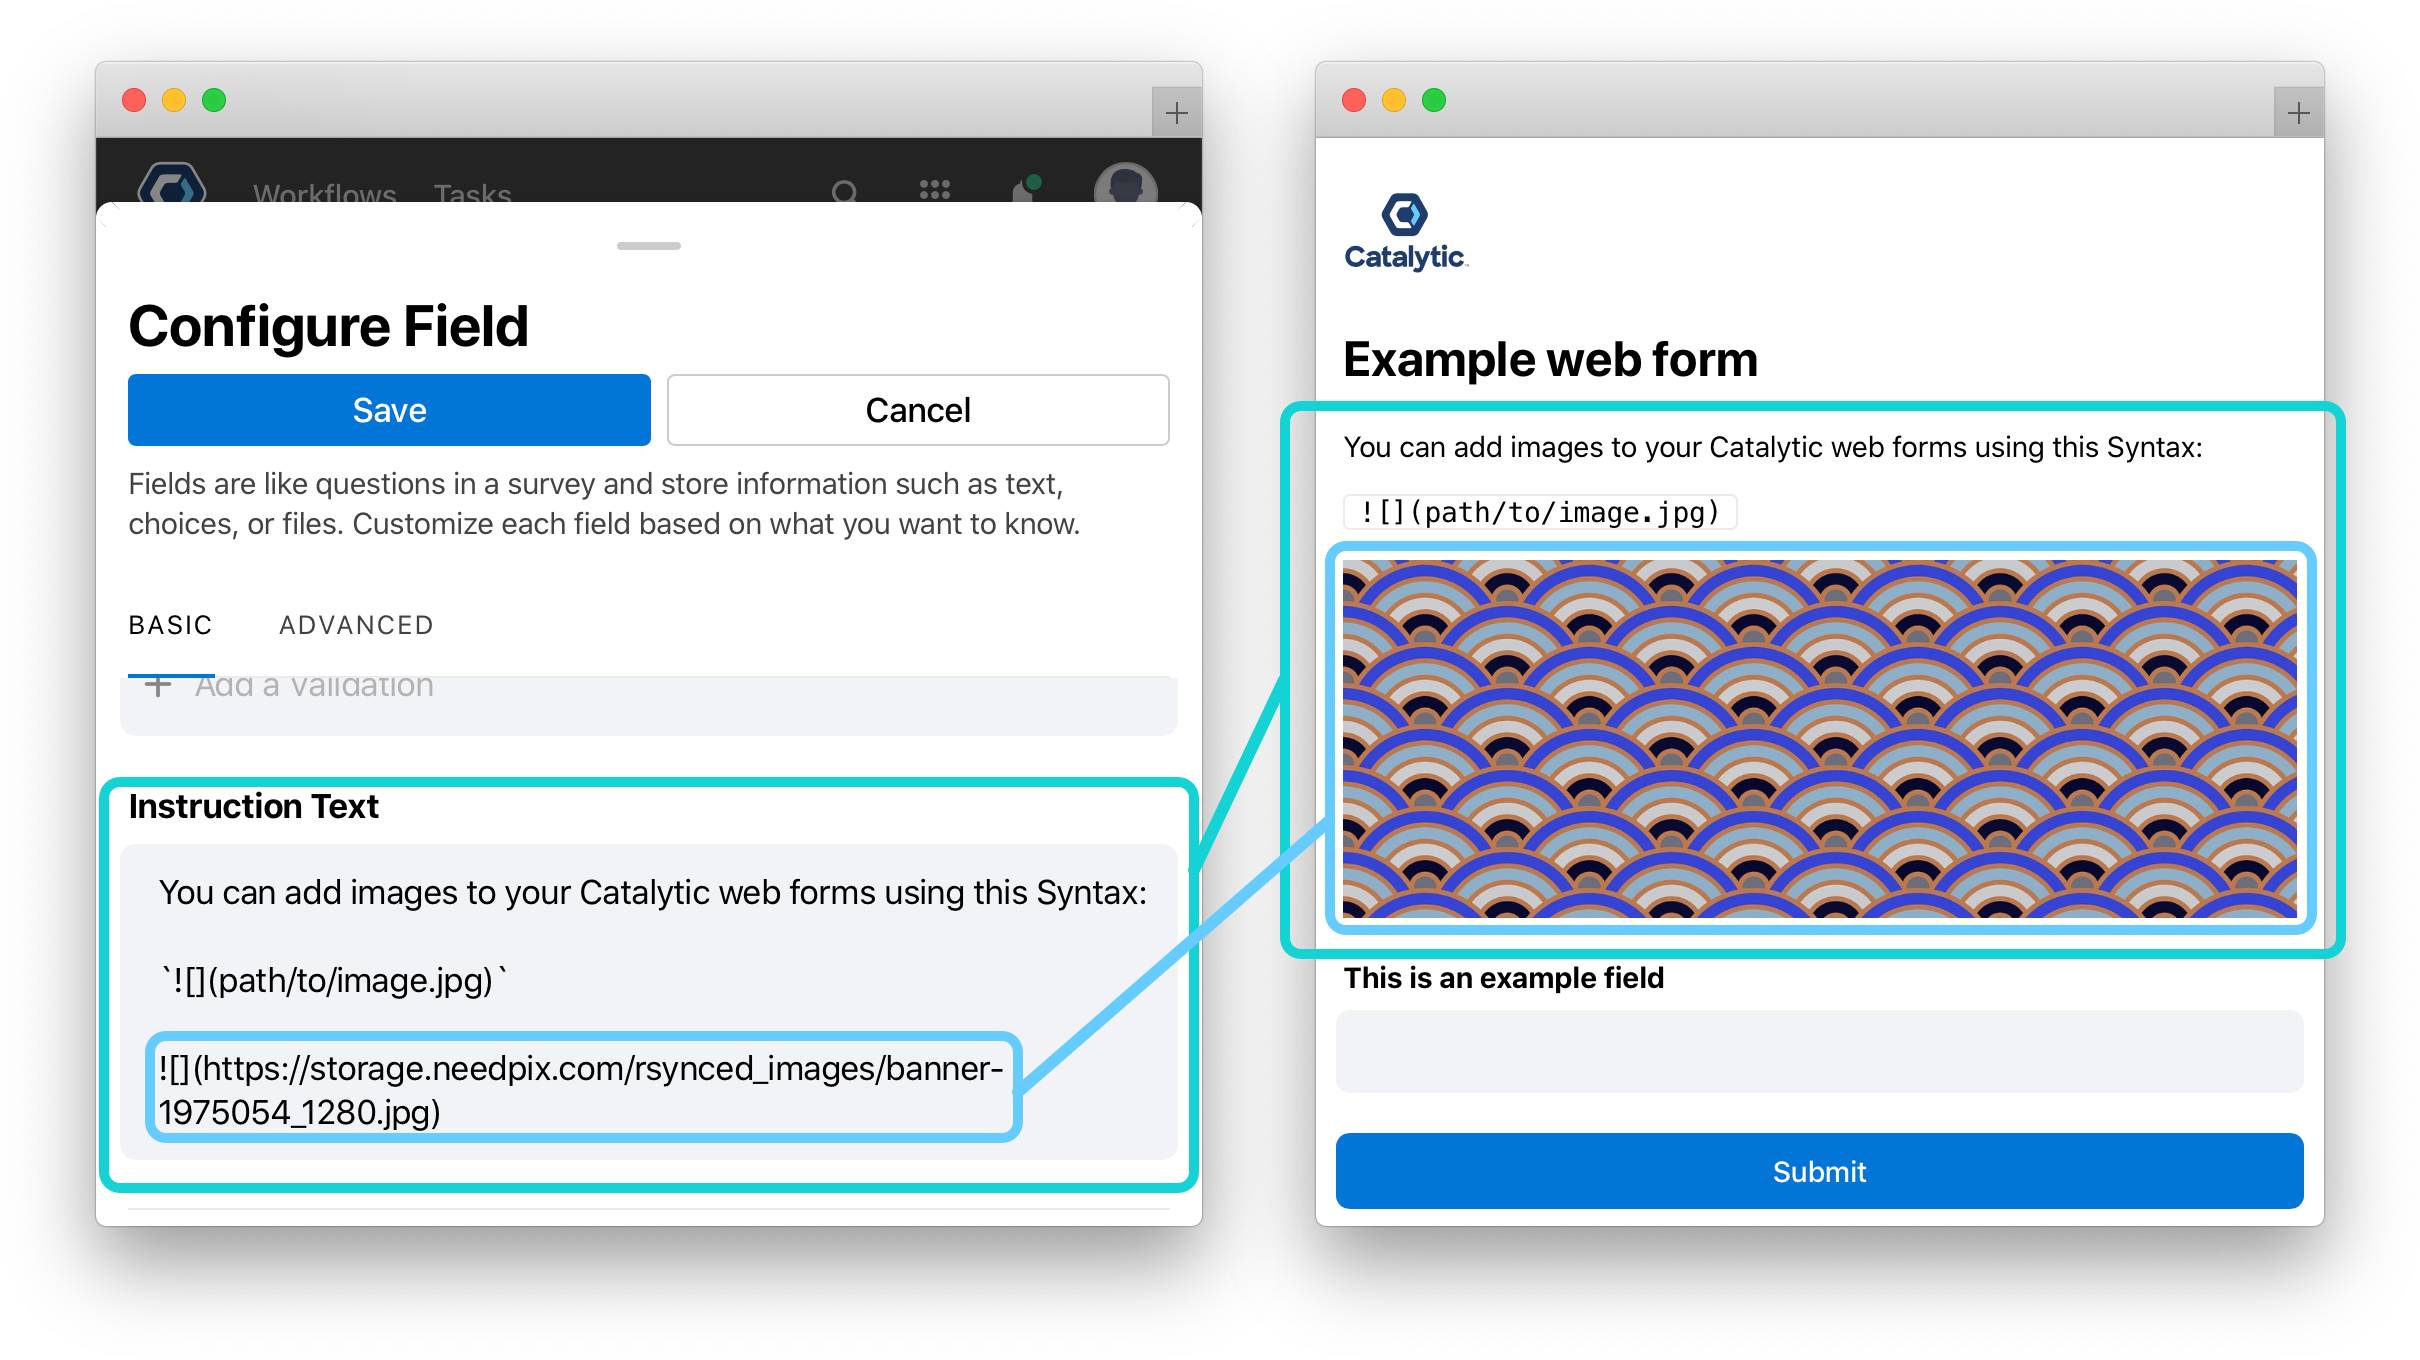
Once you add the Instruction type field, To add an image, use the following format: , where path/to/the/image.jpg is an image hosted online on a service like Dropbox or Google Drive.
For this demonstration, we can use the following image: https://storage.needpix.com/rsynced_images/banner-1975054_1280.jpg.
✅ Heads-up: Some links to images will download the link, rather than displaying it. Typically if the link ends in an image extension, like .jpg or .png, the image will work in a web form.
- Add a web form trigger. See Add a web form trigger for more details.
- Choose a Workflow, this will open the Workflow detail page.
- Select
 in the upper-right corner to get to the Workflow Builder page.
 - Click open the Triggers and Fields section to head to your Form Fields
-
Select Add a Field.
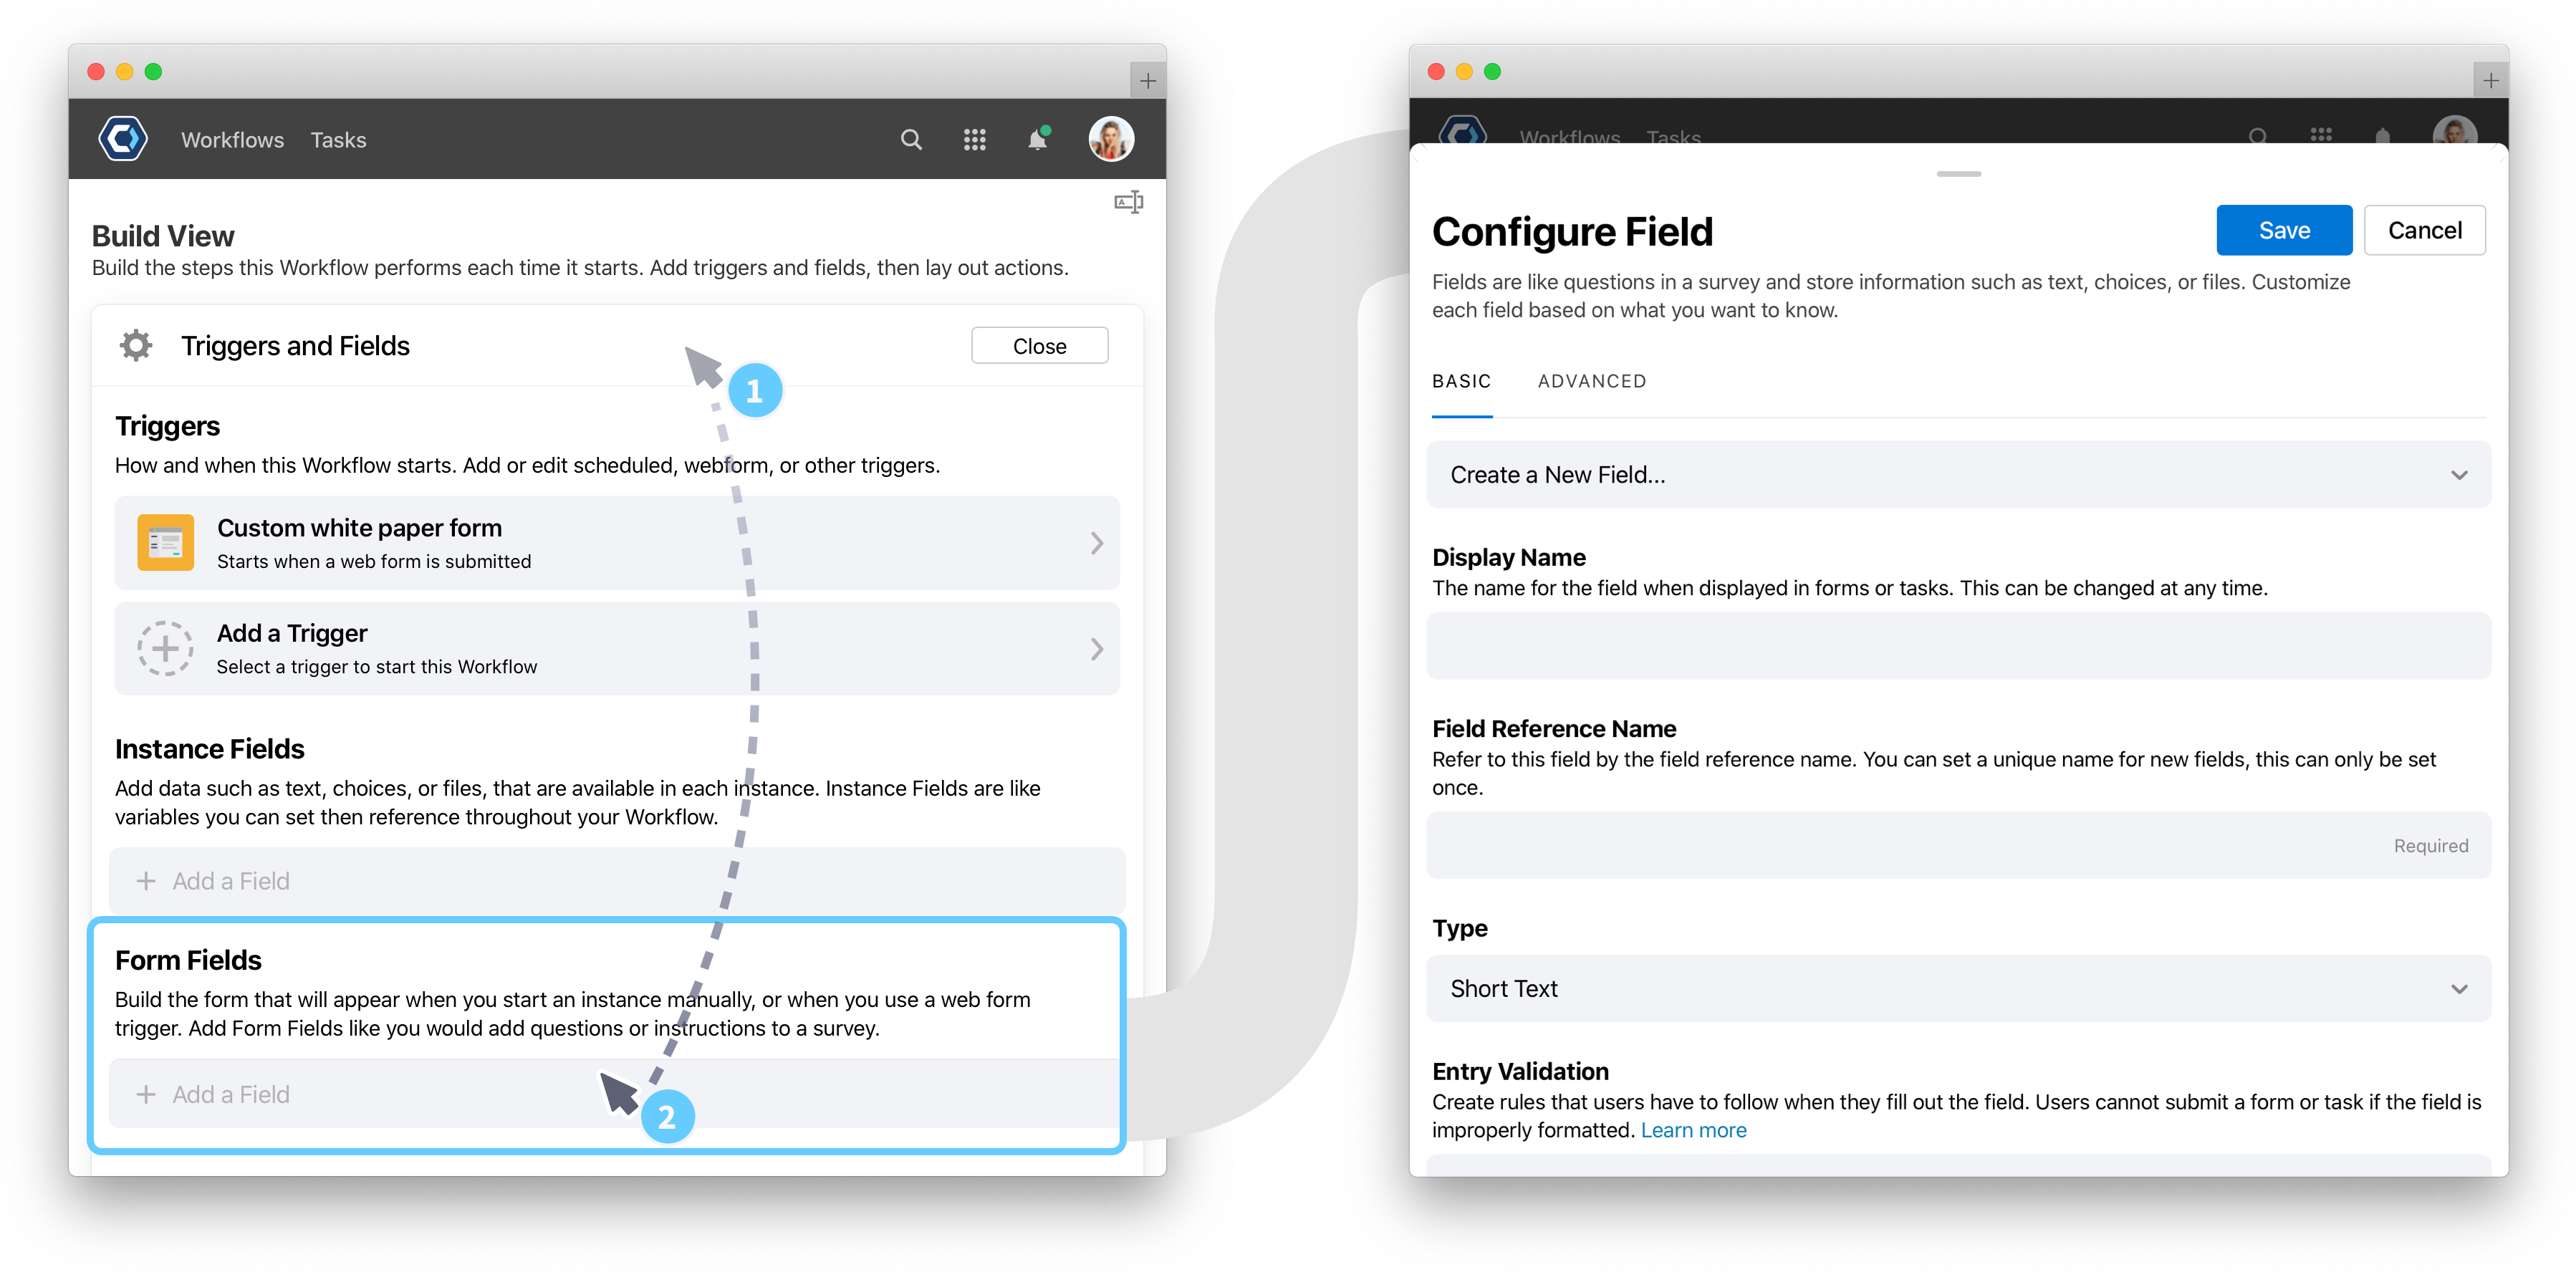
- Configure the field name as desired.
- Set the Type to Instructions.
- In the Instruction Text field, add the Markdown for an inline image. To practice, you could try
 - When finished, select
 .
.
You can configure and reorder Instance Fields just like regular fields. See the fields page for additional information.
Auto-populate web form fields with URLs
During setup of an action or Workflow, you can set defaults for each field so every web form has fields pre-populated. But for added customization, you can create custom web form URLs so each web form is auto-populated with dynamic data.
For example, you could generate 3 custom web form URLs for three company regions, then distribute the regional link to the recipients in each region. When the recipient accesses the web form, a Region field can be pre-filled with EMEA, APAC, or LATAM
This small touch can reduce error rate in a web form by auto-populating important survey information like office, date, email address, or region. Read more about setting this up from the Auto-populate fields with URLs article.
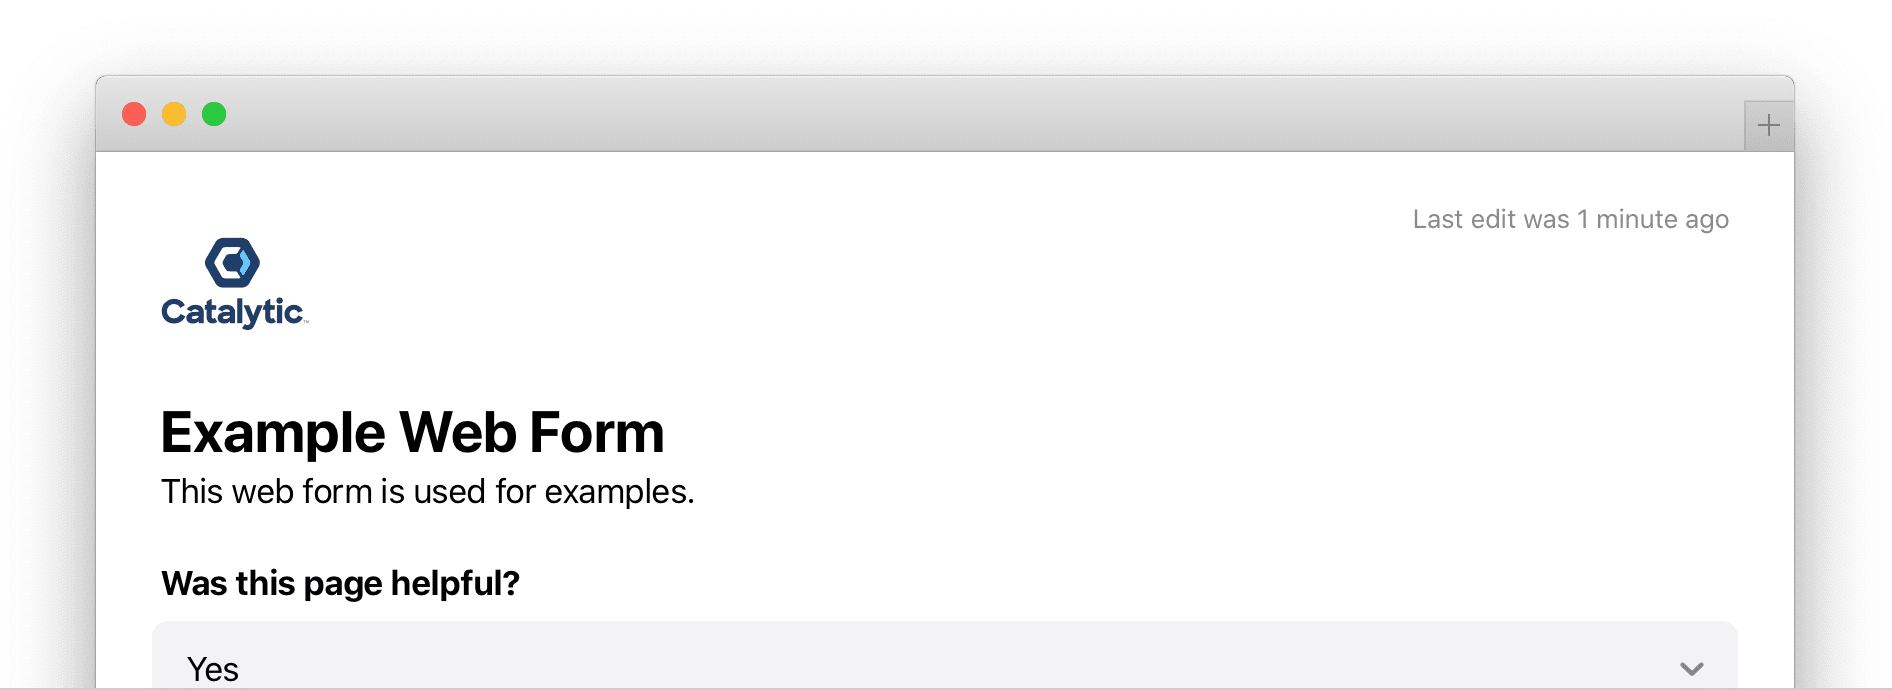
How web forms save progress
By default, web forms save any changes in the browser until submitted. This means if you accidentally close a tab or quit your web browser, you can return to the web form and pick up where you left off. While working in a web form, you’ll see the last time you edited the form in the top right corner.
This feature is enabled by default, and does not require any configuration. See the web form article for more information on how web form progress is saved.
Thanks for your feedback
We update the Help Center daily, so expect changes soon.
Link Copied
Paste this URL anywhere to link straight to the section.