 Field Conditions
Use field conditions to hide or show specific fields in a task based on information entered in a previous field. In the example below, different instruction type fields are conditionally shown based on each choice selected.

For more information on how task conditions work, see Condition Options for guidance on constructing conditions and some condition basics.
Examples of use 
Field conditions can simplify the structure and format of form and task fields, and add dynamic qualities to the experience:
- If a manager chooses to reject a vacation request, a field could appear asking the manager to input the reason for the rejection.
- Some fields could be set as department specific, so once a user selects a department, additional fields appear and all the other irrelevant fields are never shown.
- If collecting feedback about a webinar, a field could appear to collect feedback if an attendee rates the experience below a 7 out of 10 stars.
How to add a field condition
The following instructions explain how to add field conditions to a task that uses fields, like the Assign Task to a Person or the Email: Send a Form action, but the same process works for Instance Fields
- From the Workflow Builder page, click an action to configure it.
- Within that action, select a field or add a new field.
- From the add a field screen:
- Select the Advanced tab.
- Select Add a Condition.
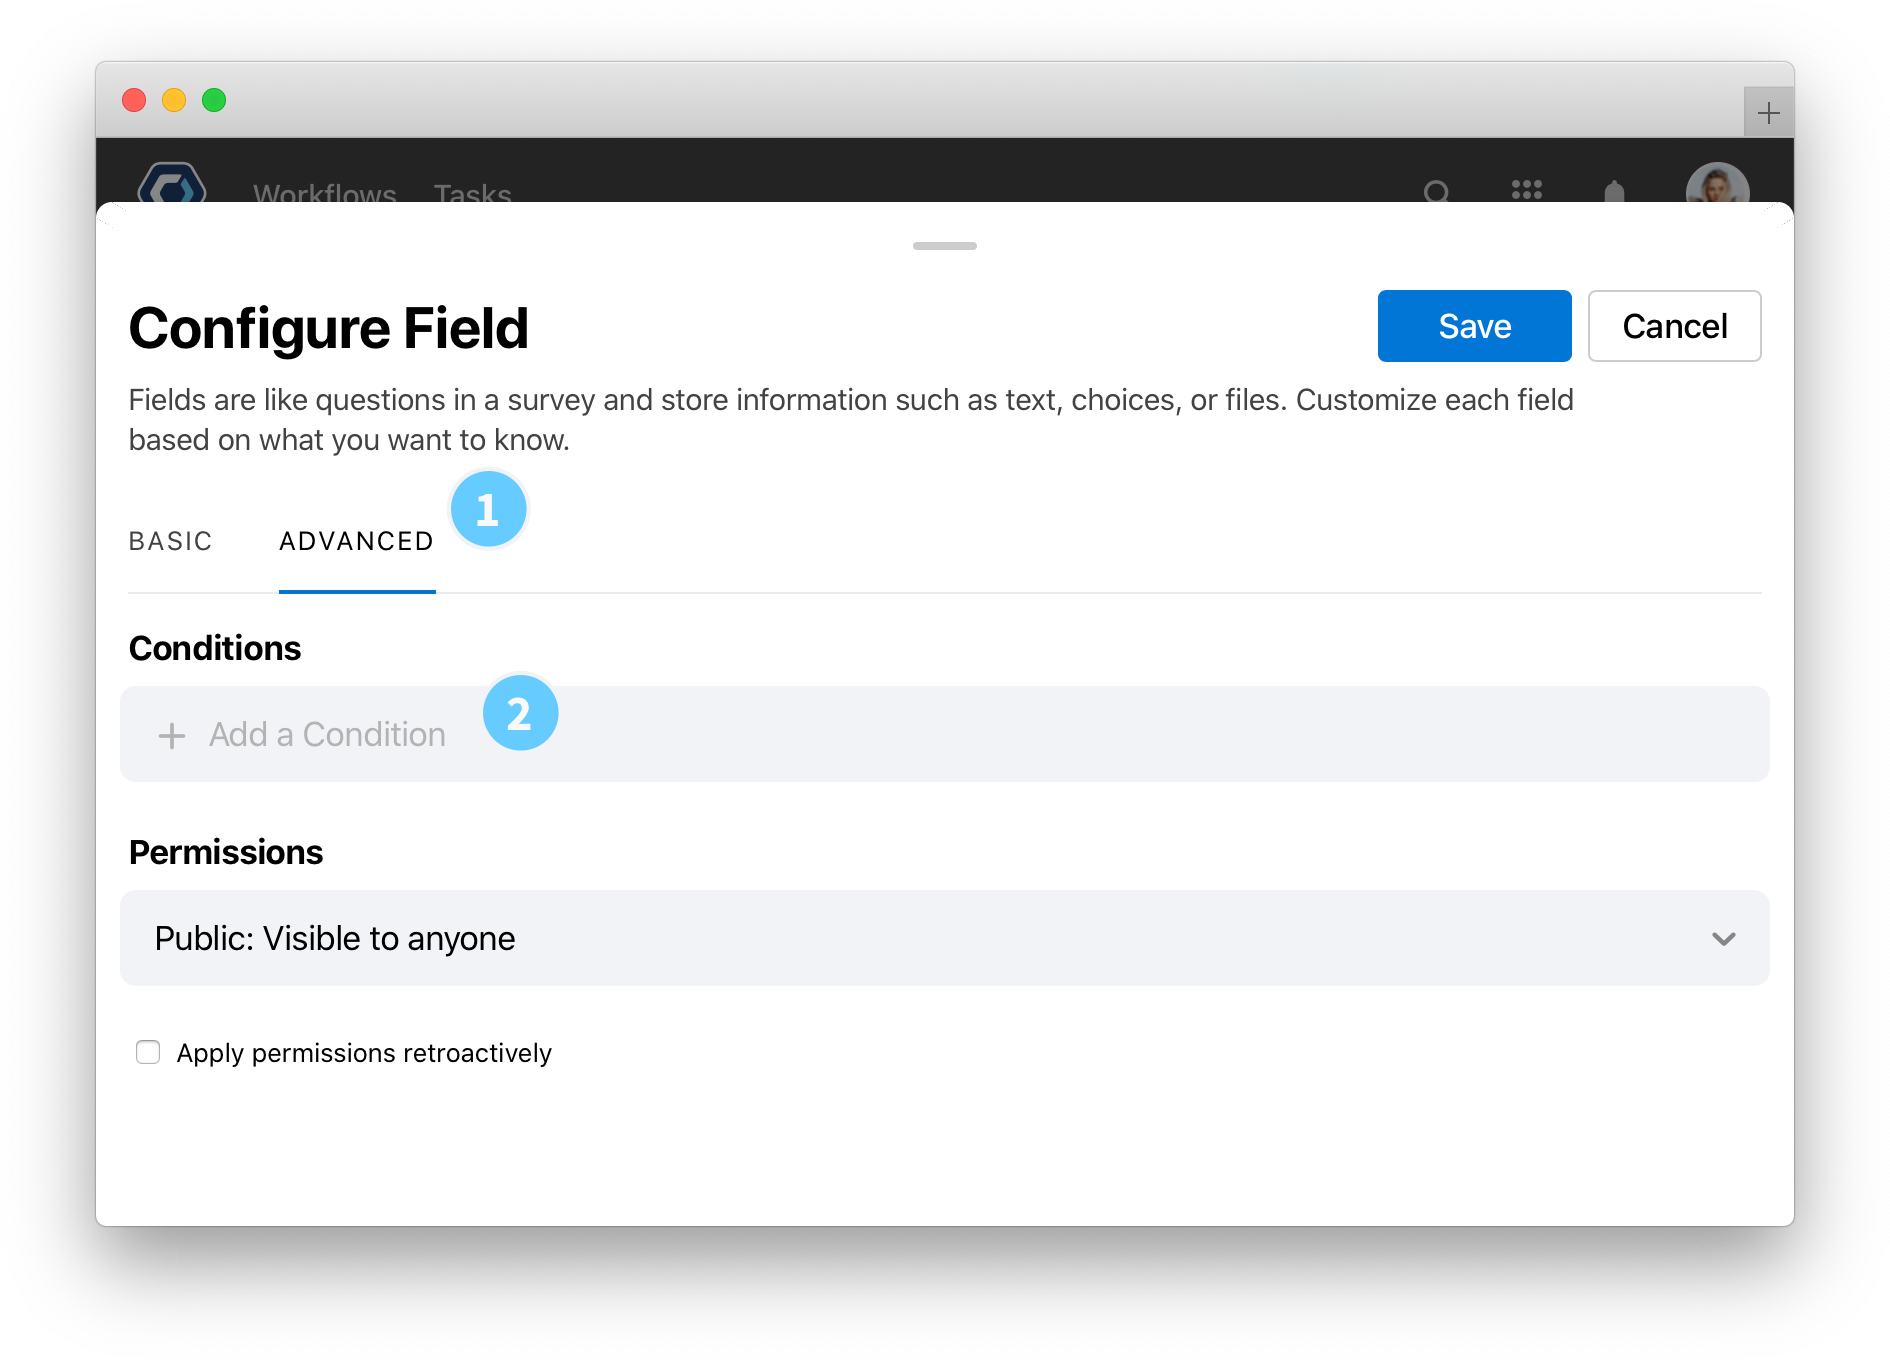
From the add a field screen, select advanced, then select conditions.
When setting a field condition, the field is visible if the condition is true. The field is hidden if the condition is false. For example:
- If Action A is snoozed, and your condition is “If Action A is snoozed”, the task will execute.
-
If Action B is not snoozed, and your condition is “If Action A is snoozed”, the task will be skipped.
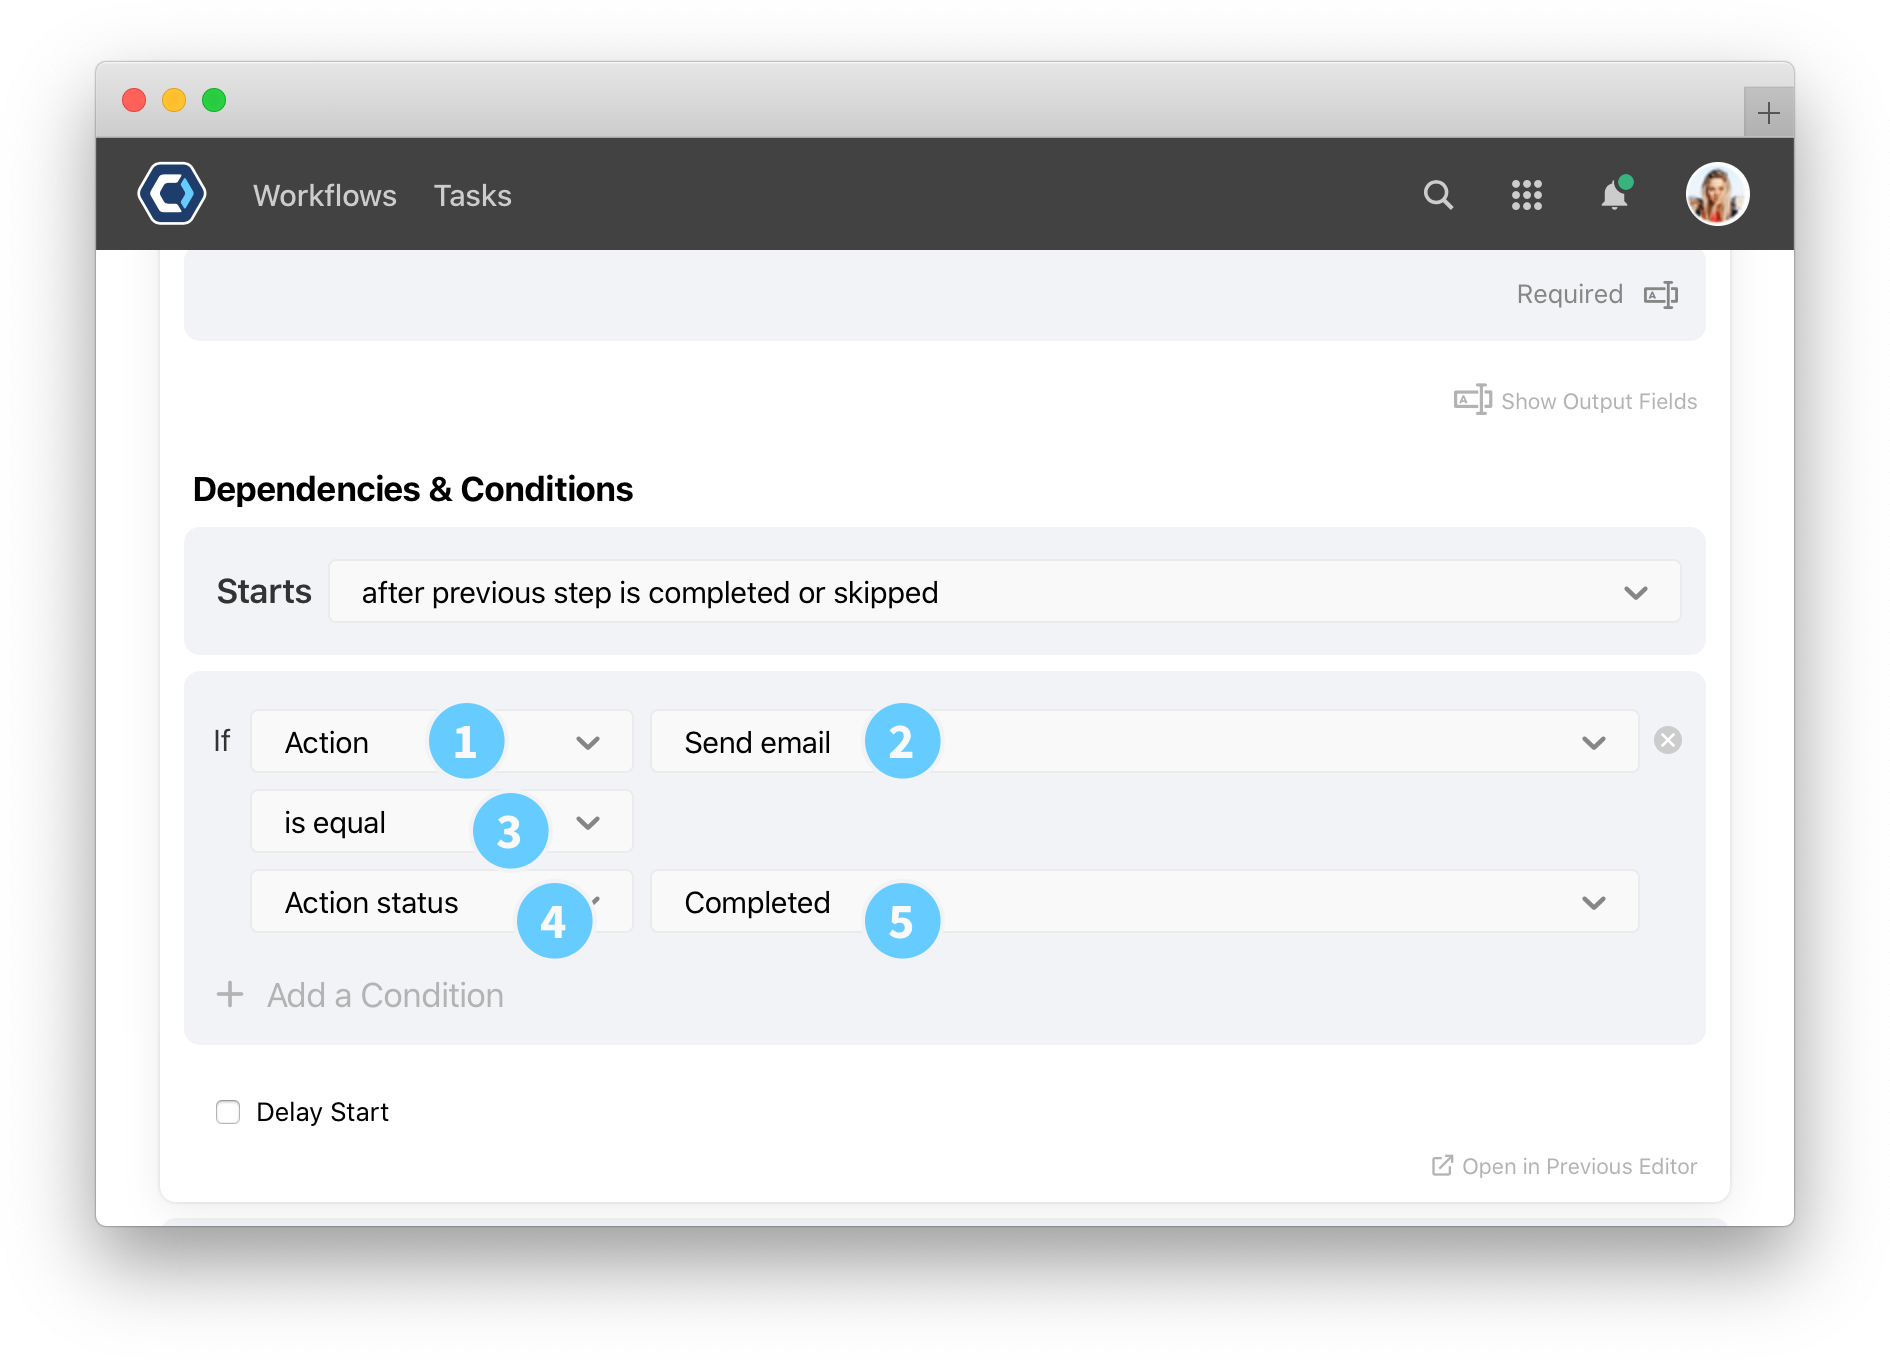
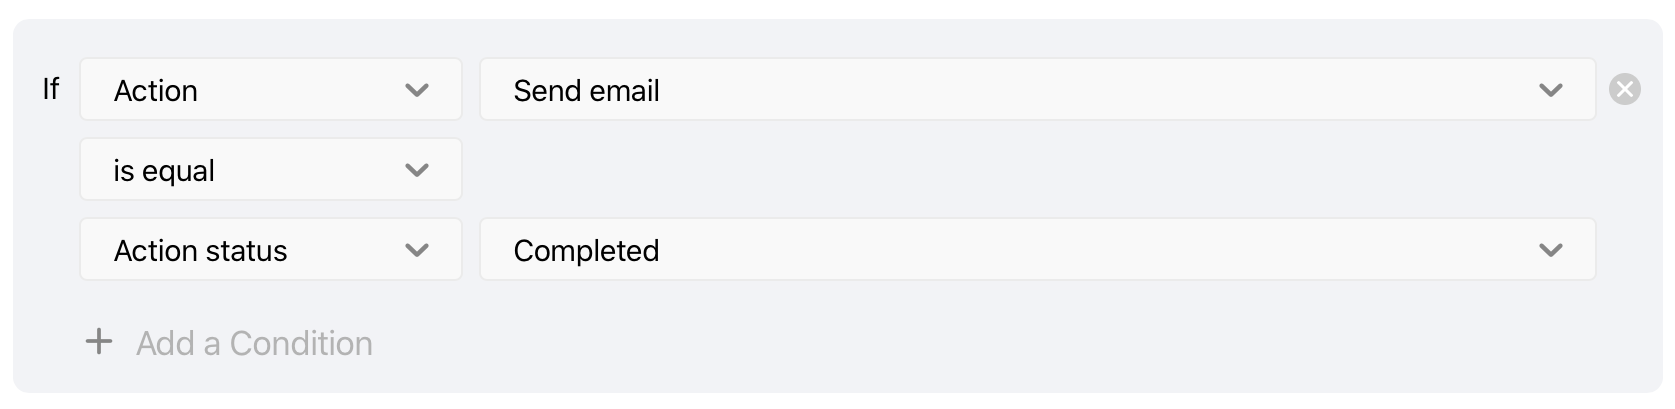
Create the conditional statement by mix and matching objects. For example, “If Action A has the Action Status Snoozed”. You first select the object type, like Action, Field, or True or False, then select the value, such as “Action A” or “Output Field B” or “True”. See List of selectable conditions options for more information on each option.
- Select the type of object you want to add to the condition, then select the object, such as
ActionSend emailorTextEMEA. - Select an operator, such as
is equalorcontains. - Select the next type of object you want to add to the condition, then select the object, just like step 1.
- Add or remove a condition. Select Add a Condition to add new conditions, or select
 to remove a condition.
 - Select

List of selectable condition options
To create a condition, compare two objects. To do this, select the object type, then select the value.
For example, to check if an action is completed, select the type “Action”, then select the action. Set the operator to “is equal”. Then, select the type “Action Status” and select “Completed” status.
- Field: Select from a list fields available in this Workflow.
- Field Choice: Only appears if one of the conditions is a single or multiple choice field. Select from a list of available choices.
- Text: Enter in a value, such as text or integer, to compare against. This accepts more than just strings.
- True or False: Select from True or False.
- Action: Select from a list of actions available in this Workflow.
- Action Status: Select a status that an action may have, such as “Completed” or “In Progress”
💡 Tip: Fields that are conditional on other fields should be ordered after the fields that the conditions are based on.
Use a field reference to conditionally display text in a field
In task instruction fields and the body of emails, you can set text to display conditionally based on the value of a field. This method uses field references and conditions to conditionally display text and fields. For all the examples below, replace field-name with the field name of your choice:
💡 Tip: If you have trouble configuring the conditions, you may need to set them in the previous editor. See How to open a step in the previous editor.
IF: Defining a condition for text to appear only if a field value DOES exist:
{{#if field-name}}
This is the text will only display if field-name DOES exist
{{/if}}
IF / ELSE: Defining a condition for text to appear if a field value DOES exist and a second condition for different text to appear if the field DOES NOT exist:
{{#if field-name}}
This is the text will only display if field-name DOES exist
{{else}}
This is the text will only display if field-name DOES NOT exist
{{/if}}
UNLESS: Defining a condition for text to appear only if a field value DOES NOT exist:
{{#unless field-name}}
This is the text will only display if field-name DOES NOT exist
{{/unless}}
For more information on field references, see the field references article
Add a field condition walkthrough
In this example, let’s add one field, then depending on the choice, reveal other fields. Here’s what the end result will look like:
You can replace any of the field names or values with choices that work for you.
- First, create a web form. See How to create a web form trigger. You could also follow these steps using a web form sent by an action.
- Add and configure the options for three fields:
- Field 1:
Select your favorite vegetable or fruit. Set the field reference name toselectyourfavorite. Set the field type toSingle Choiceand addFruitsandVegetablesas choices. - Field 2:
Choose your favorite fruit. Set the field type toMultiple Choiceand add three options. - Field 3:
Choose your favorite vegetable. Set the field type toMultiple Choiceand add three options.
- Field 1:
- With all three fields added, go back to the
Choose your favorite fruitandChoose your favorite vegetablefields and add a condition so they appear is someone has selectedFruitsorVegetablesrespectively.- Select the
Choose your favorite fruitfield. - Select Advanced at the top of the new window.
- Select Add a condition.
- For the first parameter, select
Field, then selectSelect your favorite. - For the second parameter, select
Field Choice, then selectFruits. - Repeat the same process for the
Choose your favorite vegetablesfield, but set the condition toVegetablesinstead.
- Select the
Get help with a problem or question
If something’s not working as expected, or you’re looking for suggestions, check through the options below.
My conditions are not working as expected
Remember that if the conditional statement evaluates to true, the field is hidden or the task is skipped.
For example, when setting a task condition, the task executes if the condition is true. The task is skipped is the condition is false.
- If Action A is snoozed, and your condition is “If Action A is snoozed”, the task will execute.
- If Action B is not snoozed, and your condition is “If Action A is snoozed”, the task will be skipped.
Conditions are evaluated from top to bottom. In some cases, it’s necessary to rearrange the order of conditions when you have two or more conditionals linked with and and or statements. For example, it’s usually best practice to put is empty or is not empty statements last.
Thanks for your feedback
We update the Help Center daily, so expect changes soon.
Link Copied
Paste this URL anywhere to link straight to the section.