 Web Form Trigger
Web forms look like a questionnaire and collect information from people for a Workflow instance. Web form triggers are publicly accessible web forms that anyone can visit and fill out. When a user fills out a web form trigger, an instance states.

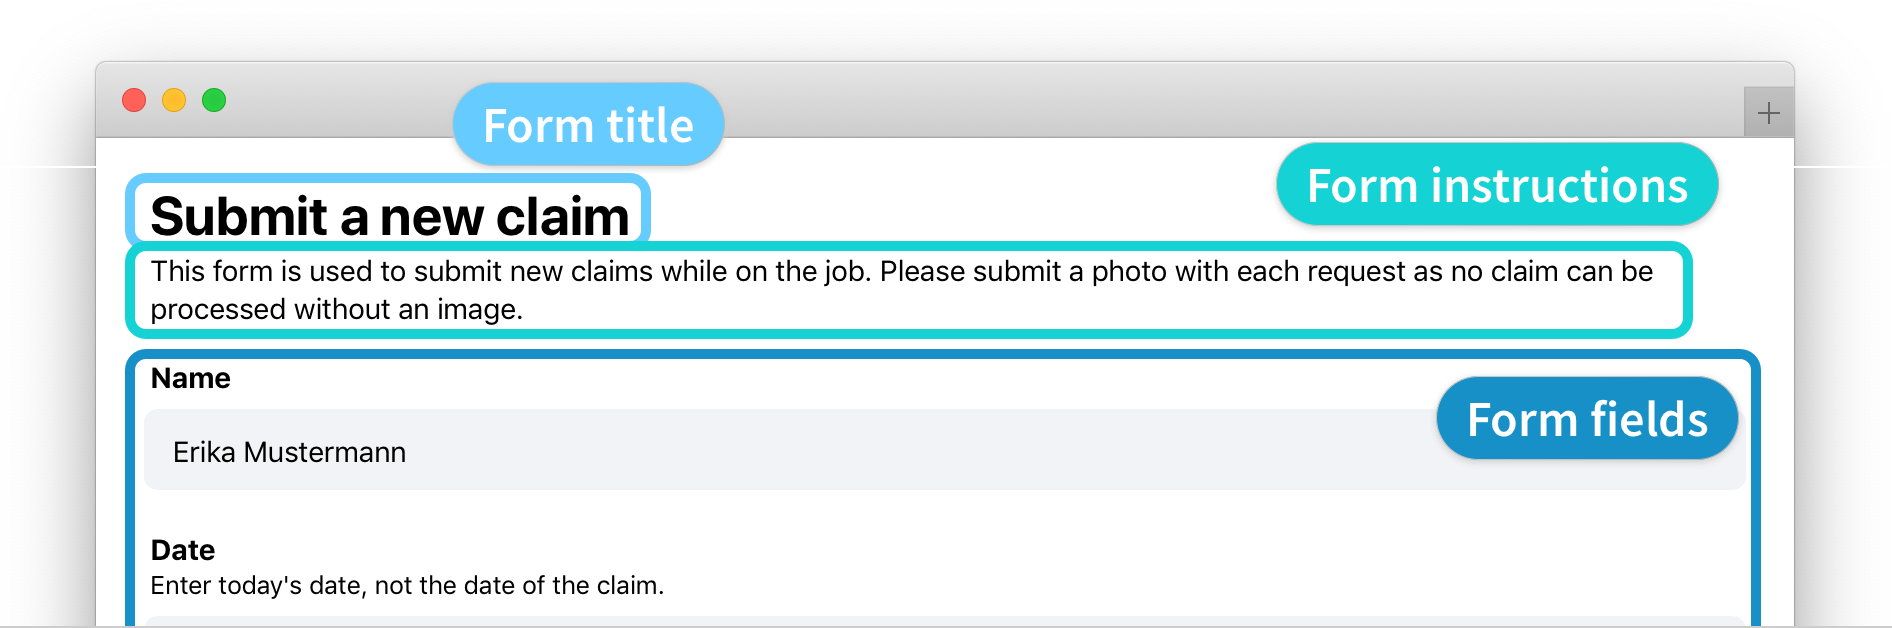
Fields filled out in a web form, like Name, Date, Claim Type, or Claim Image in the example above, are available as fields in the triggered process.
When a web form is completed and triggers a Workflow, an instance is started. This is often used as an intake mechanism for requests, tickets, or issues that can then be addressed through a Workflow.

A web form trigger is useful for collecting input from customers, partners, vendors and employees who are not users within your PagerDuty Workflow Automation team. There are other ways to create web forms, see Web forms for an overview of web forms in general.
How a web form trigger works 
Fields filled out in a web form, like Name, Date, Claim Type, or Claim Image in the example below, are available as fields in the triggered Workflow.
With a web form trigger, the web form is hosted on a publicly accessible link, like example-team.pushbot.com/form/submit-new-claim-trigger.

How to create a web form trigger
Add or edit a web form trigger from the Workflow Builder screen. Triggers are configured for each Workflow. The trigger is set up in two steps:
Add a web form trigger
- Select Workflows from the top navigation bar.
- Choose a Workflow, this will open the Workflow detail page.
- Select Open Builder in the upper-right corner to get to the Workflow Builder page.
-
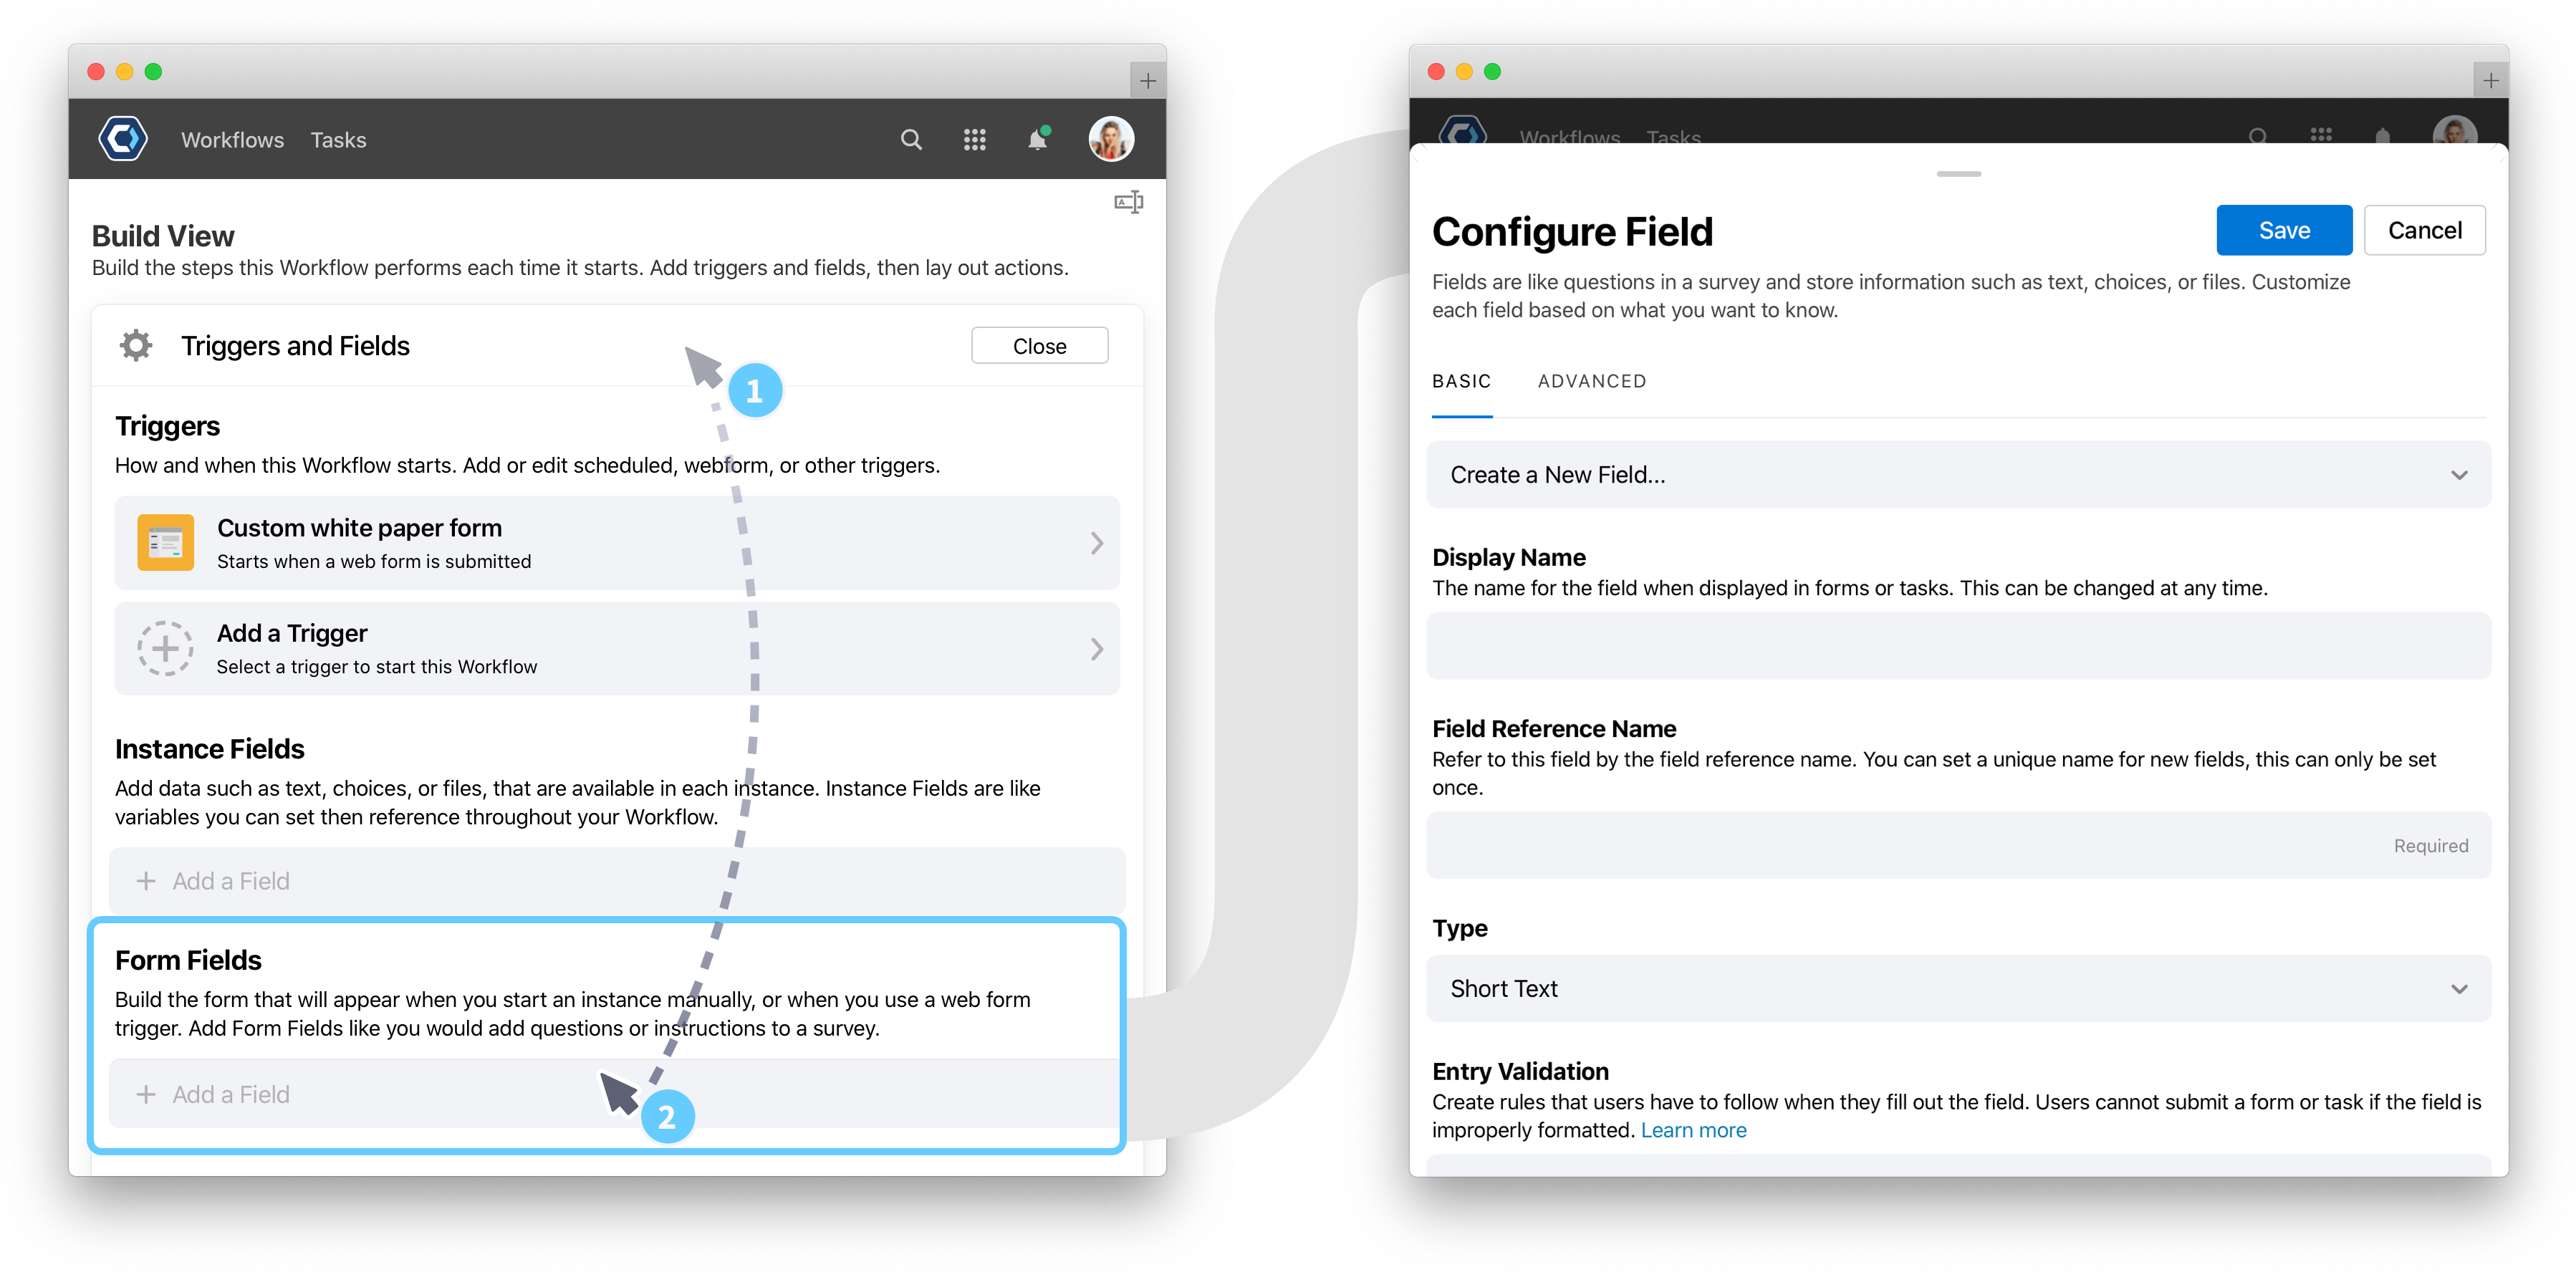
Head to your triggers under the Triggers & Fields section.
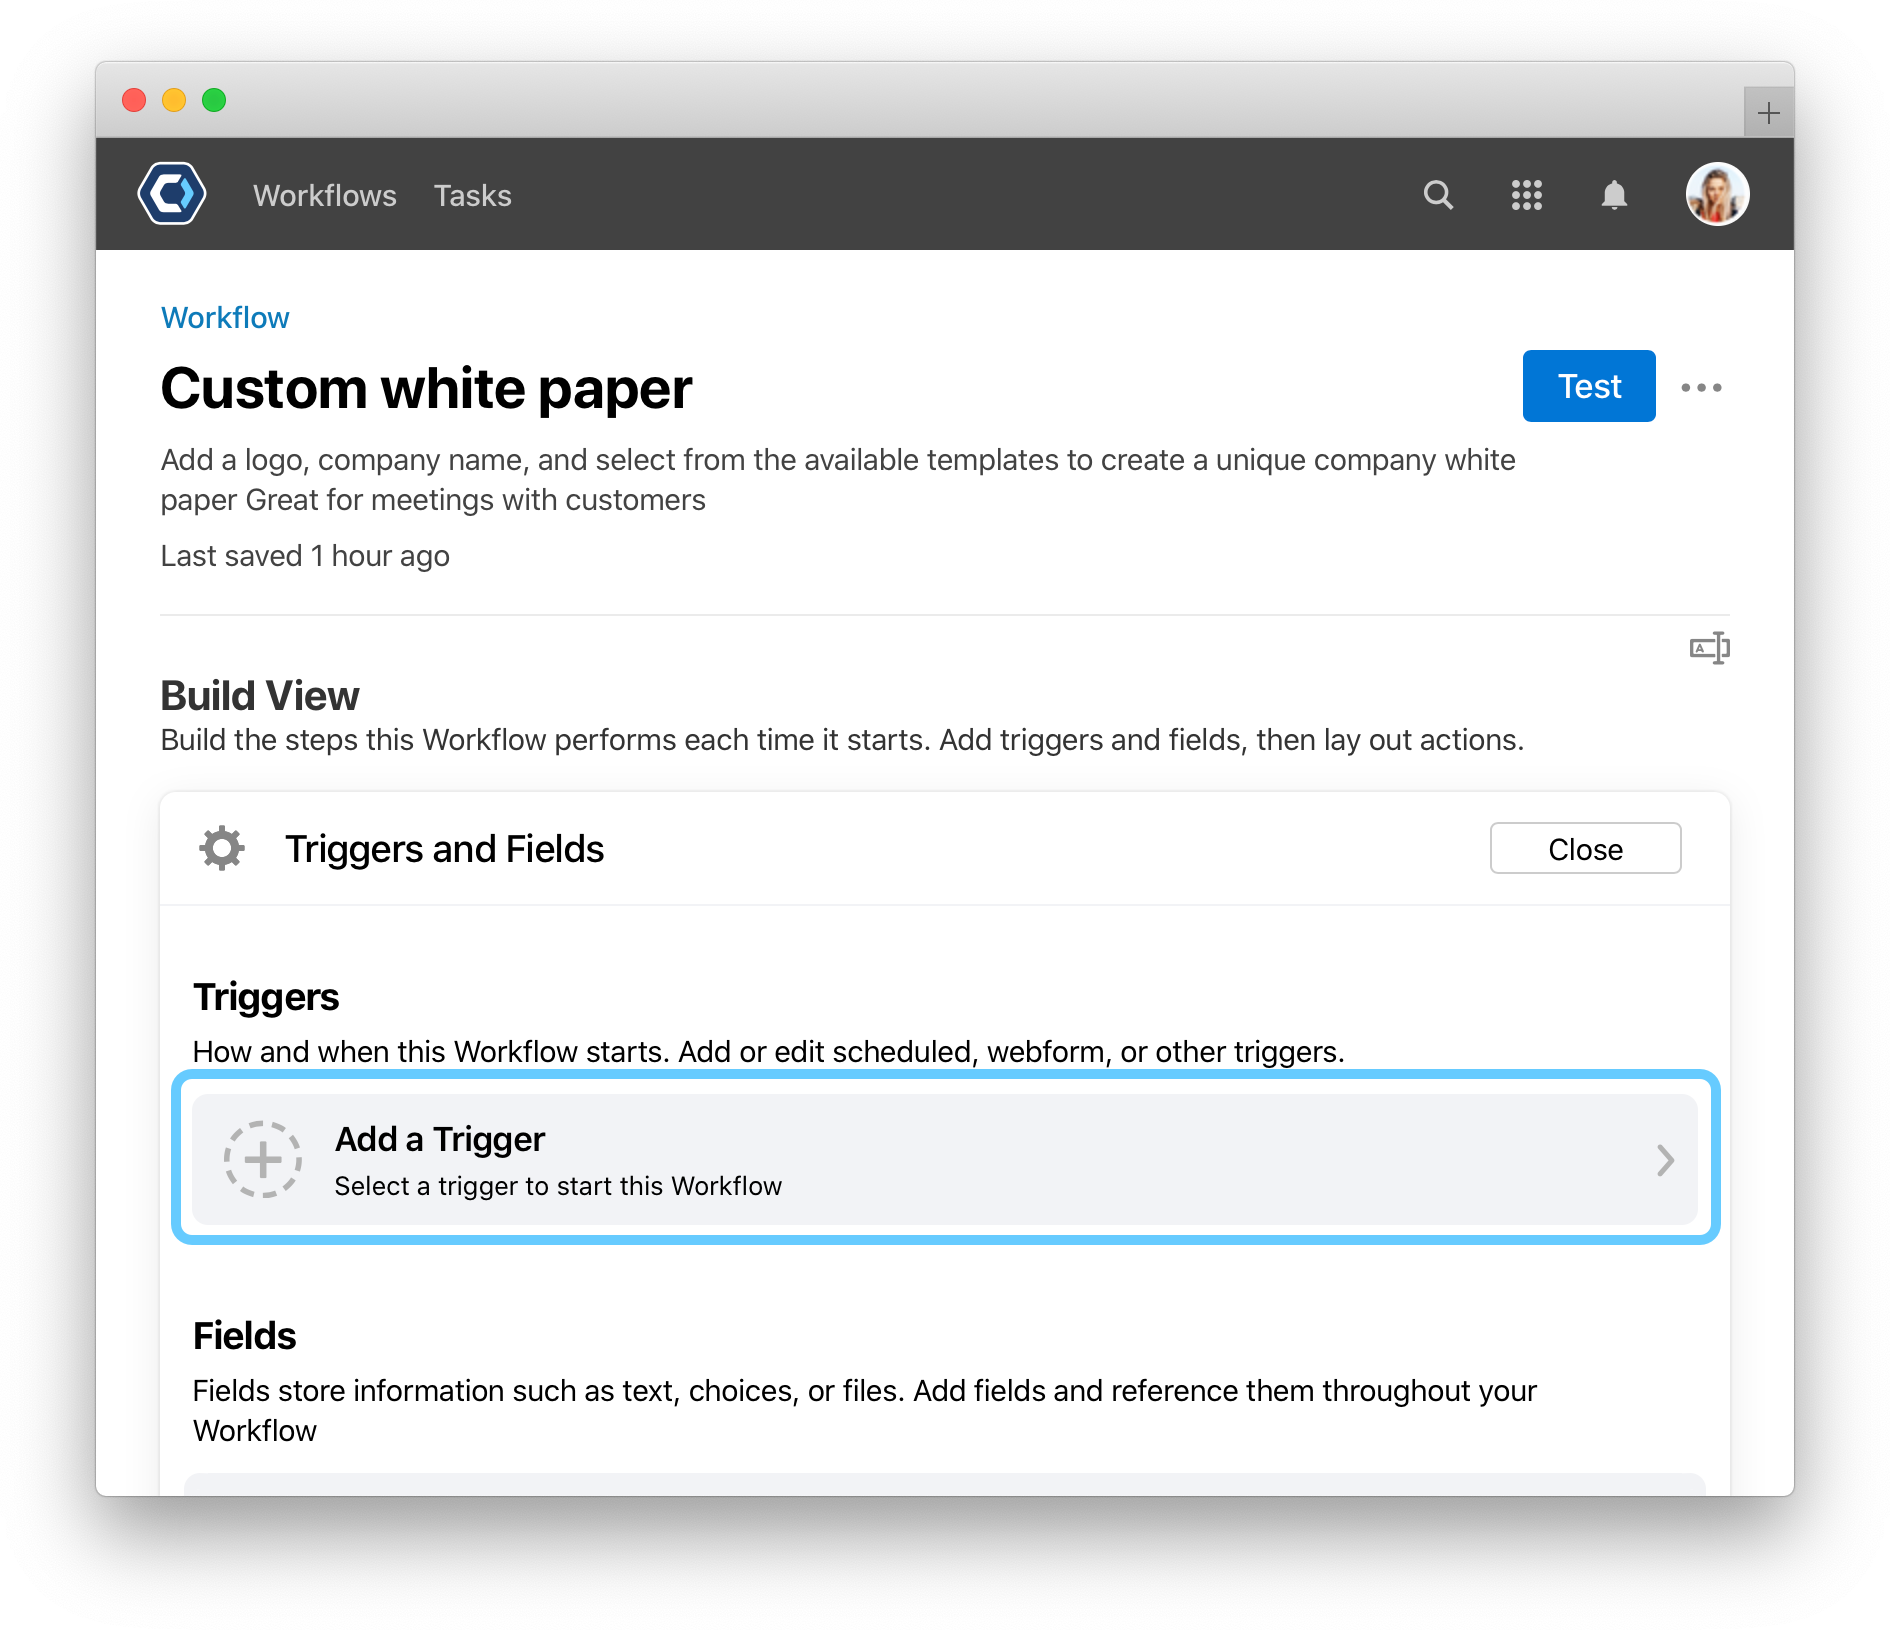
- Select Add a Trigger. This opens the Select trigger type screen.
- From the list of triggers available to your team, select the Web Form type trigger.
- Information on the trigger is shown. When ready, select Add this Trigger. This opens the Create Web Form Trigger screen, where you enter in the trigger details.
- Enter a Trigger Name. The trigger name is how it appears to other members of your team in PagerDuty Workflow Automation.
-
Enter a Form title and Form instructions to appear to people completing the web form.
- In the URL box, enter the text to appear at the end of a URL:
https://teamname.pushbot.com/forms/{{URL Field}} - If you want people completing the form to see the names of actions and track the progress of the instance, turn on Public Status Tracking.
- Select Done
Here’s an example of that process:

This will set up the relationship between the web form trigger and a Workflow. The next step is to add fields to the web form.
Add fields to the web form
You can add fields to a web form trigger from the Workflow Builder screen in the Triggers and Fields section.
First follow the steps above to create a web form trigger. After the web form trigger is created, follow the steps below to add fields to the web form.
- Choose a Workflow, this will open the Workflow detail page.
- Select Open Builder in the upper-right corner to get to the Workflow Builder page.
- Click open the Triggers and Fields section to head to your Form Fields.
-
Select Add a Field in the Form Fields section.
- Add fields to the action in the order they should appear on the form
- Select each field to configure field specific settings, like type or description. See How to configure fields for more details.
- When finished, select Save.
The web form trigger associated with the Workflow will list each field added.
How to set permissions on a web form
Set permissions on a web form to limit who can find, view, or submit the web form. You can set permissions from the web form configuration page. Permissions are set per-Web form. You can set permissions for web form actions and web form triggers.
Permissions can be set as public, internal, confidential, or email recipients.
- Public: Visible to anyone.
- Internal: Visible to team members only.
- Confidential: Visible to designated users only. You can select which users to share the web form with.
- Email Recipients: Visible to email recipients only. Only available for web form actions.
What will this output?
Every time the web form is completed, a Workflow instance will start. That instance will have access to all fields entered in the web form.
Get help with a problem or question
If something’s not working as expected, or you’re looking for suggestions, check through the options below.
Can I have a field reference to a previous field in the same web form?
It is not possible to reference a field from in a web form from within that web form. Any entry or selection in a web form does not become “official” until it is submitted. You can use field conditions to conditionally hide a field based on a previous field’s value, but you cannot actually reference a previous entry.
Thanks for your feedback
We update the Help Center daily, so expect changes soon.
Link Copied
Paste this URL anywhere to link straight to the section.