 General Trigger Information
Triggers are the events that start a Workflow instance and begin an automated process. There are various types of triggers, for example, manual triggers, web form triggers, email triggers, scheduled triggers, and integration triggers.
A full list of available triggers is in the triggers section of the help site.
How a trigger works 
Pushbots automate business processes. Workflow’s are started, usually by a trigger, to automate work. For example, If you’ve created a “Monthly Report” Workflow, you would start an instance of it each month with a scheduled trigger.

A trigger is used to initiate every Workflow instance. You can manually Start an Instance of a Workflow from any Workflow detail page, or you can create a trigger on the Workflow Builder page and automate starting a new instance. An automated trigger is recommended in almost all cases.
Explanation of some basic trigger types
Web form trigger: Start an instance when someone completes an online form.
Email trigger: Start an instance when someone sends an email to the designated email address.
Scheduled trigger: Start an instance on a reoccurring schedule, for example:
- Every Monday
- Once a month
- Every two weeks
- Fridays at 10:00AM
Integration trigger: Start an instance with a special integration trigger, which is available based on the integrations your team has configured.
How to set up or add a trigger
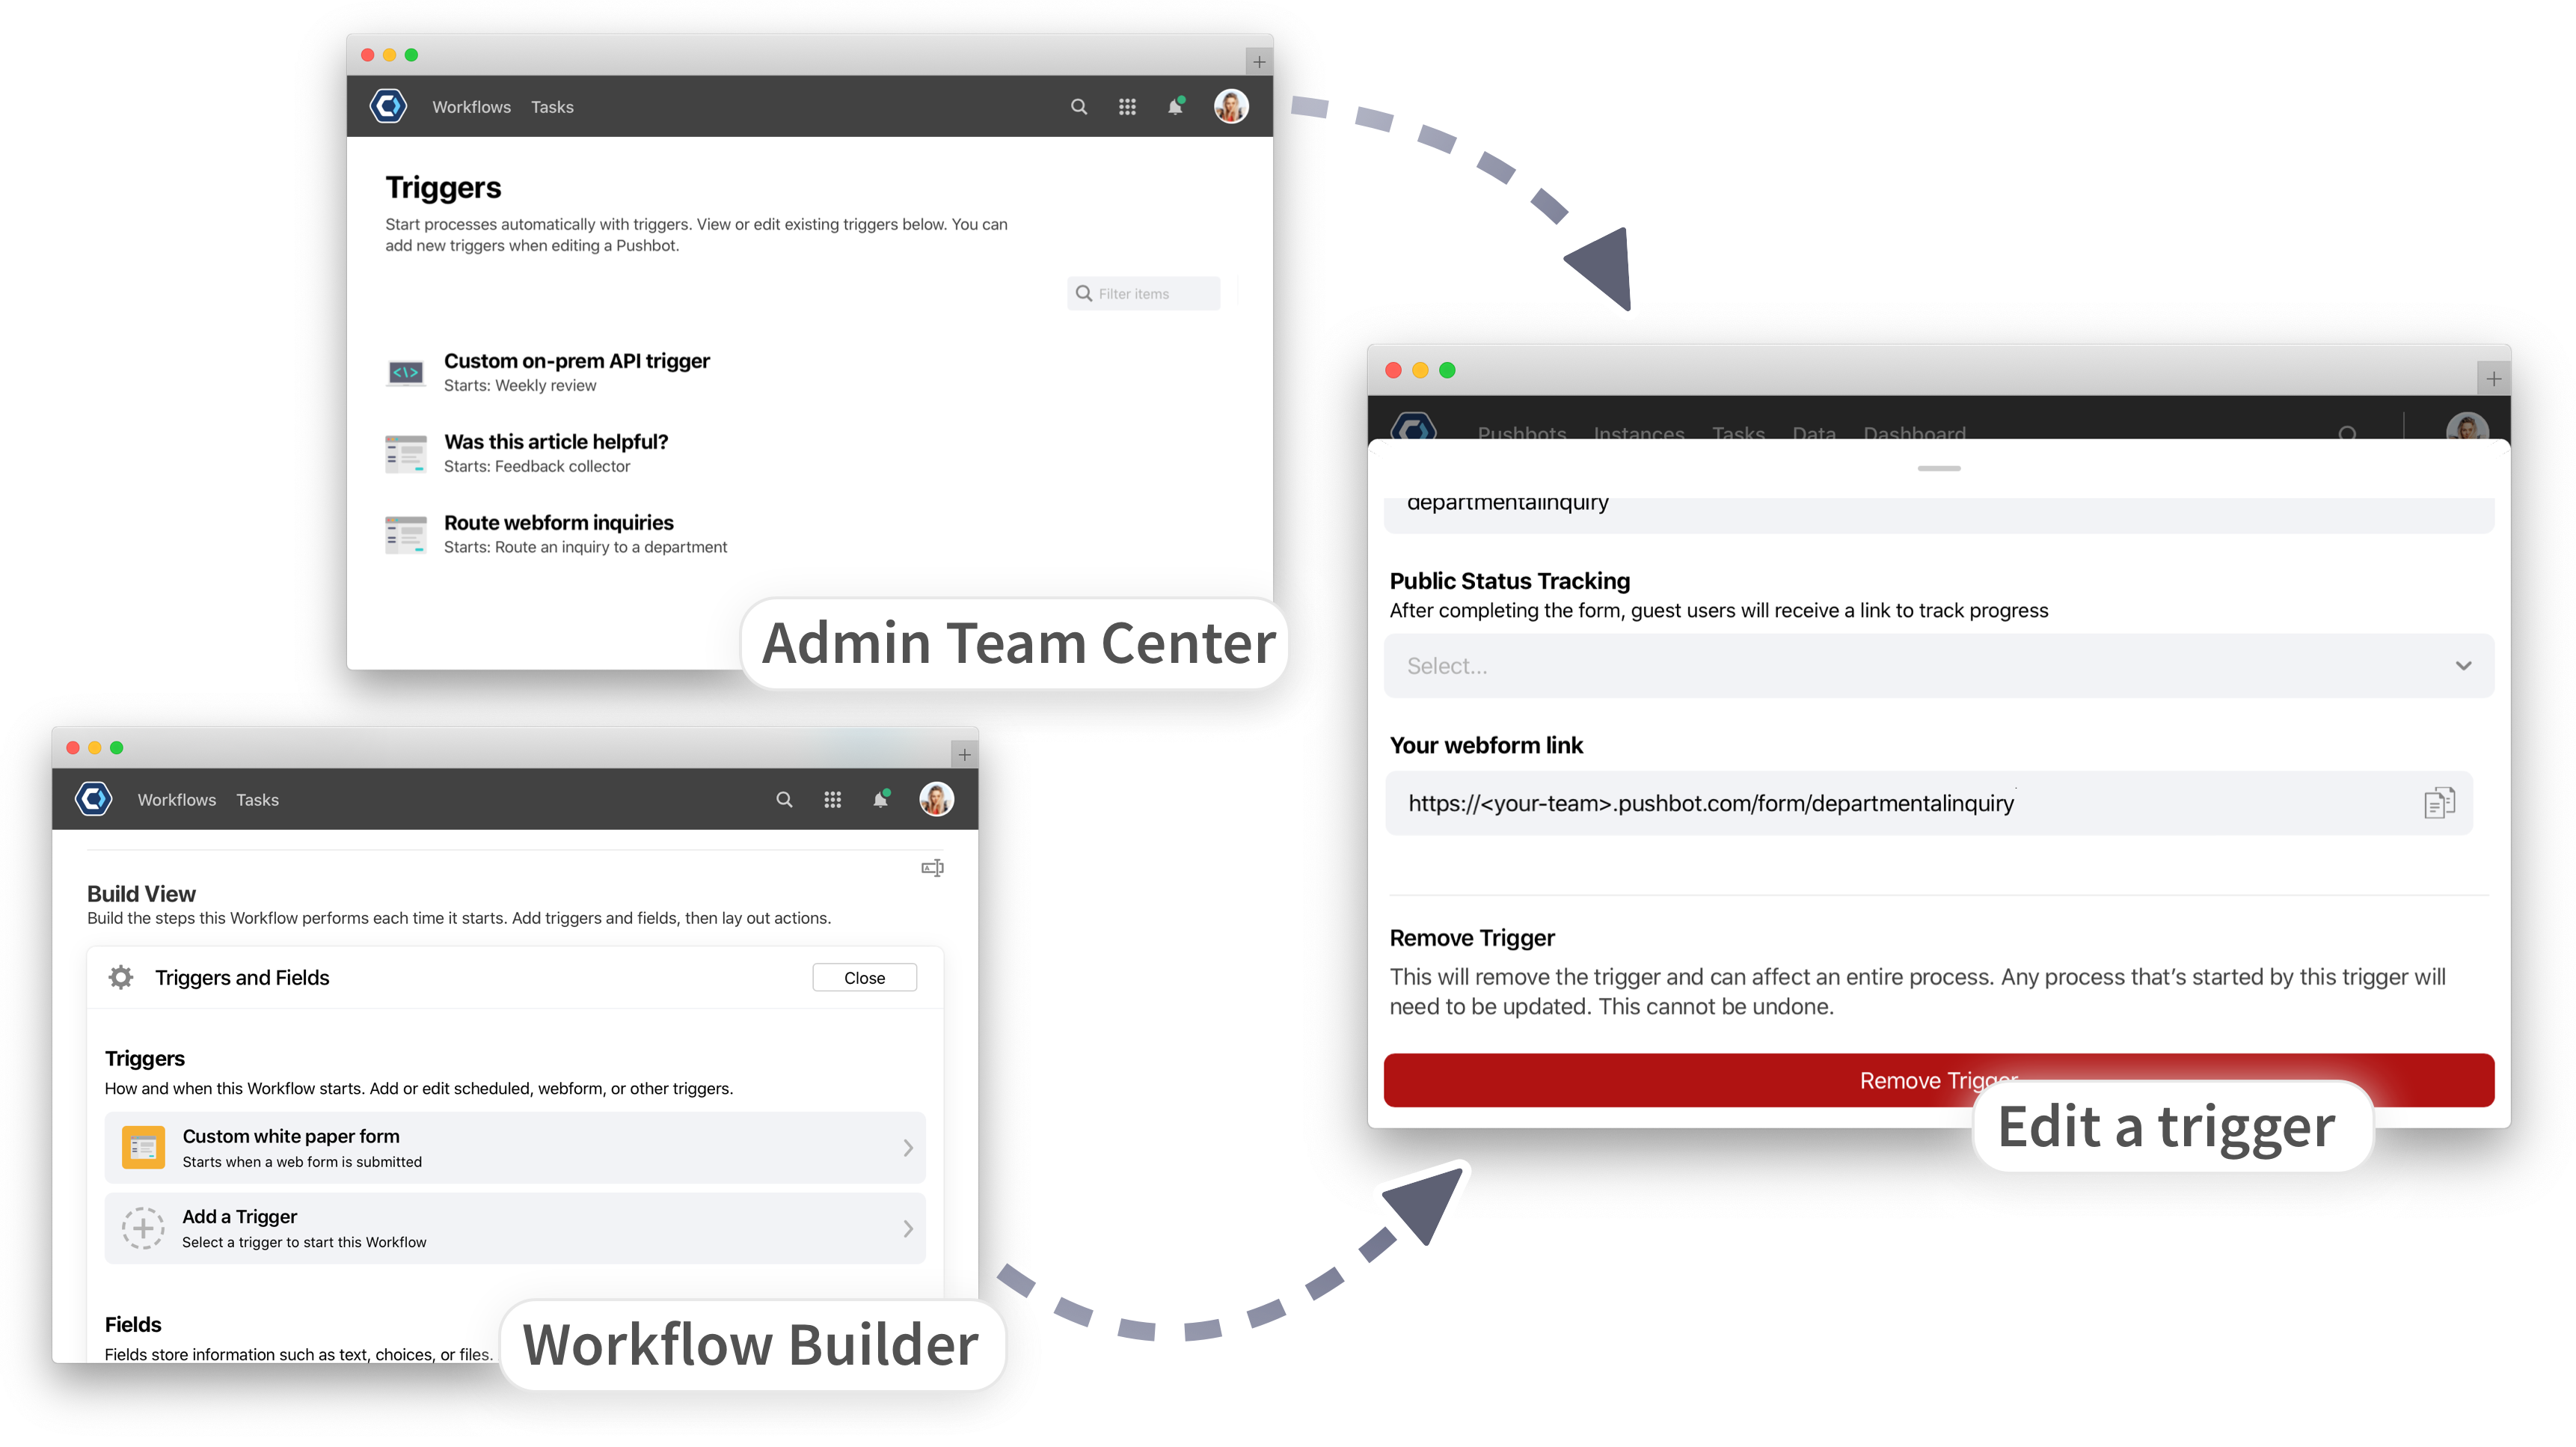
Triggers are configured per Workflow and are managed from the Workflow Settings page. From the edit screen you can add new triggers, edit existing triggers, and toggle whether or not a Workflow can be started manually.
Add or edit a Workflow’s trigger
You can add new triggers or configure any existing triggers on a Workflow’s edit screen. Triggers are configured for each Workflow.
- Select Workflows from the top navigation bar.
- Choose a Workflow, this will open the Workflow detail page
- Select
 in the upper-right corner to get to the Workflow Builder page
 -
Click open the Triggers and Fields section to head to your triggers. Select Add a trigger.
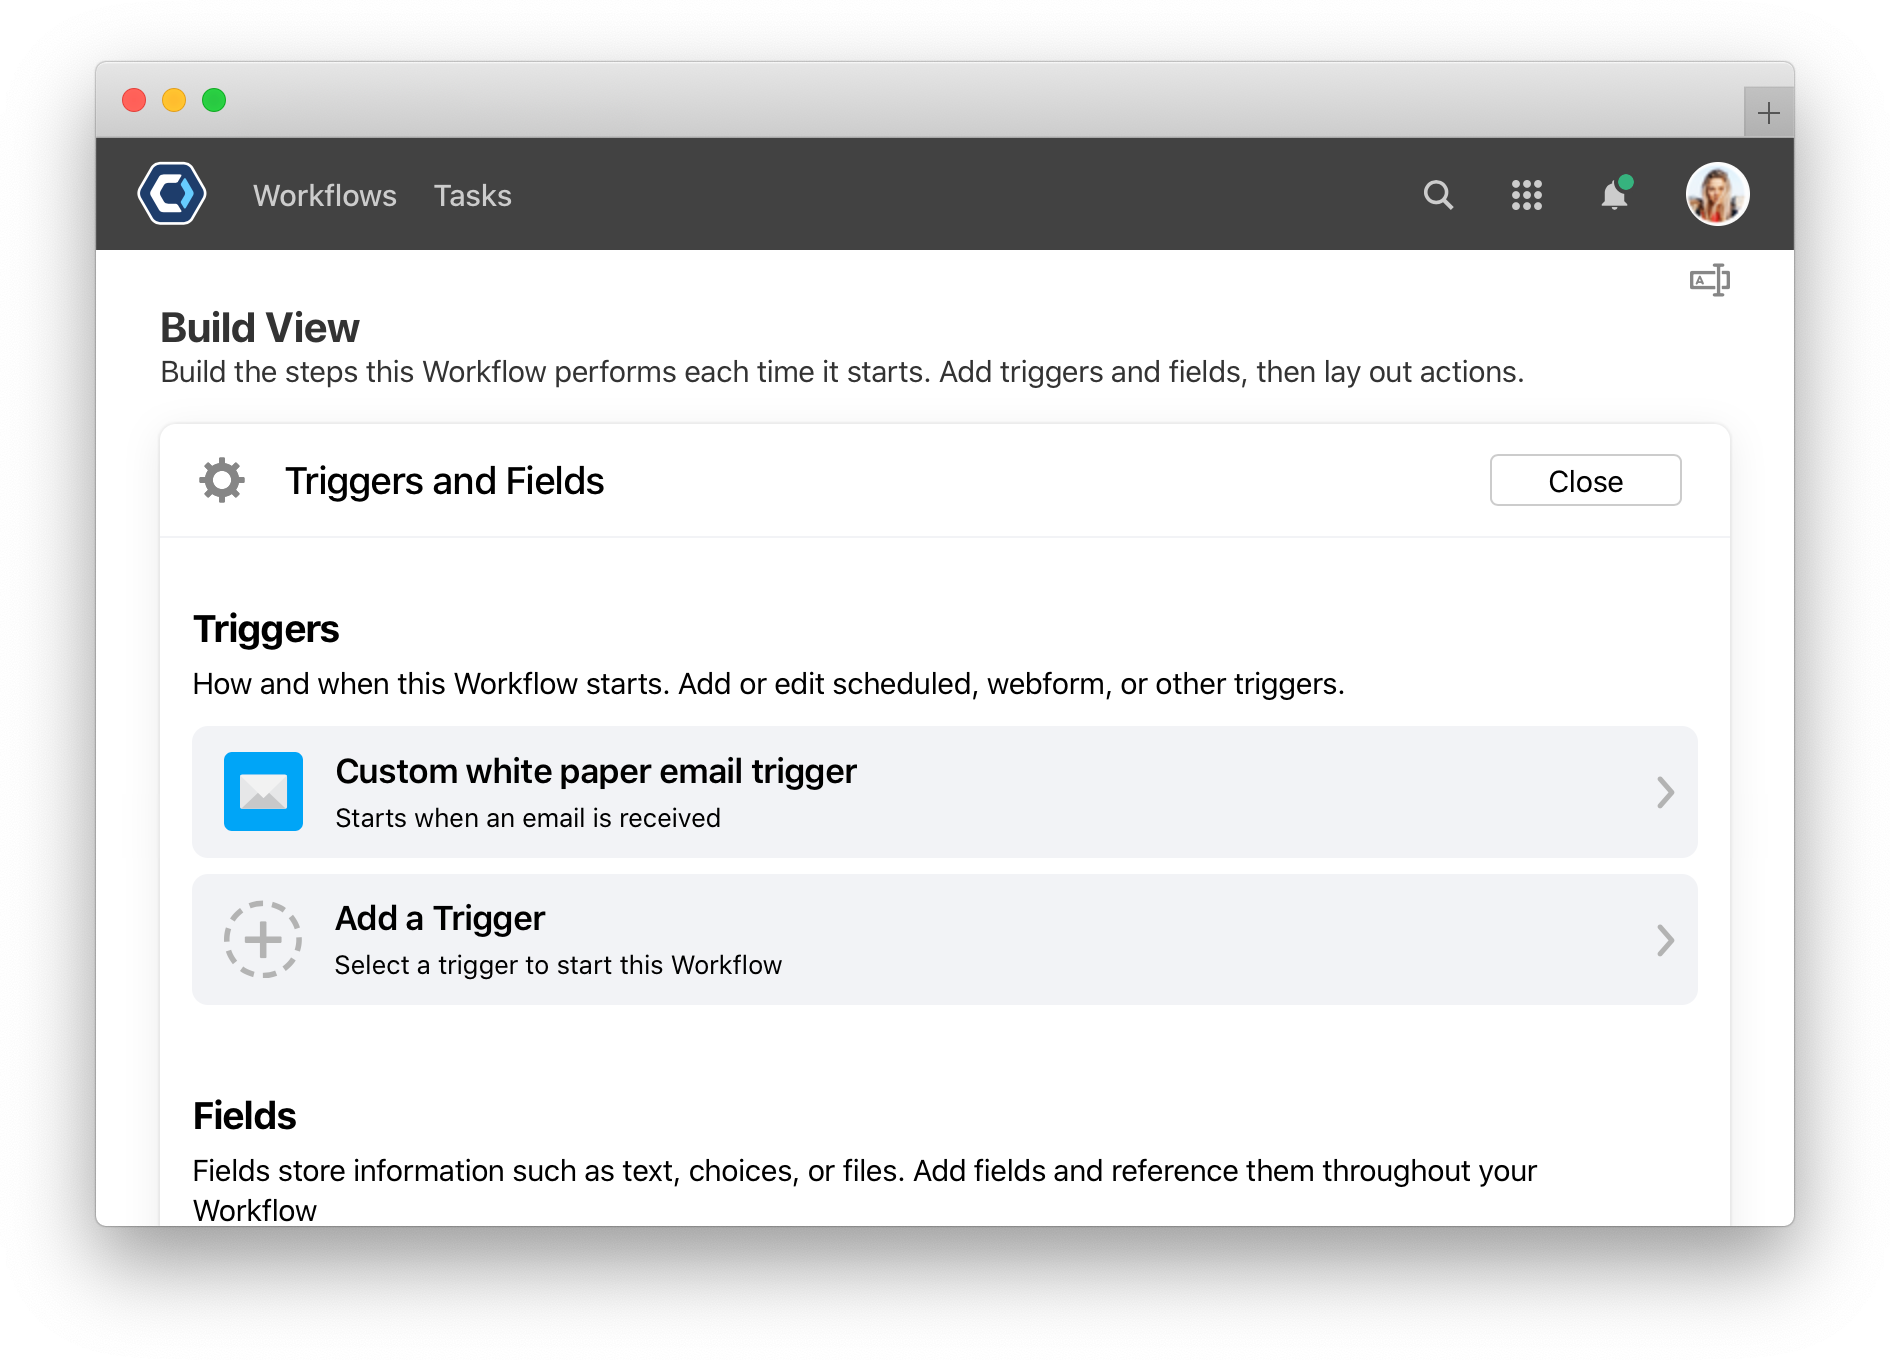
This Workflow has a web form and manual trigger configured. -
Add or edit a trigger:
-
To add a new trigger: Select Add a Trigger. For information on setting up a trigger, the trigger topic has guides for each available trigger. After you’ve added a new trigger, it will show up automatically on the Workflow’s Settings page.
-
To edit an existing trigger: Select a trigger to edit the settings.
-
✅ Heads-up: By default, all newly created Workflows can be started manually by any user or group with edit permissions for it.
How to remove a trigger
- Select Workflows from the top navigation bar.
- Choose a Workflow, this will open the Workflow detail page.
- Select in the upper-right corner to get to the Workflow Builder page
- Click open the Triggers and Fields section to head to your triggers.
-
Select a trigger to edit.
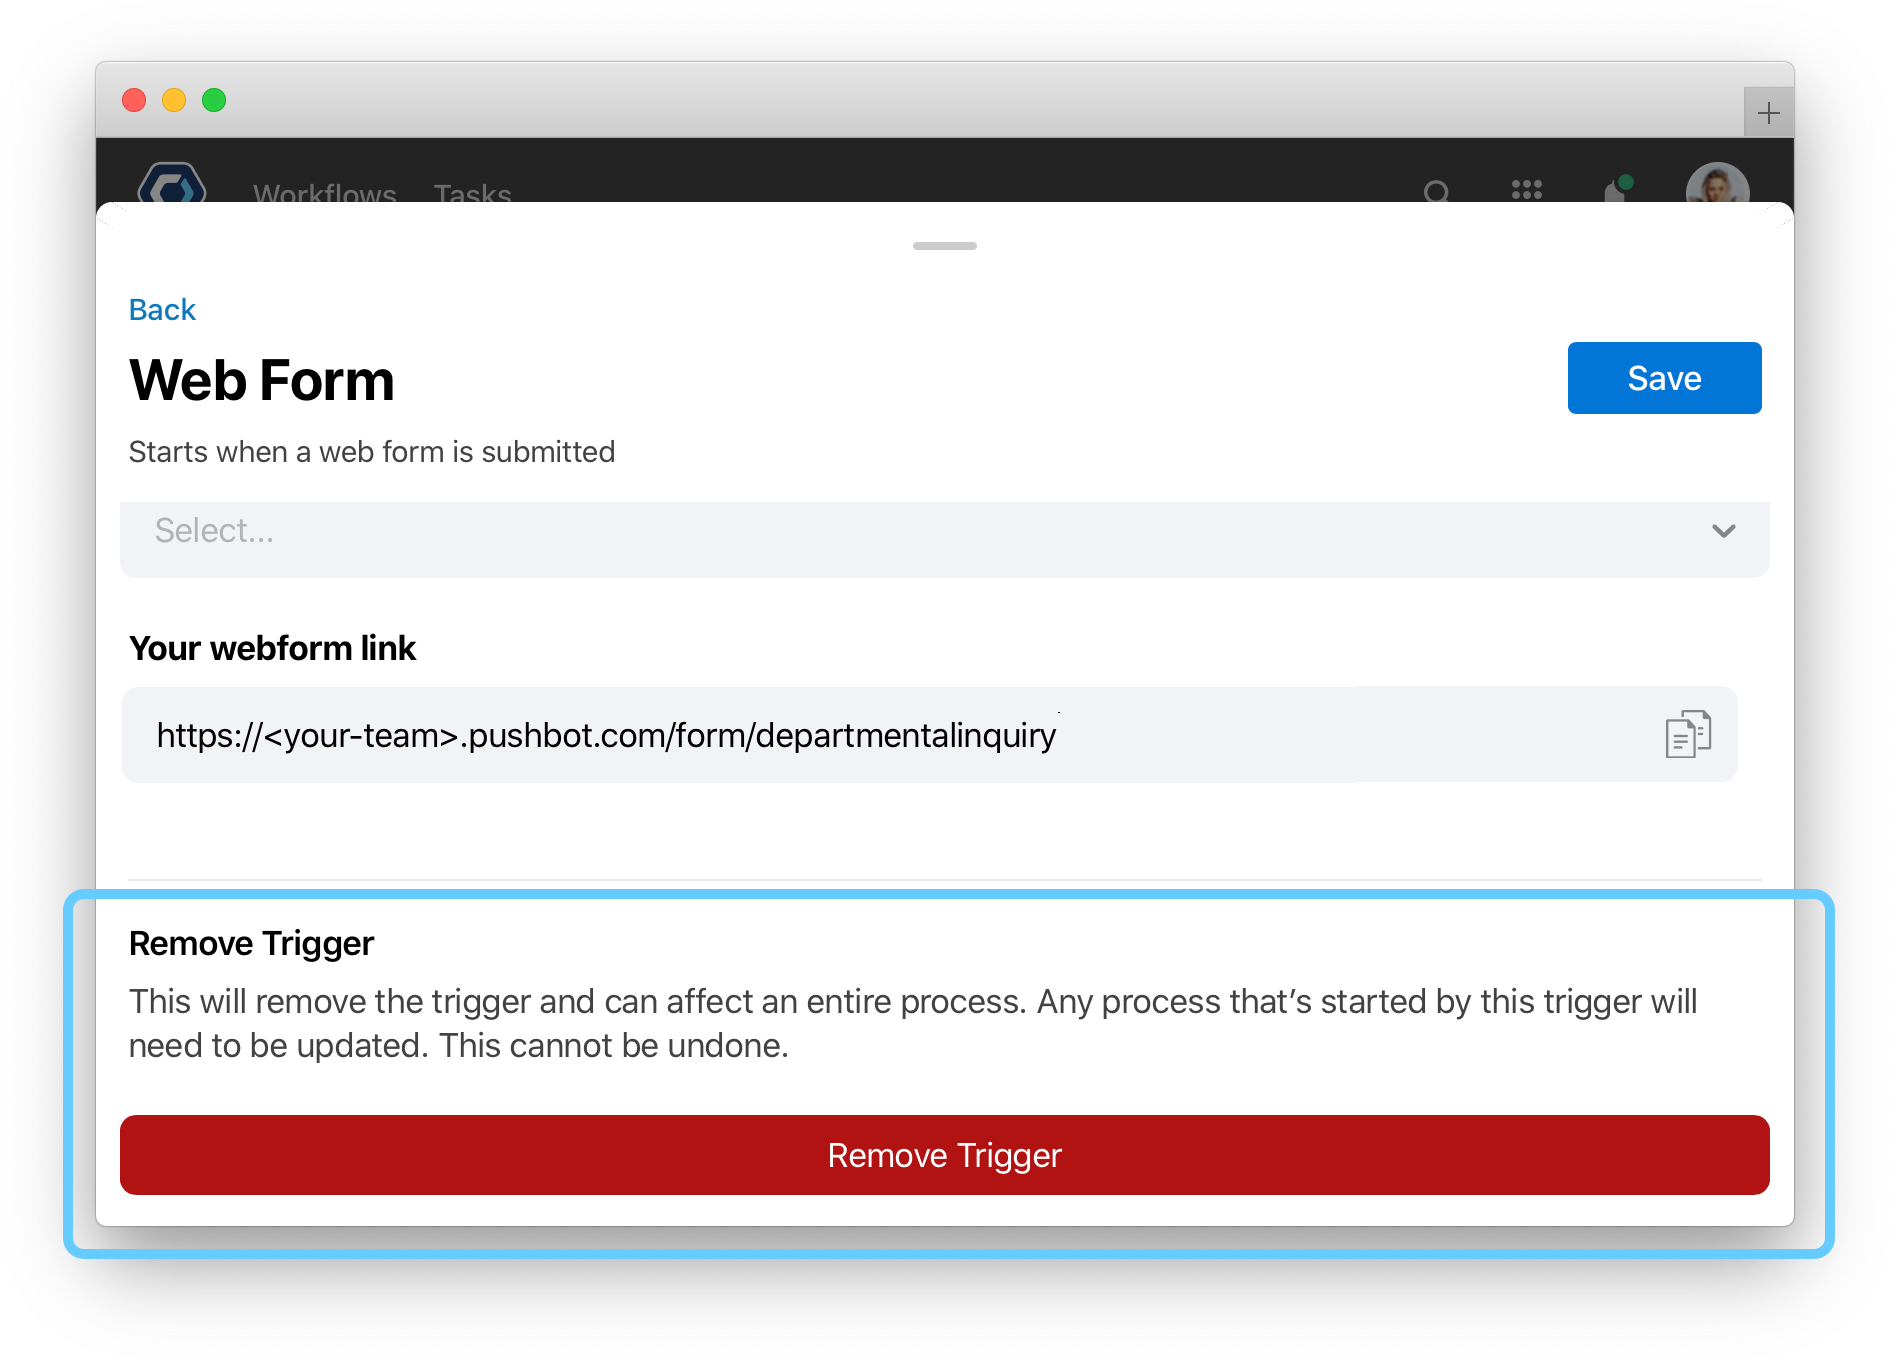
- Select

✅ Heads-up: Removing a trigger can affect an entire process. Any process that’s started by this trigger will need to be updated. Removing a trigger cannot be undone.
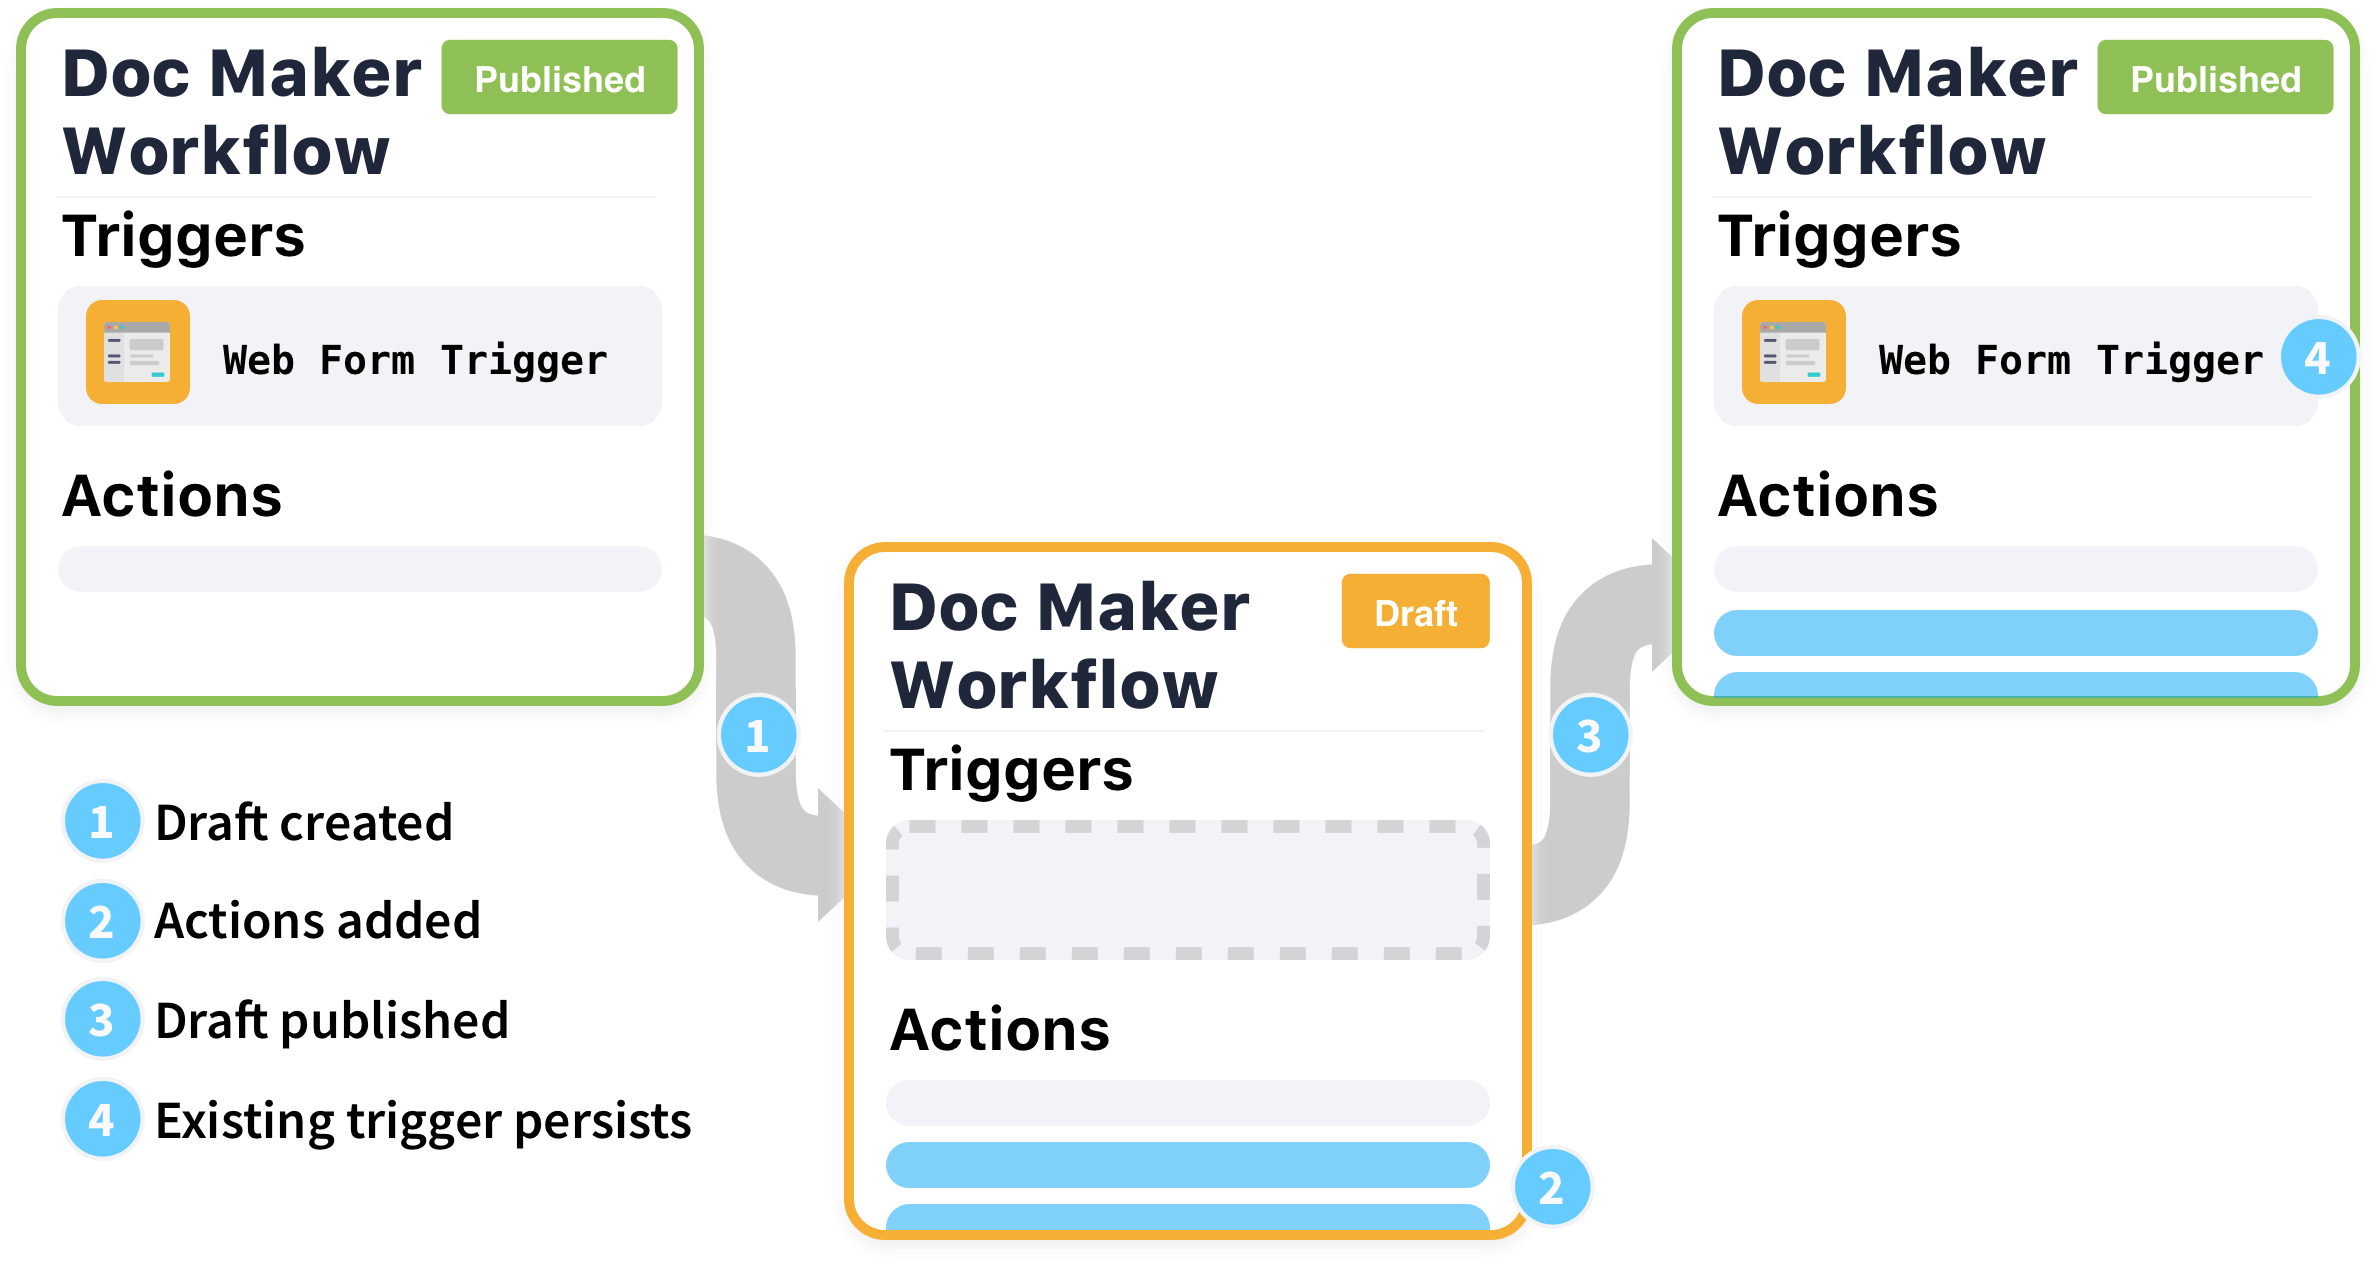
How triggers work in Workflow drafts
When you create a Workflow draft, triggers are not included in the draft. This is done intentionally to avoid having duplicate triggers across multiple versions, all triggering simultaneously.
In other words, if you have a published Workflow with a web form trigger, and create a draft of it, you will not see the web form trigger in the draft. Then, once you publish the Workflow draft, the published Workflow is replaced by the draft as expected—but the existing published triggers persist.
For more information, check the version control article.
Tips
- Many triggers will assign the Workflow owner as the instance owner. If you would like to update the instance owner for each instance, add a Workflow: Update Owner action within your Workflow.
Thanks for your feedback
We update the Help Center daily, so expect changes soon.
Link Copied
Paste this URL anywhere to link straight to the section.