 Test Workflows & Actions
Before rolling out your new Workflow to employees, customers, or partners, you should test it to ensure it’s functioning as expected. As you build out a Workflow, you can even test each individual action.
Experience shows the benefit of extensively testing any Workflow before launching it with other users. Put yourself in the mind of someone who is unfamiliar with your Workflow and ensure your instructions and steps are clear. To enhance your tests, try to break the Workflow by not filling out optional fields and inputting unexpected data to see how the automation behaves in a worst case scenario.
How testing in PagerDuty Workflow Automation works 
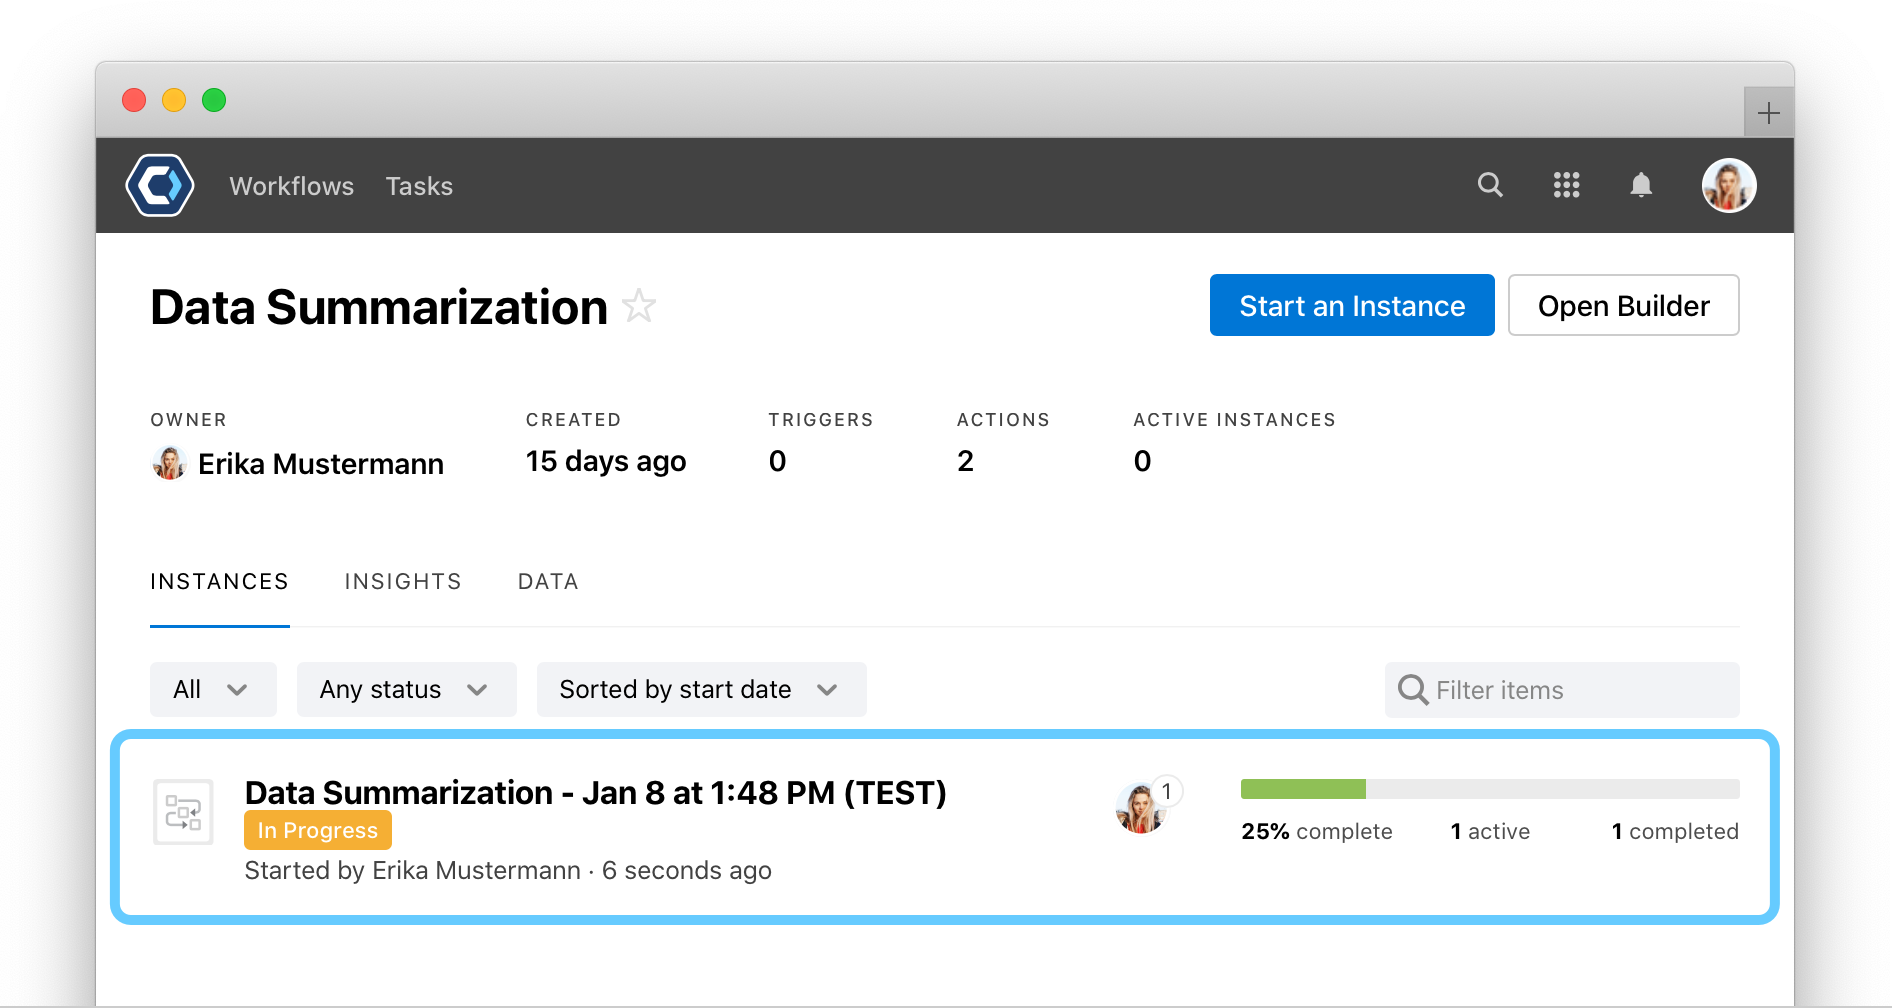
When you run a test in PagerDuty Workflow Automation, a (TEST) instance starts. This means you will get to see how a Workflow or action will actually function. Test instances appear on the Instance detail screen, where you can can easily review or revisit your previous tests.
There are a few protective measures and features added to testing to help make testing easier. Here are a few things to keep in mind:
- Tested instances are not included in any metrics or Weekly Team Summary emails or reports.
- All task timing will be ignored when testing
- Workflow tests are not included in the master data table. However, all data table actions will be performed, so be sure to review and correct any changes which occurred via actions within any imported tables.
- When you run a Workflow test, you can select whether to run the test By yourself or With others. If you select With others any Tasks or email actions will be delivered to actual assignees or recipients.
How to test an entire Workflow
- In the Workflow Builder screen, select
 at the top.
 - Choose how to run the test:
- By yourself: Tasks and email actions will be sent to you, instead of the normal assignee’s and recipients. Note that other system actions might affect other people or those systems.
- With others: Tasks and email actions will be sent to their normal assignees and recipients. The name of the instance and tasks will include (TEST) appended at the end.
- Select
 . When you start the test, the test instance page will load.
 - A test instance is now in progress. Progress through the instance as normal, completing tasks and noting any changes that you would like to make
- To end the instance early, Select
 at the top of the page and then select End Instance
note
- Note: After running a test, be sure to return to the Workflow you were working on, instead of accidentally editing the test itself. Click the handle at the top of the test window to close the test and return to your original Workflow.
If your Workflow includes a task to automatically start a process for each row, these instances will all be started and marked as (TEST).
How to test a trigger
One way to test a trigger is to add Instance Fields that imitate the actual output fields created by the trigger.
Example
- Varun wants to test the email trigger he just added. To do this without actually triggering the complete Workflow, he can add Instance Fields that imitate the fields that would come from the email trigger. In other words, he can emulate receiving email trigger information by adding fields like
fromemailorsubjectinto his Workflow and filling in his own default values.
Another way to test a trigger is to add a single Assign task to a person or Workflow: End this Workflow step to the beginning of your Workflow to act as a “stop point”. In other words, you can halt the Workflow from running through every step by ending the Workflow immediately, or by making it wait for the completion of a Task. This makes it easy to test the output of the trigger without needing to run through the full Workflow.
Tips for testing a Workflow
There are some best practices when testing Workflows, especially as you add more steps or complexity.
If a process does not end, use End this Workflow
If you find a pathway in the Workflow which does not close out the Workflow as desired, add a Workflow: End this Workflow action.
Add stop points while building to prevent runaway Workflows
Some builders add dedicated “stop” points to their Workflow. This makes it easy to test different sections without needing to run through the full Workflow. You could add stopping points with Workflow: End this Workflow.

Review the Workflow flowchart to see the structure
You can use the flowchart view to review all action dependencies and conditions and ensure all actions have been tested. You can access the flowchart from the Builder page.
How to test an individual action
While you build out your Workflow, you can test individual actions to understand their functionality, or make sure they work as expected. You can also test actions within Discover Actions when browsing through the action library.
-
In the Workflow Builder screen, find the action you would like to test, select
, then select Test Step.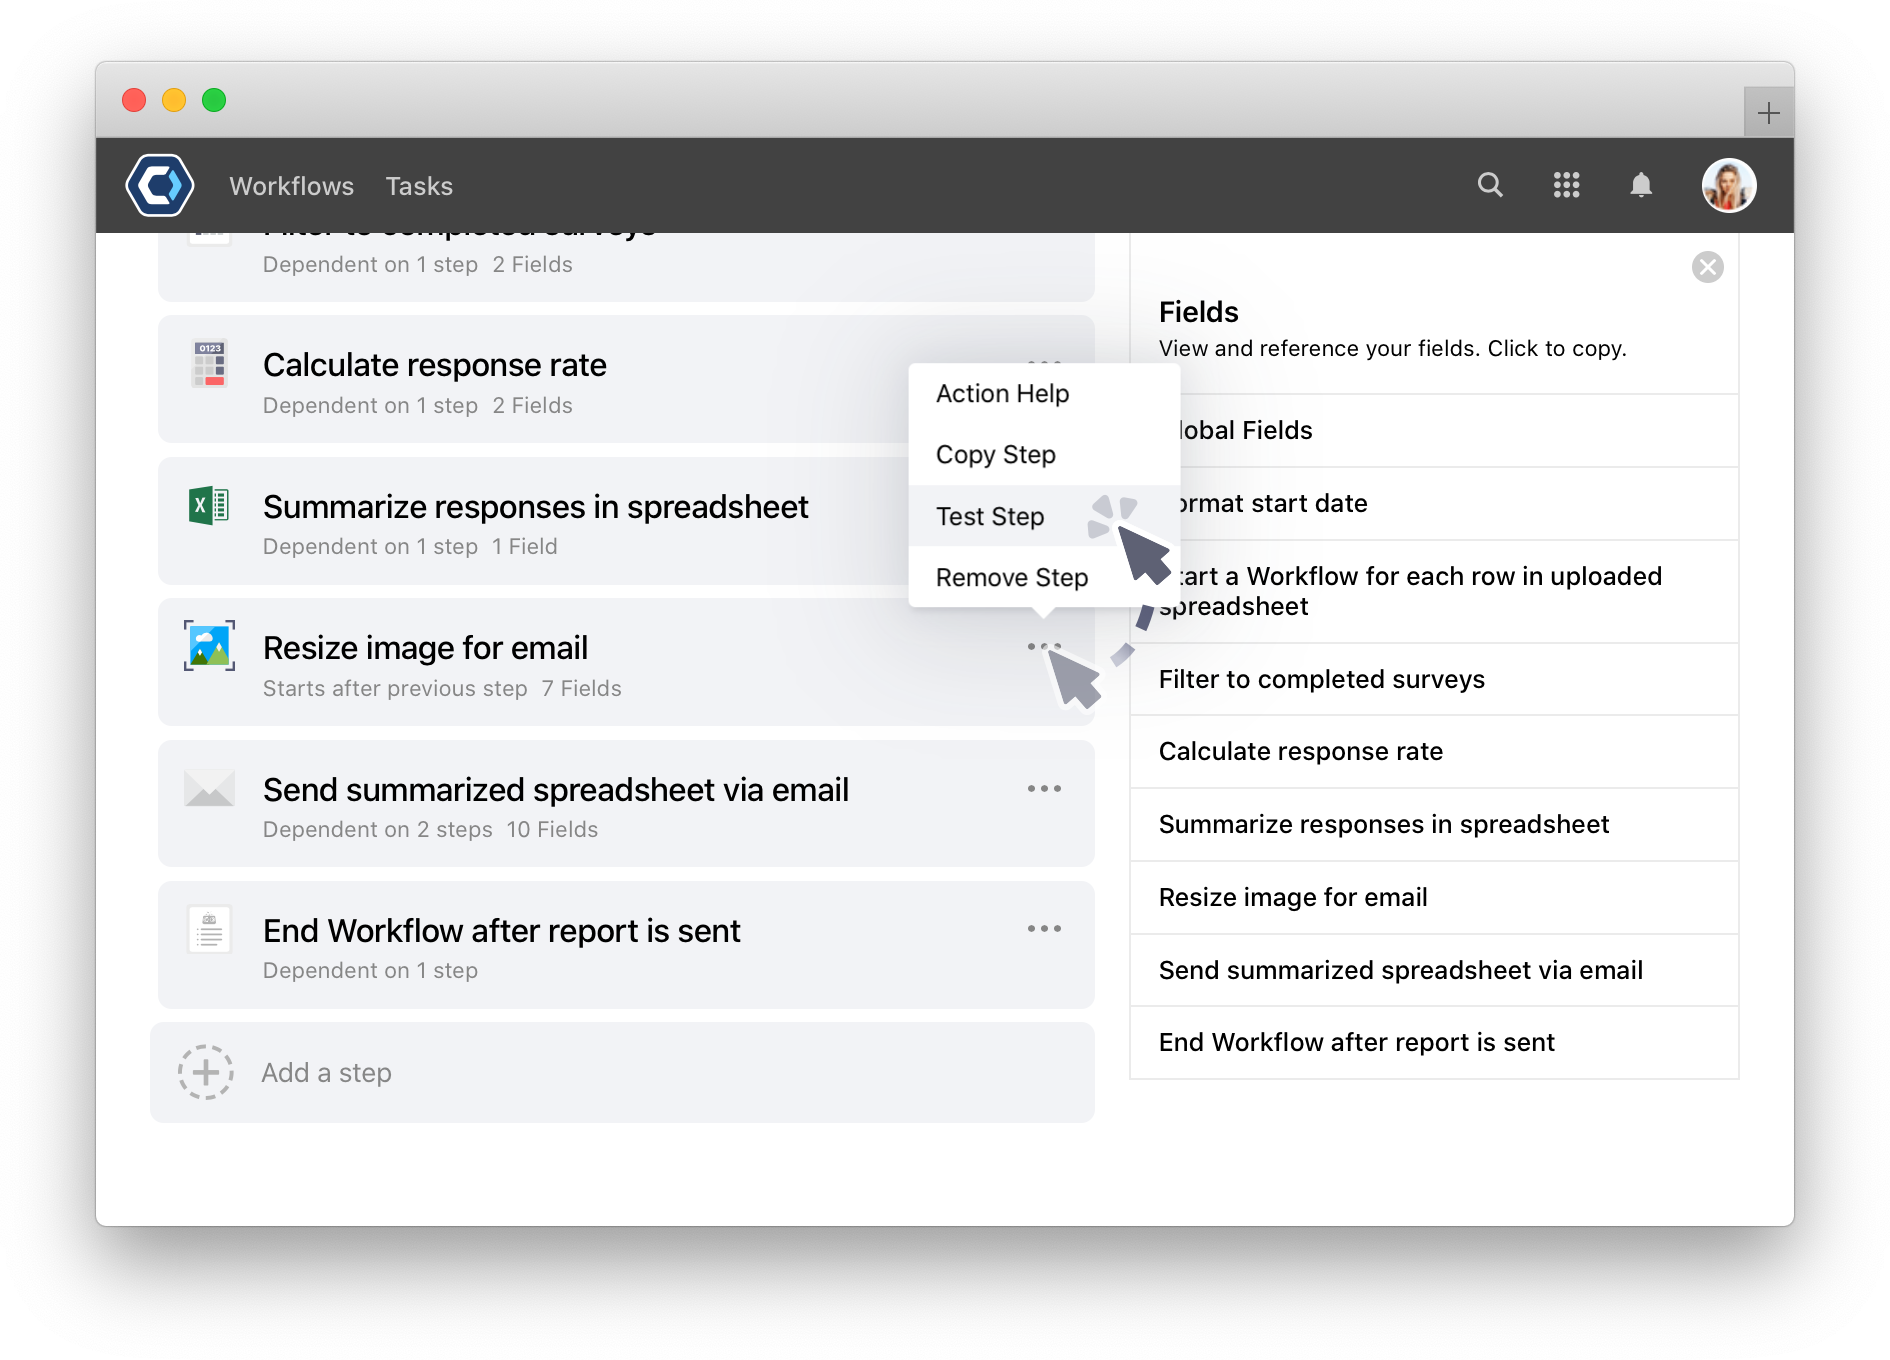
- If the action requires field data to test, there will be empty fields to fill out first. If the action is ready to test, you can test it immediately.
- Select the
 button when you’re ready to test.
 - The action will process for a moment. When it appears, select the Open test as instance to see the full test.
Tips for testing an action
There are some best practices when testing actions, especially with Tasks, or certain action types like email or table actions.
Table actions make live changes during testing
If you test a table action, the action will make actual changes. For example, if you have a Workflow you’re testing that updates an important employee register, any table actions you test like Tables: Remove a Column or Tables: Apply formulas to columns will actually remove columns or apply formulas.
To more safely test tables, try importing a table you can edit freely.
Open up a separate window or tab when testing emails or Tasks
When you test automated actions, the test will finish in a few seconds. If you test a Task, or an email action, you’ll be instructed to take an action on another screen before you can see the result.
For example, if you test an Assign task to a person action, you’ll need to go complete the action before seeing the results. Be sure to keep the test window open during this time so the finished results appear.
How delays function when testing
Any delays set per action are ignored during testing. Dependencies and conditions are still checked in the typical order. This applies when testing an entire Workflow or a single action. Deadlines on Tasks are still assessed as normal.
For example, if a Workflow has a single action set with a 1 week delay:
- If the Workflow is started normally: the action would check dependencies, conditions, then delays, then would be delayed for 1 week.
- If the Workflow was tested: the action would check dependencies, conditions, then skip checking delays. It would then start immediately.
Get help with a problem or question
If something’s not working as expected, or you’re looking for suggestions, check through the options below.
Why can’t I test certain actions?
Almost all PagerDuty Workflow Automation actions can be tested. Depending on your permissions, or the action type, you may be unable to test certain actions. For example some Workflow actions cannot be tested because of how they interact with other Workflows.
Some actions must also be part of a Workflow to test properly. If you run into any issues testing from the Discover Actions page, try adding the action to a Workflow first, then testing it.
Thanks for your feedback
We update the Help Center daily, so expect changes soon.
Link Copied
Paste this URL anywhere to link straight to the section.