 Generate Document and Collect E-Signature Starter Template
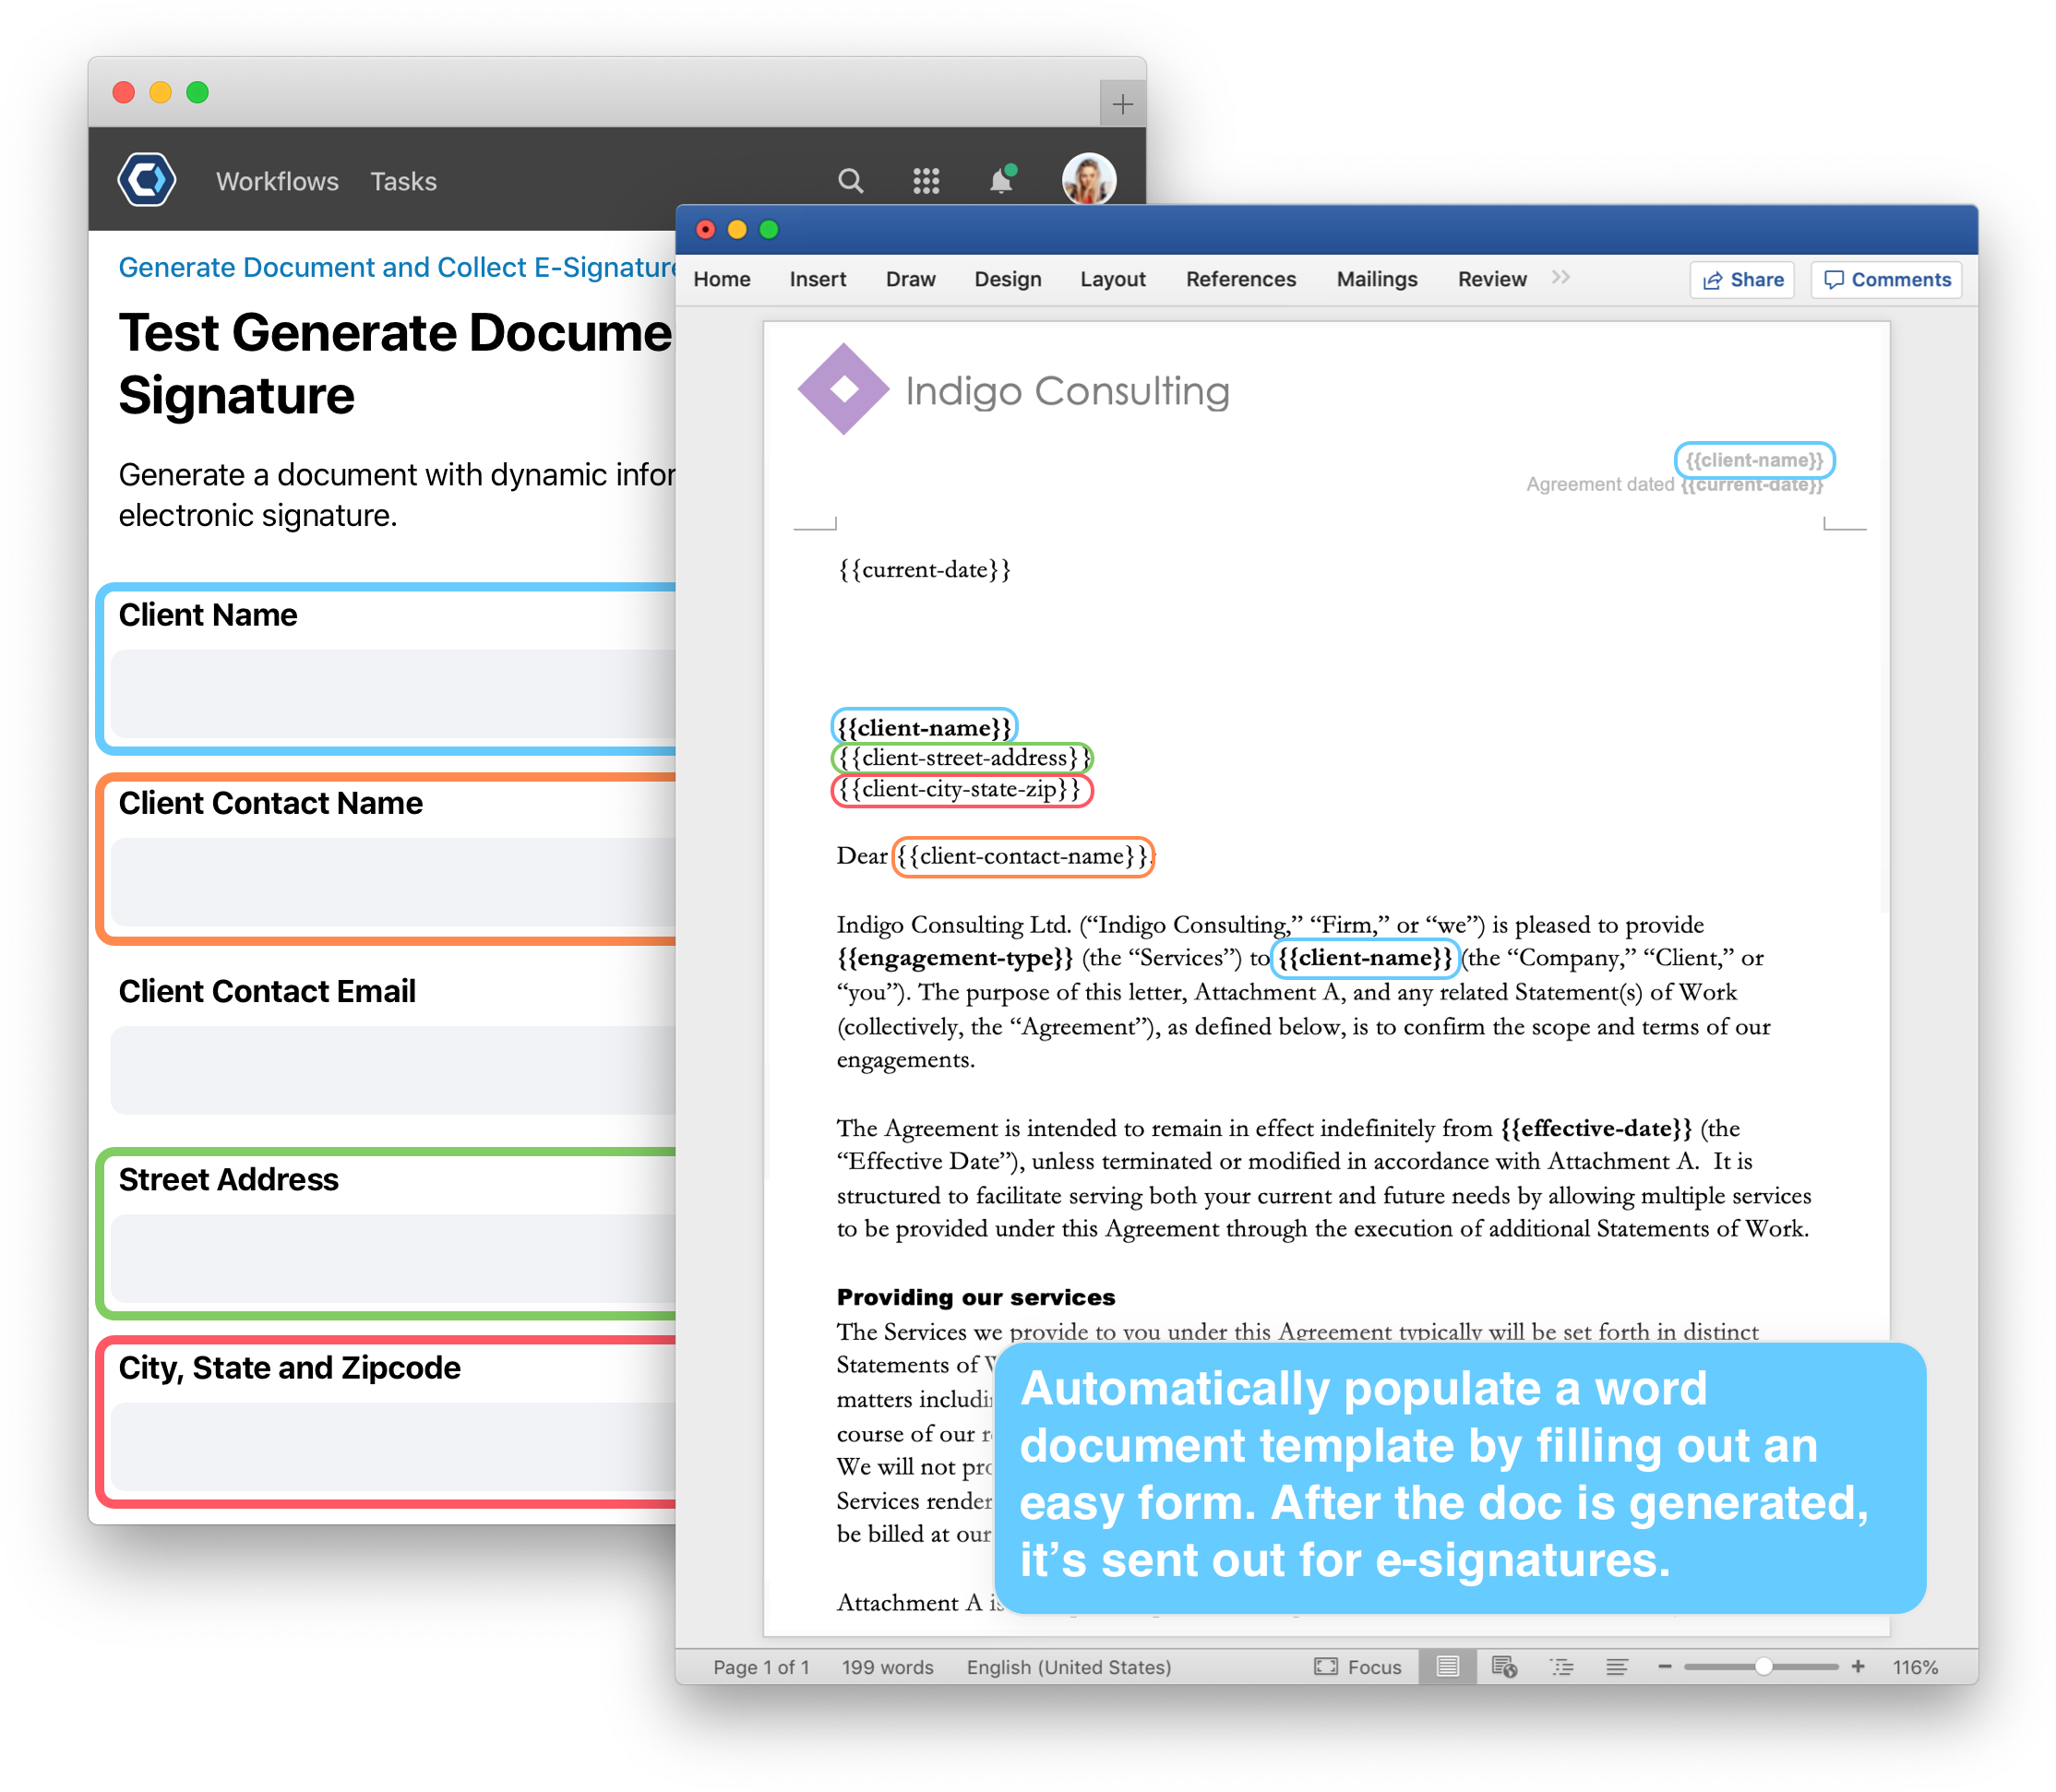
Get started with the Generate Document and Collection E-Signature template to create and populate a dynamic word document, then send the document out for signature.
How to configure this template 
In this template, you’ll start by downloading and editing a simple Word document, then after you upload it to your PagerDuty Workflow Automation Workflow, you can populate it with data from your process.
Add the Workflow from the showcase
To get started with a template, first create a new Workflow, then import the template from the showcase.
-
Select Workflows from the top navigation bar, then select


- Select Generate Document and Collect E-Signature from the Showcase Templates section.
- Select

Congratulations! Because you imported the template, most of the Workflow configuration is already complete. We only have a few more steps before your process is good to go. After importing the template, you’ll land on the Workflow Builder page.
Download and open the Word doc template file
The process depends on a Word doc which is included in the template. You will download, edit, and reupload it as part of the setup. This file is stored in something called an Instance Field, which is where you can store data you want to use in every instance of your process.
-
Click the Triggers and Fields section and select the Document Template field in the Instance Fields section.

- On the Configure Field page, scroll down to the Default Value field. This field is where we store the Word doc template file.
-
Click the
Engagement Letter Template.xlsxto download it.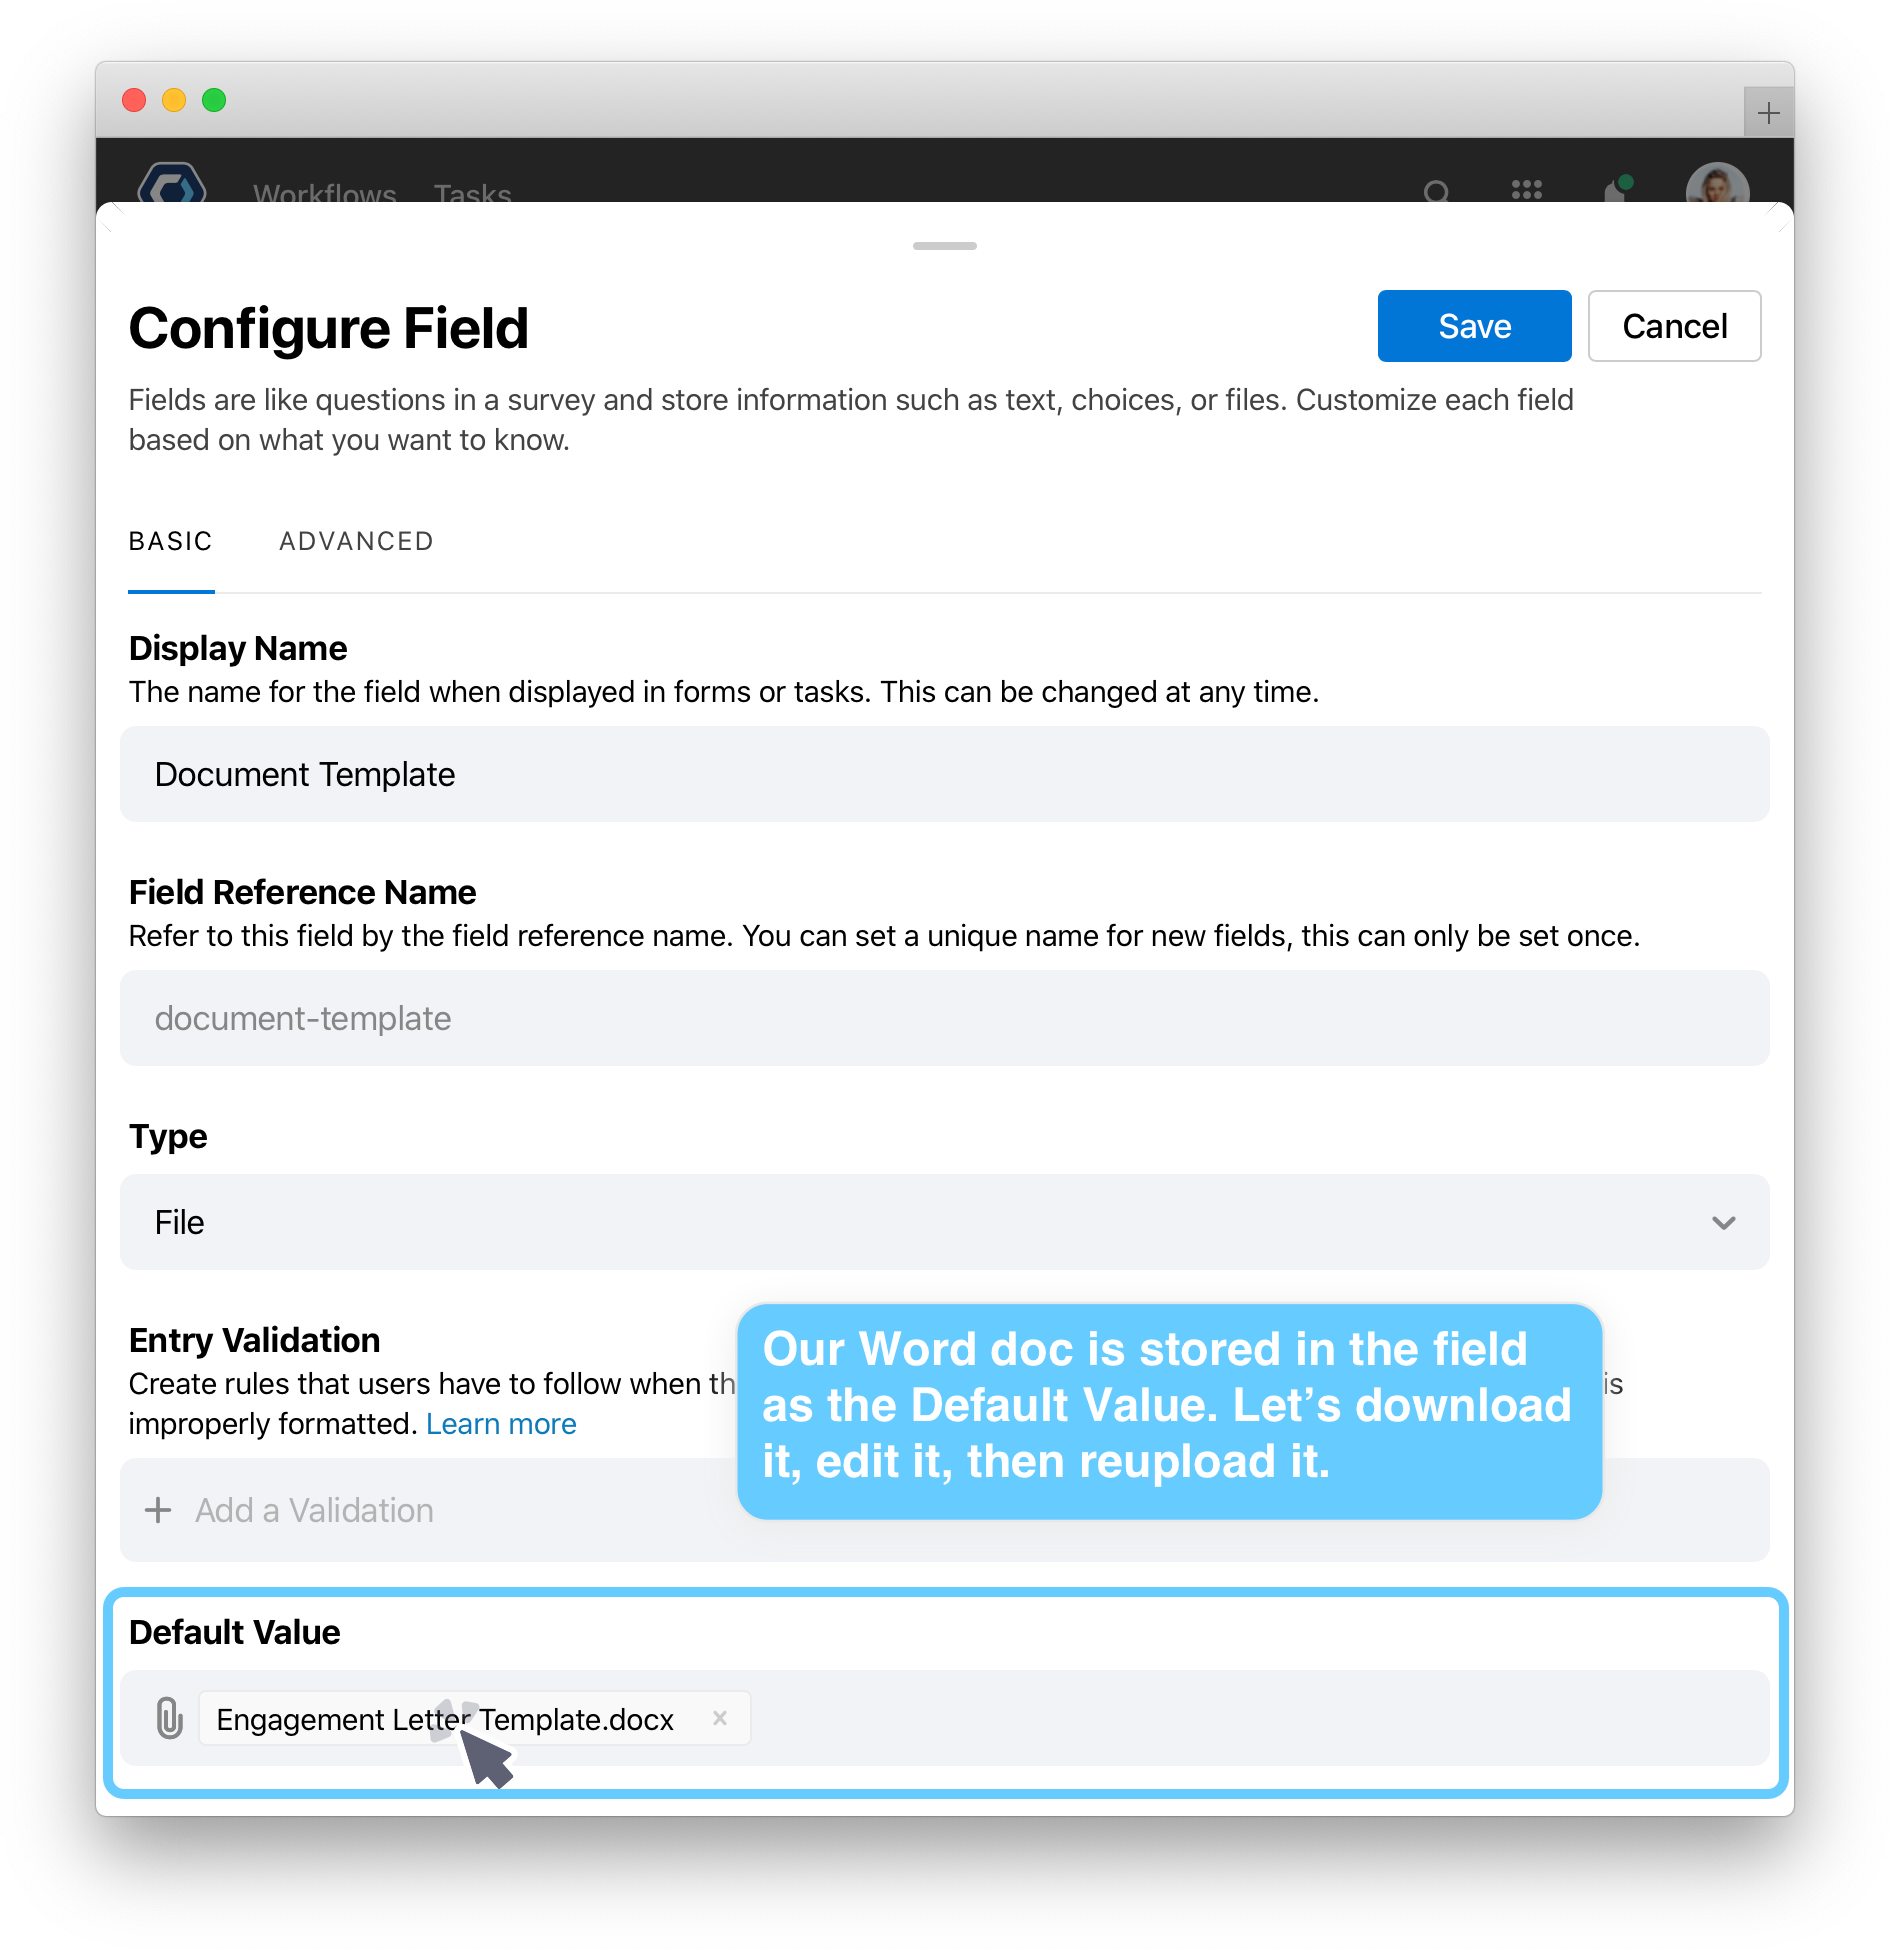
Edit and reupload the Word doc template file
We need a way to insert the the form entries into the Word doc template—we can do this with field references. Field references are a way to dynamically reference data from other parts of process.
When you reference data, you need to use a special {{syntax}}. This is just like doing a mail merge, or if you’ve ever done a Mad Lib, it’s a similar idea—we’re going to “fill in the blanks” of our Word doc template with data from the form. We’ll see this in more detail later.
For now, let’s add a confidentiality clause to this template, which users can easy enable or disable.
- Open the template in Word. If you don’t have Word, you can open it in your word processor of choice. Make sure you save it as a DOCX file when done.
- Let’s make two small changes so we can see how this template works:
- Let’s add a confidentiality clause by adding a new field reference—add a new line above the
Dear {{client-contact-name}}:, and add{{confidential}}to it. - Let’s add the current date at the end of the template. On the last page, add
{{current-date}}on a new line afterINDIGO CONSULTING LTD. - Save the DOCX.
- To reupload the Word doc file, return to PagerDuty Workflow Automation and navigate back the Workflow Builder, and reopen the Configure Field page for the Document Template field.
-
From the Configure field page, delete the old template from the default value by clicking its X.
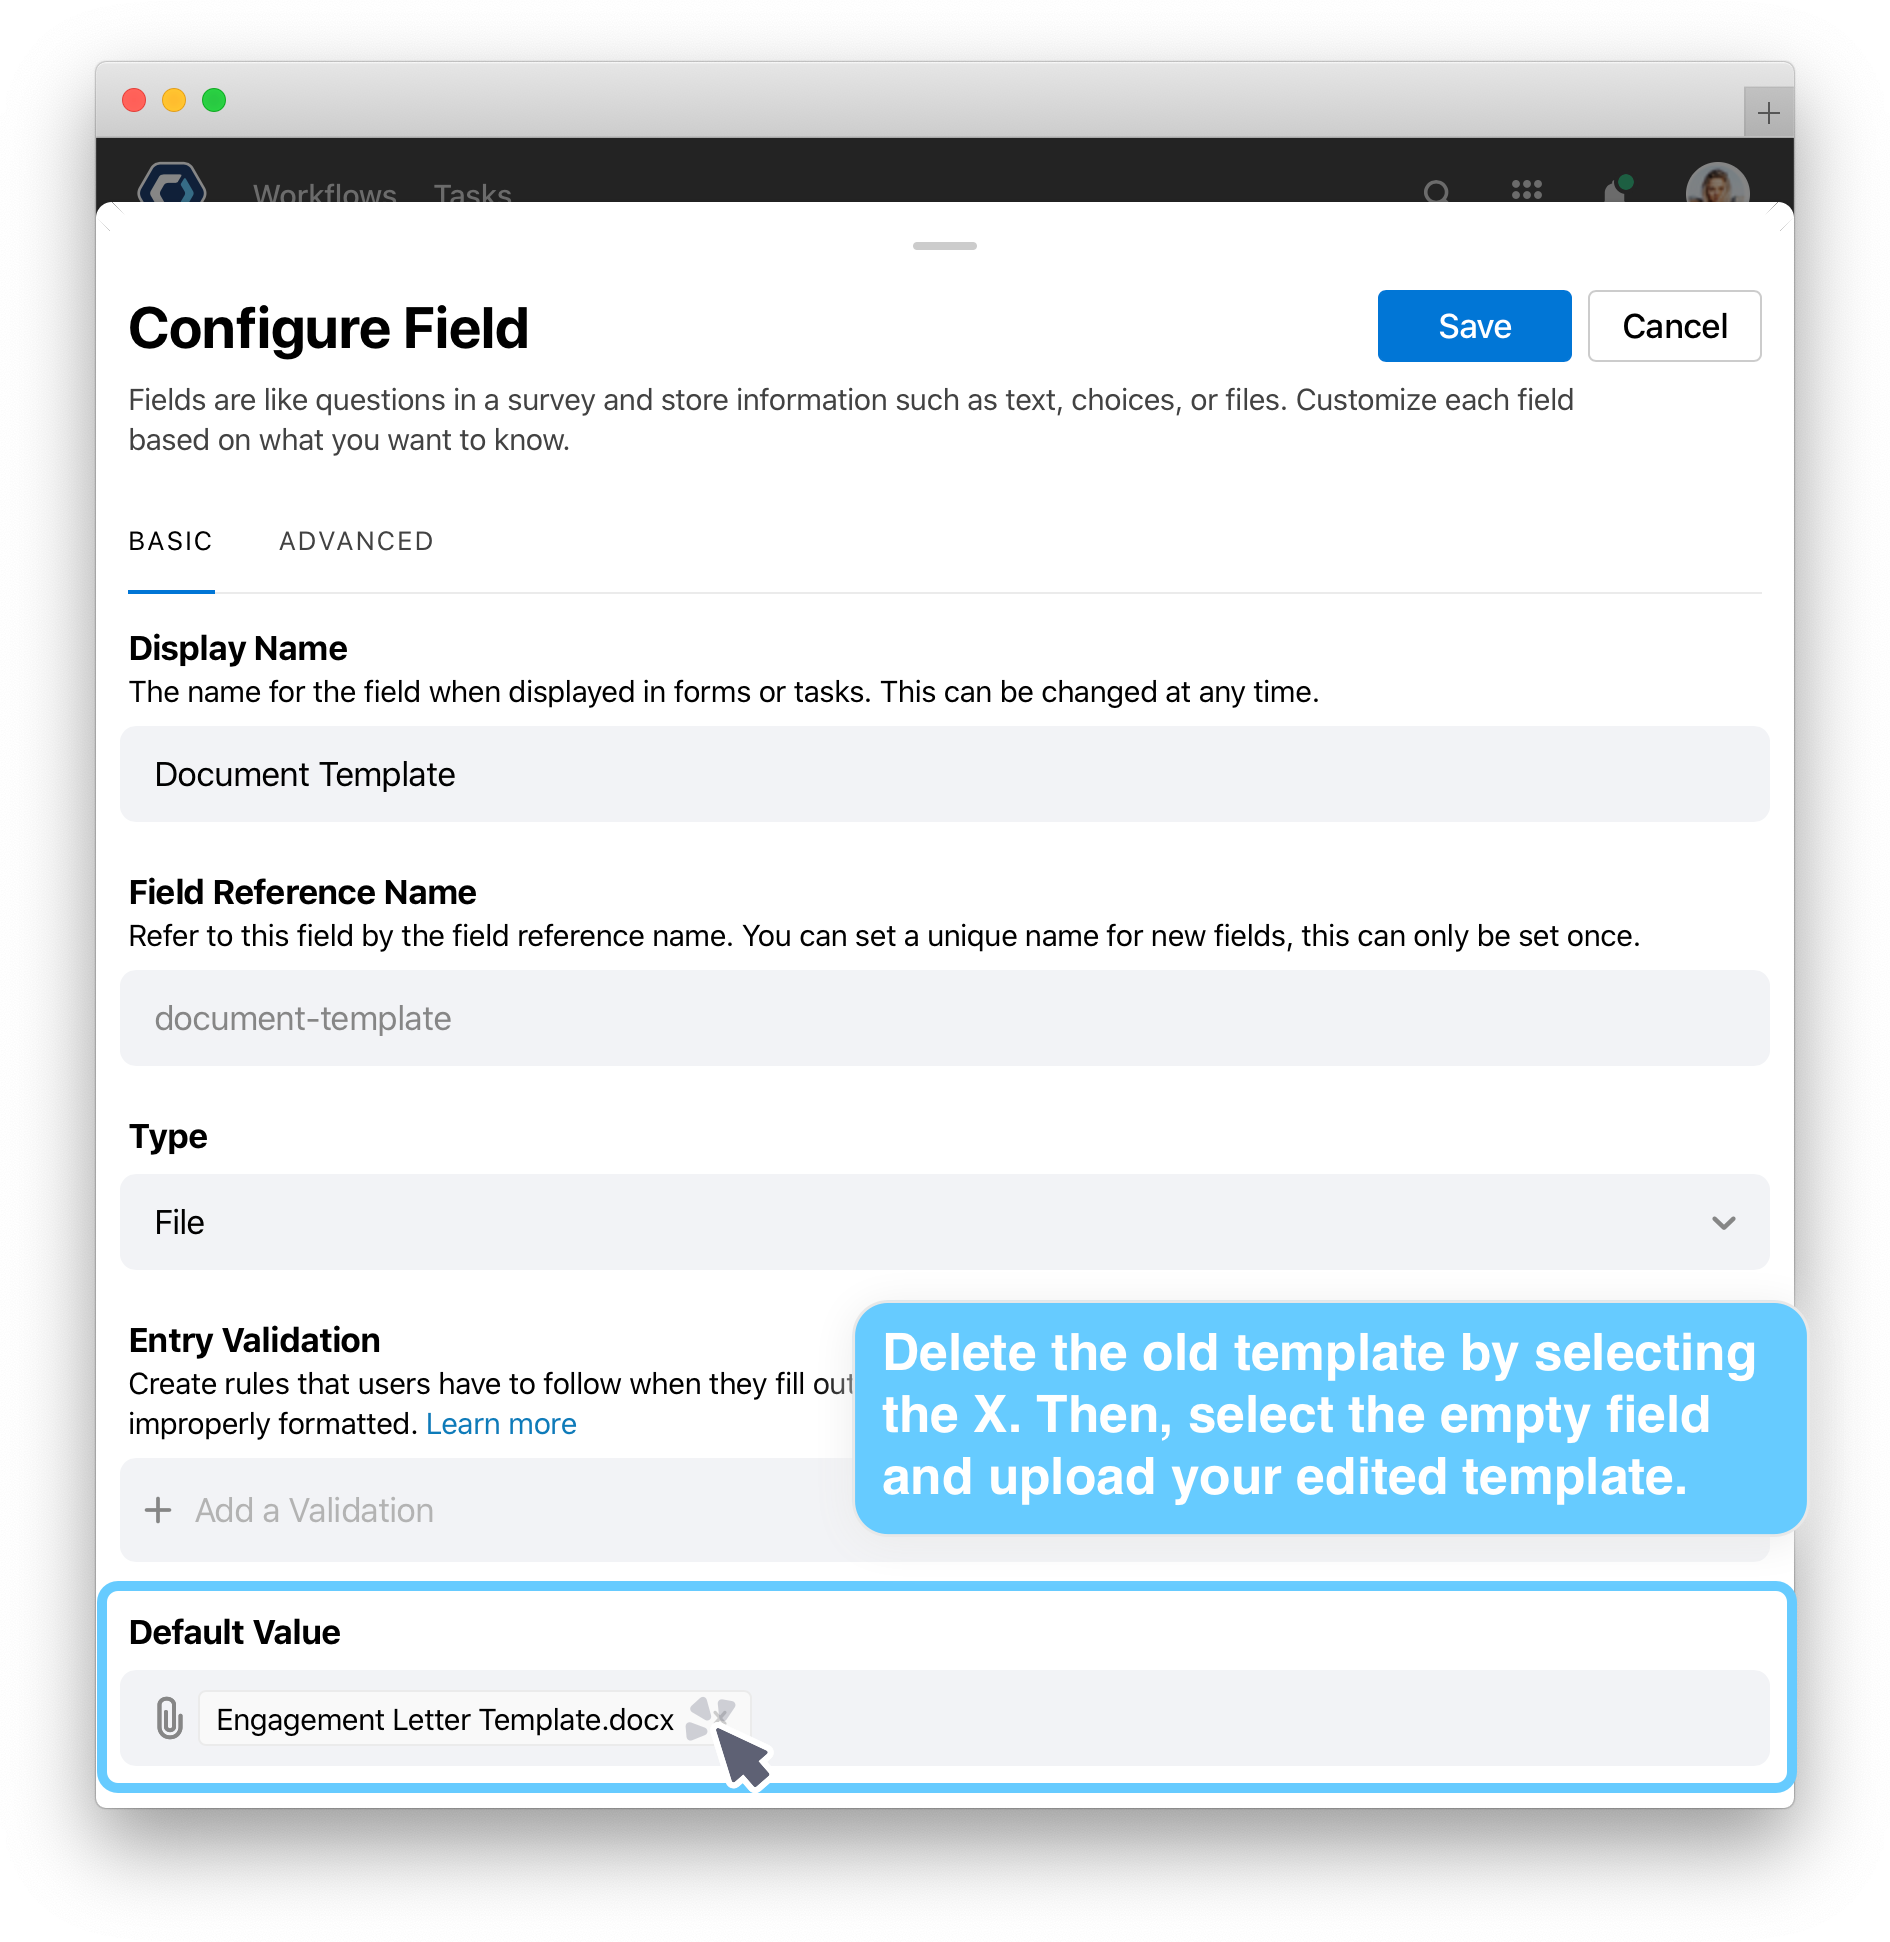
- Select the now blank field and upload your edited Word file.
- Scroll to the top of the page and select

Edit the form and add a new field
We added the new confidential reference in the word doc template, but now we need to add a field to the form so users can choose whether to add the clause. For reference, you can see an image of the fully configured action below:
Fully configured field example

-
From the Workflow Builder page, return back to the Triggers and Fields section.
Let’s take a quick detour to look at how the configuration of these fields will change what the user sees in the form they will fill out:

-
To configure a new field, select Add a field in the Instance Fields section.
- Set the Display name to
Confidentiality clause. The display name is what the “title” of the field is on the task. - Set the Field reference name to
confidential, this is the name you enter in as a field reference, which we did earlier when we added{{confidential}}to the Word doc template. - Add a description, for example
Add a confidentiality clause if required. If left blank, no clause is added. - Finally, mark the field as required by clicking the
 for Required Field.
 - Scroll to the top of the page and select to save the changes to the field.
- Set the Display name to
💡 Tip: If you’re interested in more details on task configuration, you can see an overview of basic field configuration below.
Overview of basic field configuration
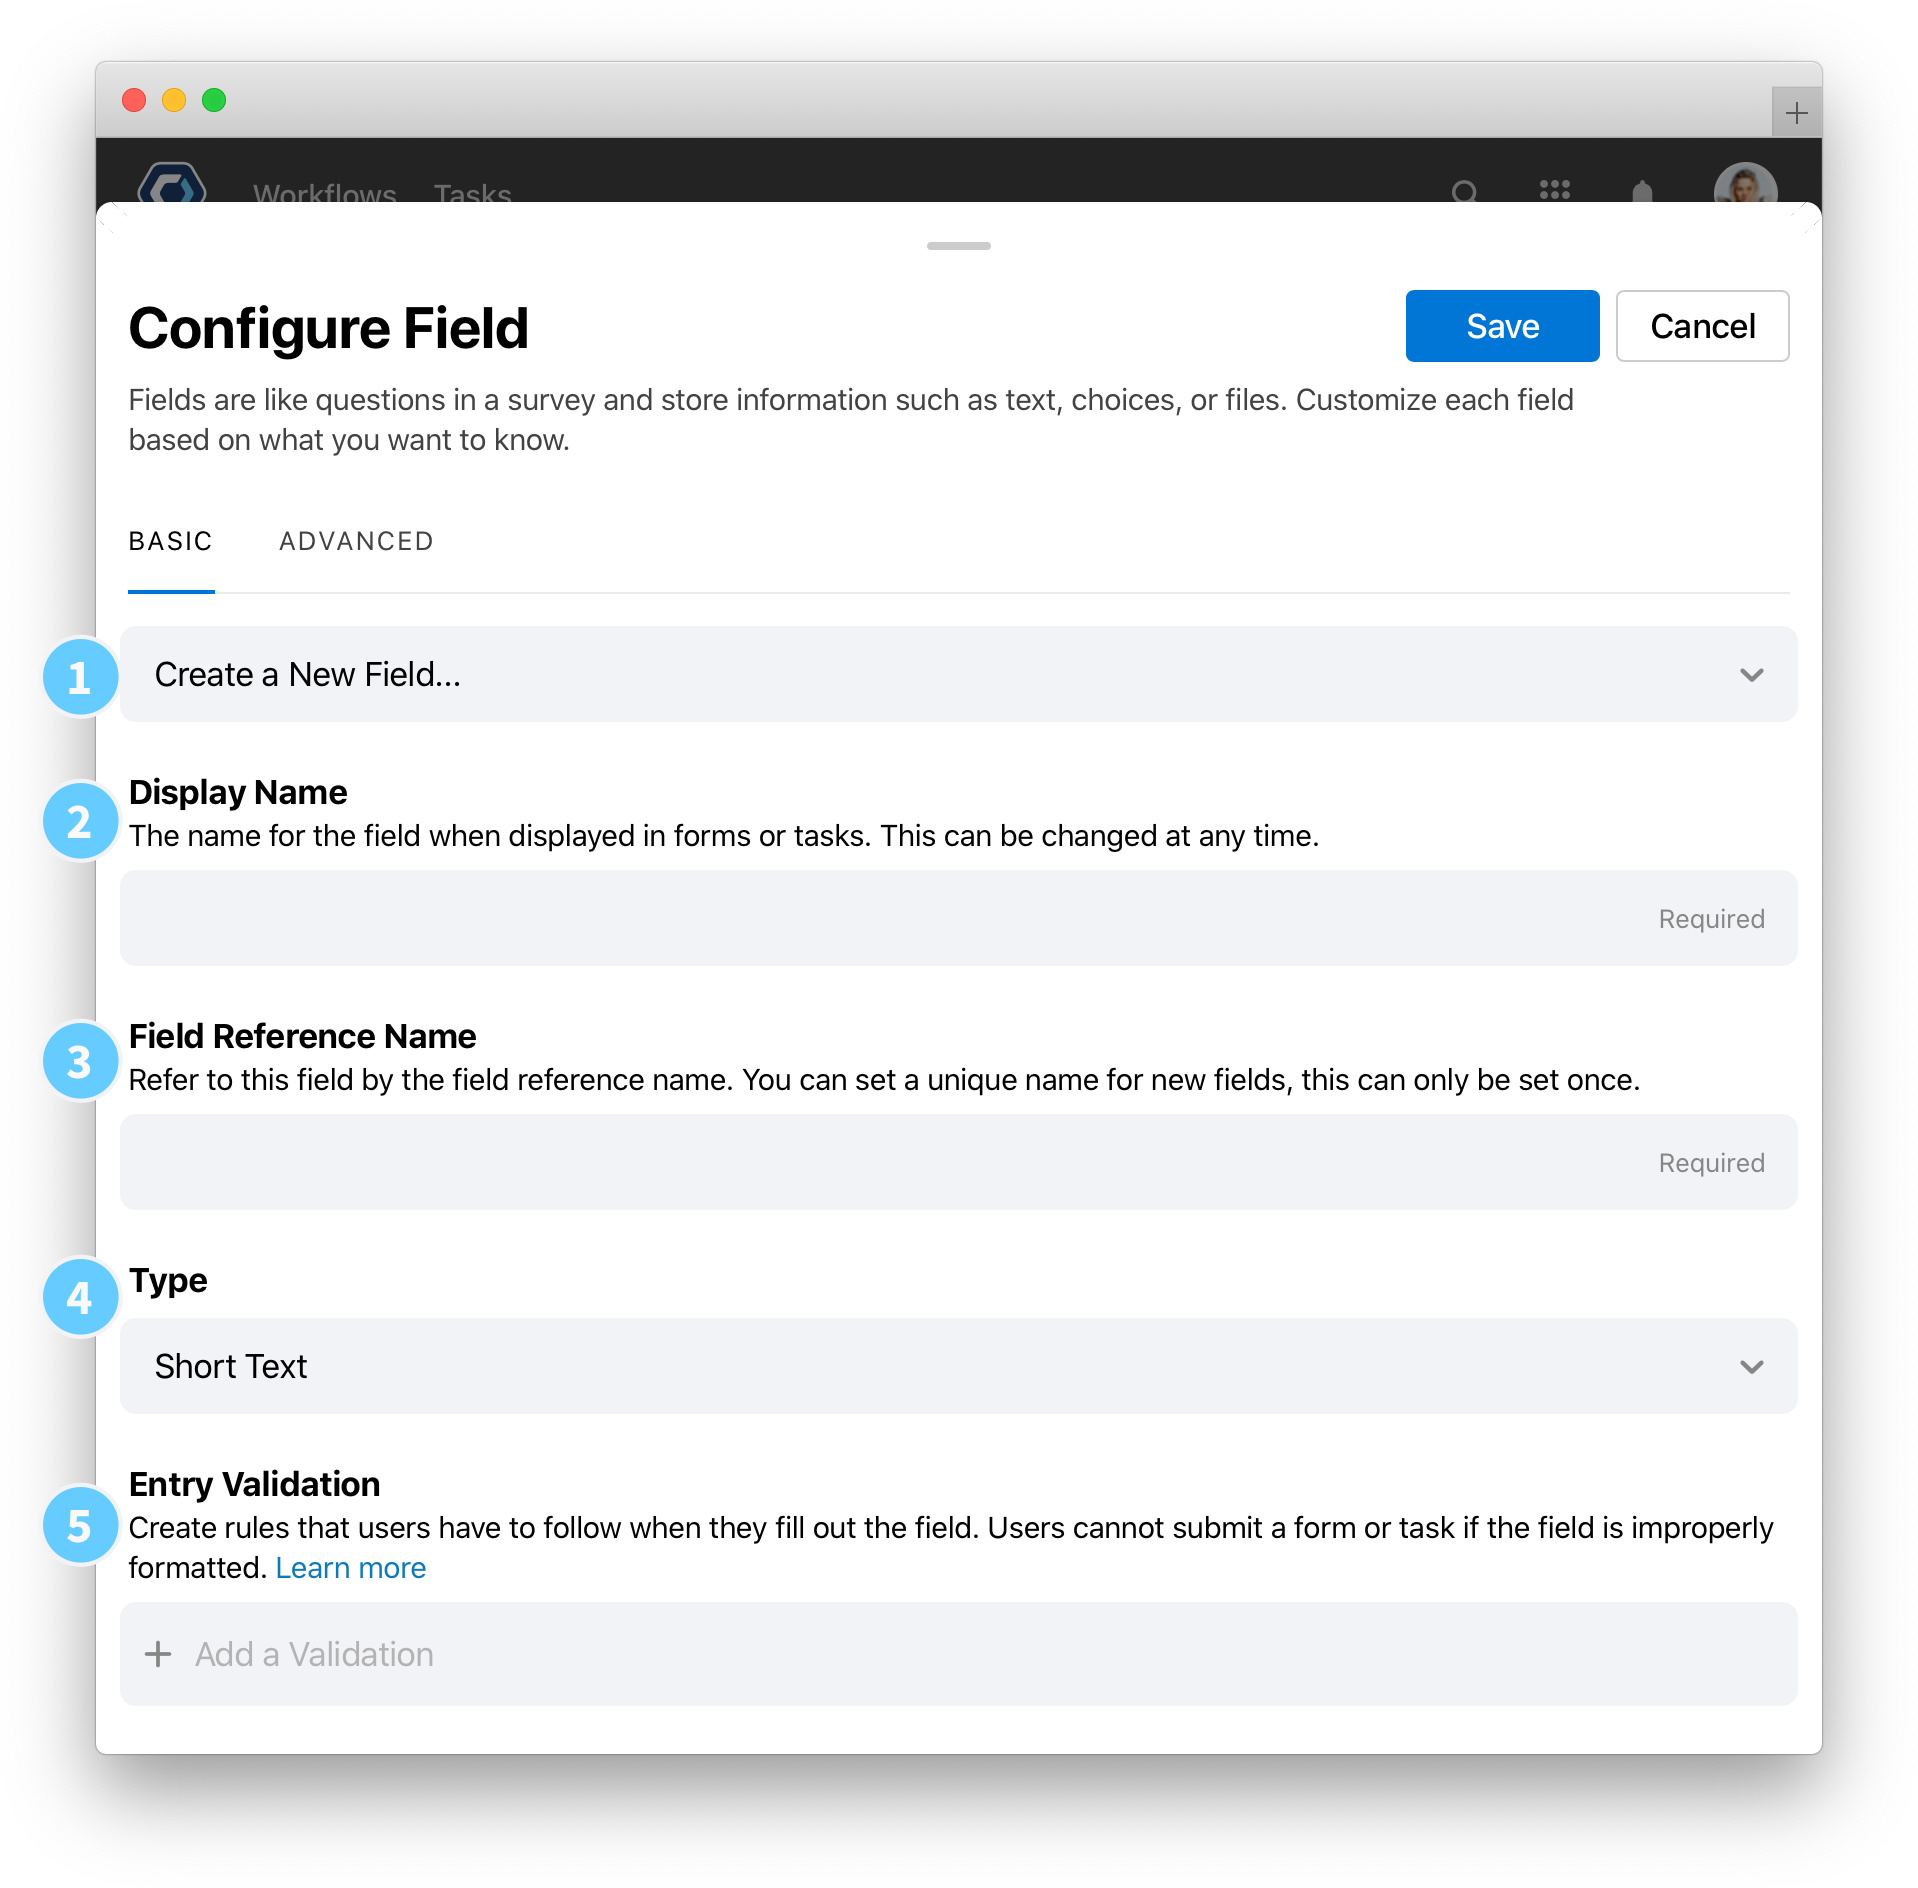
- Create a New Field, or Select an Existing Field: By default, adding a field will create a new field. Alternatively, use Select an Existing Field to pick an existing field from anywhere in the process, and add it as a form field. See the section on Select an existing field
- Display Name: Change the field name that is displayed to people. Note that the display name is cosmetic and can be changed at any time—it is the field reference name that is used to reference the field value.
- Field Reference Name: Refer to the field by this field reference name. You can set a unique name for this field, but only when the field is first created.
- Type: Select the field type, such as Text, Decimal, Integer, or Date. See the field types article for more information on each type.
-
Default Value: Set the default value of the field that users can choose to leave as is or change. For example in a true or false field, setting the default value to “True” will mean true will be preselected.
- Description: Appears above the field, directly below the display name, providing guidance to the user. Description fields do not support Markdown. To add more detailed instructions, see the Instruction field type.
-
Example: Appears directly below the description field, and is useful to provide an example or typical value for a field.
- Required Field: By setting a field to required, the user must add a value before completing a task or submitting a web form.
Entry validation for text, integer, and decimal fields
Text, integer, and decimal fields support entry validation, which prevents or restricts a user from submitting a form or task when a field has incorrect data. The Entry validation and Error message fields are used to set a custom validation. Check out Apply entry validation to fields to learn more.
For this section, we’re just making small changes, but you can customize the Word doc and form to work for any situation.
Configure the e-signature action
Now we can open up the actions for this Workflow, and configure the action that collects e-signatures. The actions are the actual steps the Workflow performs. We can access the actions from the Workflow Builder page, below the Triggers and Fields section we’ve been working in.
✅ Heads-up: The E-signatures: Request document signature action is a premium action. You can use it freely in this template in Test mode. Please contact PagerDuty Support to begin working with this action outside of Test mode.
-
Click Collect e-signature to open up the e-signature action.

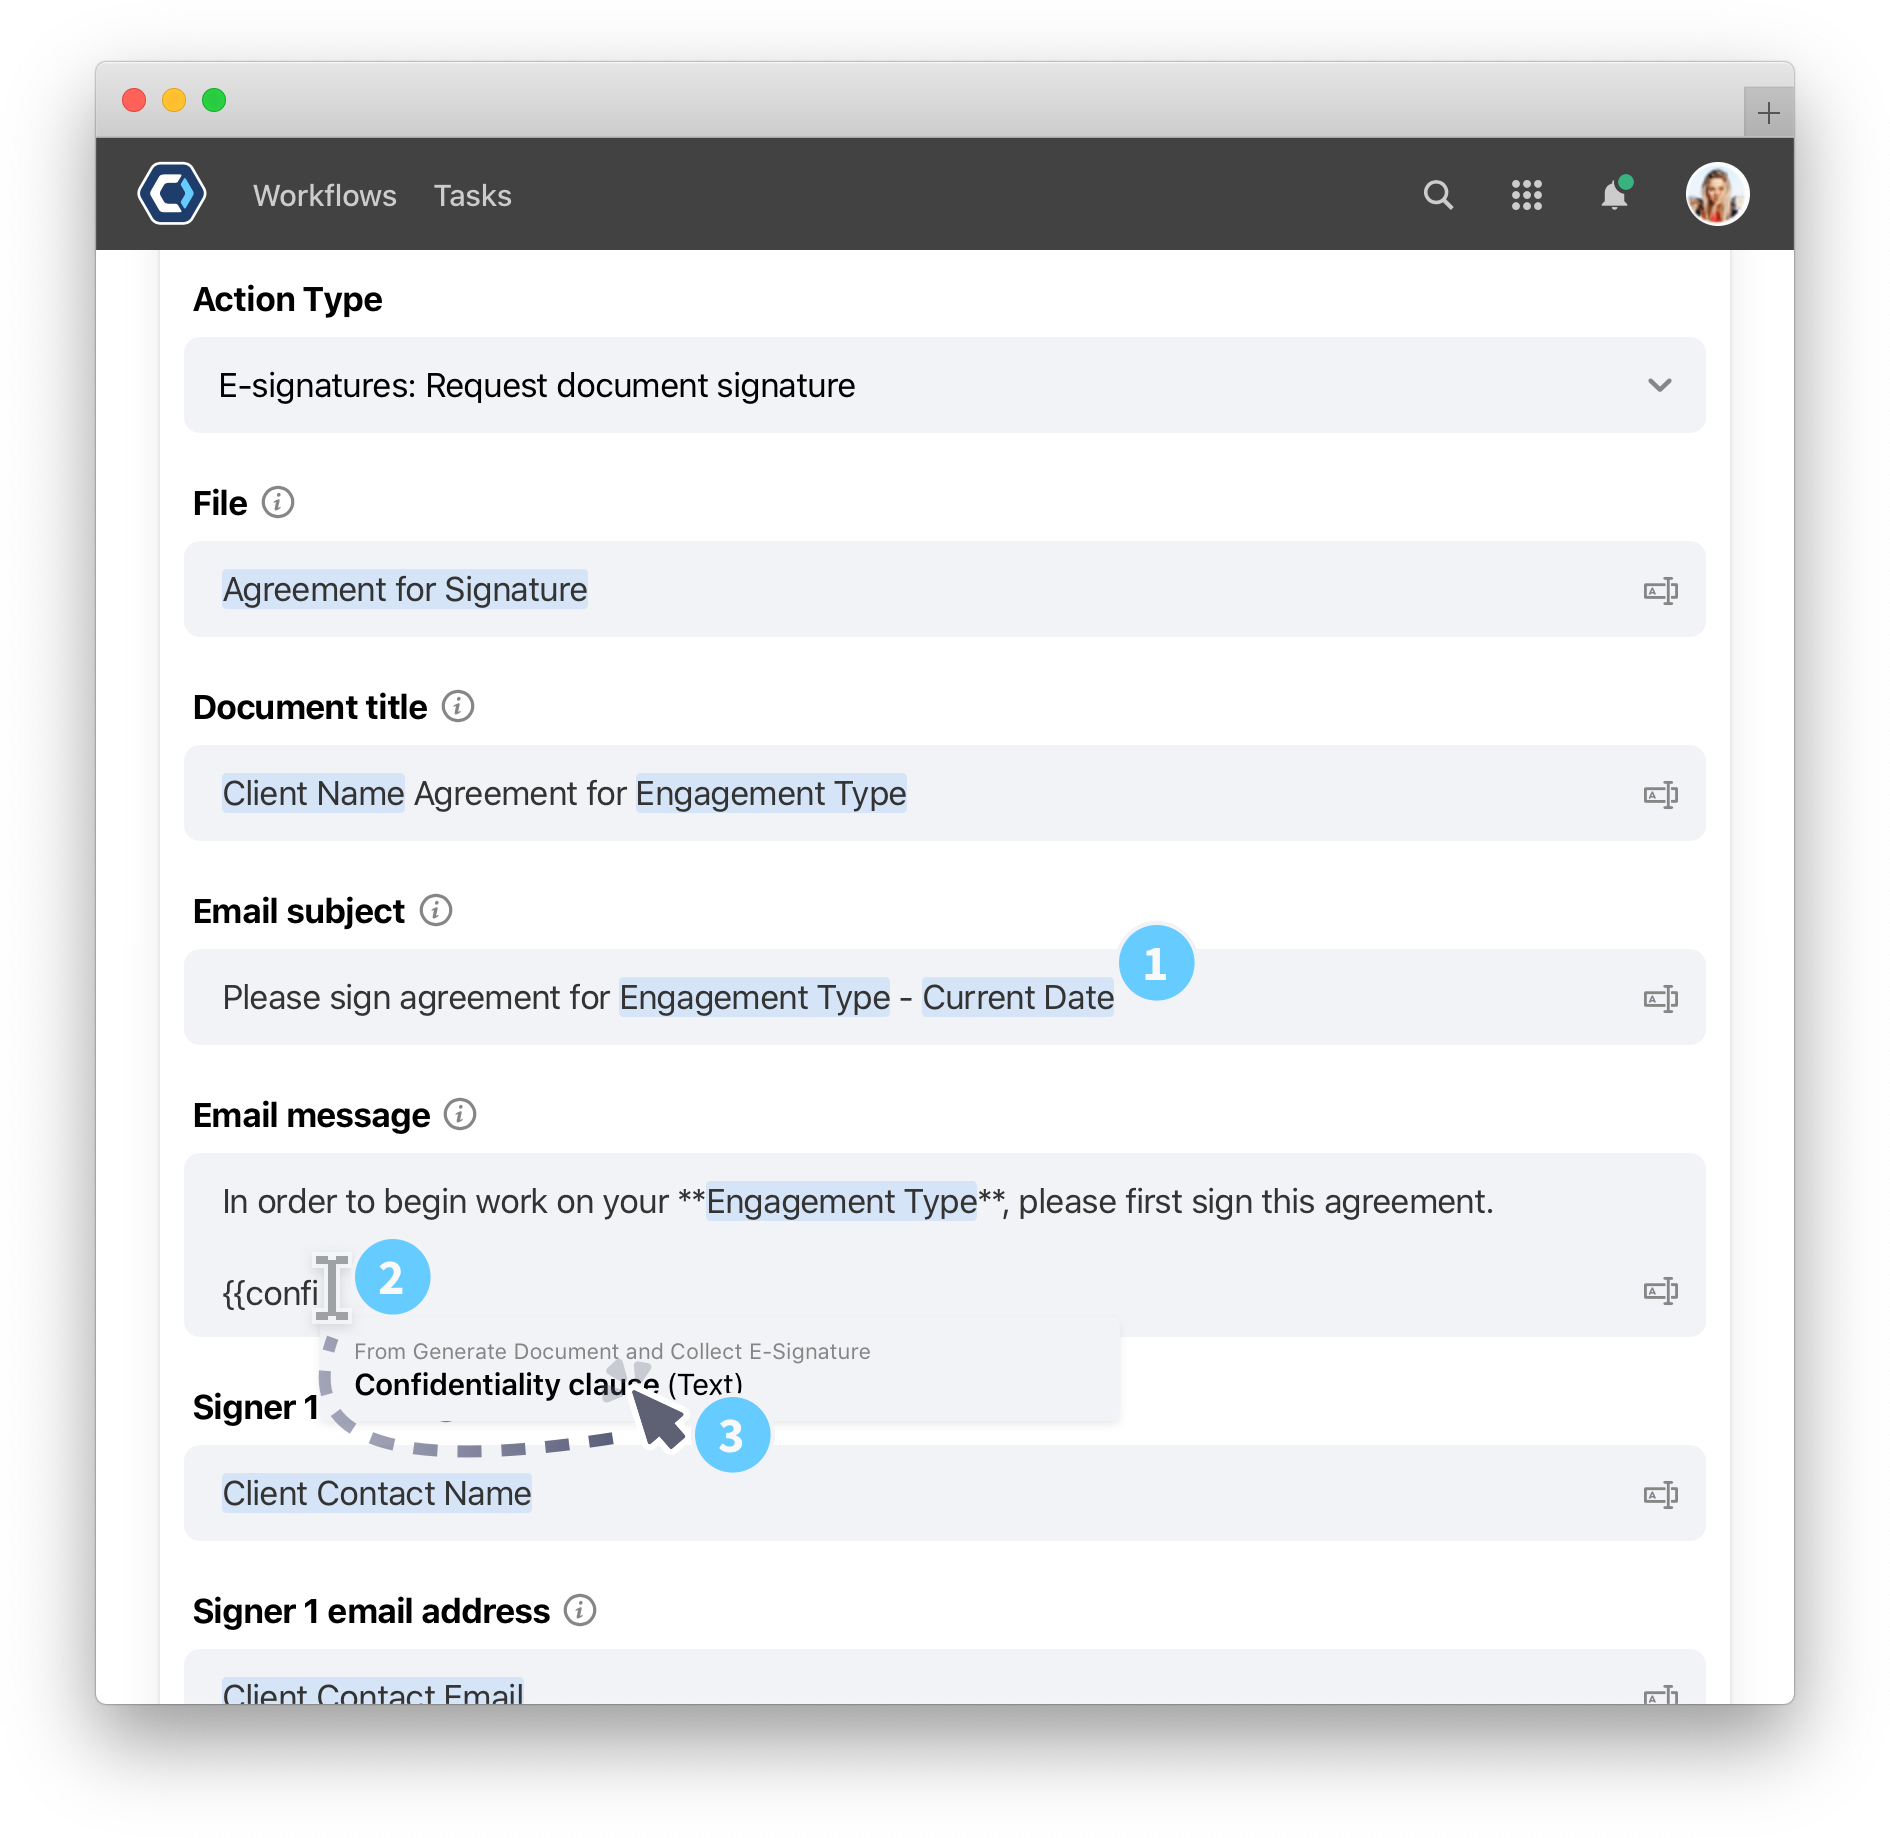
- You’re now looking at the configuration for the E-signatures: Request document signature action. From here, you can set all the parameters for the request. For example, you can change the body of the email that is sent as part of the request process.
- Let’s leave this action configured as is, but make two small changes, including adding our new confidentiality clause. PagerDuty Workflow Automation has a built in field picker to help you find the right field to include. Type in
{{, then start typing in the field name, likeconfidential, then select the option that pops up.- Let’s add our new confidentiality clause to the email message using the field picker. Add
{{confidential}}to the Email message field. - Let’s also add the current date to the email subject line. Add
{{current-date}}at the end of the subject line.
- Let’s add our new confidentiality clause to the email message using the field picker. Add
- Scroll to the top of the page and select to save the changes to the action.
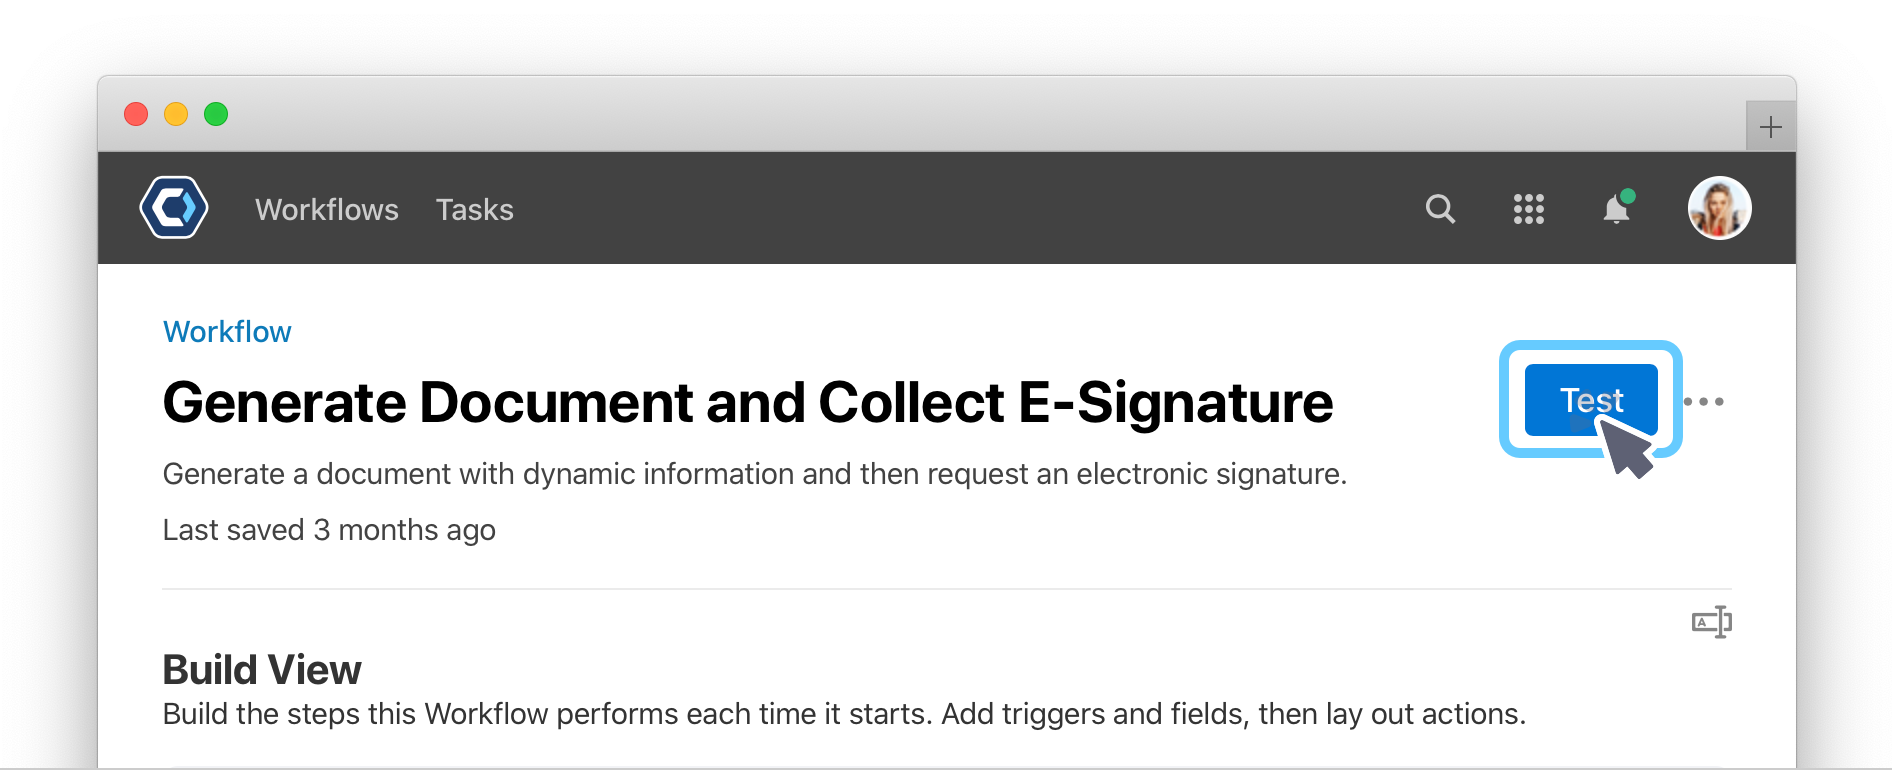
Test out the template
You can test a Workflow at any time, and by doing so regularly, you can spot and fix problems while you’re building. A lot of builders say they test their Workflow every time they configure a new task; we recommend that!
When you test the Workflow, you’re able to quickly and privately see how your configuration is working without making any changes or edits to the team or workplace.
-
From the top of the Workflow Builder page, select
 .
.
- Fill out all the blank fields. Your entries will be used in the Word doc template and e-signature request email.
- Select the
 button.
 - The instance will begin, and you will redirect to it. Scroll down to see the assigned and pending tasks. This is called the Instance detail page.
- Once the tasks complete, it may look like the page is empty—this is because only in progress tasks are show by default. Select Status is active in the filter bar, then choose Any status to see all the completed tasks.
You should get an email almost instantly with the document signing. Go ahead and download it to see the results of the automation. You can fill out the e-signature request too and finish the process.
Extend this template
Now that you’ve finished, you can go ahead and customize and edit this template to request e-signatures in any situation. A great next step is to go and edit the Word doc template and e-signature request action to something more relevant for your work.
If you’re looking for more next steps, you could also try:
-
If the document is signed, start a separate process. Try using the Workflow: Start another Workflow action to begin a new series of actions. For instance, you could distribute the new signed document using the Email: Send an email action, or Assign a task to a person to manually review the document for errors.
-
Automatically save the finished document to your online file sharing service for backup. Check out the Google Drive, Dropbox, or SharePoint integration setup guides and actions like Google Drive: Upload a file.
-
Change the email action to Email: Send a form to gather info from recipients. You can learn about web forms in the Create a web form and route inquiries guide. Also be sure to check out the Email: Send a form and the general web form article.
-
Integrate with a system and import data automatically to the process, like sending an e-signature request whenever a deal is won in Salesforce. Check out our Integrations or our general integration information article for more on integrating with different apps or services.
Thanks for your feedback
We update the Help Center daily, so expect changes soon.
Link Copied
Paste this URL anywhere to link straight to the section.