 Custom Integrations
PagerDuty Workflow Automation is always adding new Integrations for your team, but if you have a unique or custom application you want to integrate with right away, you can create a Custom Integration.

A custom integration is a one-time process to create an authorized connection between PagerDuty Workflow Automation and your favorite apps or tools. The custom integration uses the industry standard OAuth2 to create the connection.
Once you add a custom integration, you can add multiple connections just like with other integrations.
How custom integrations work 
For our existing turnkey integrations, PagerDuty Workflow Automation has already connected with the app or tool so they’re easy to make the set up easy. For custom integrations, you create this connection manually, which requires a few extra steps to get started.

In the custom integration process, PagerDuty Workflow Automation and your app or tool send requests back and forth to authorize a connection, including data like the Client ID, Client Secret, or Tokens.
After you configure a custom integration, you can use any Web API actions with your app or tool. You can even turn a series of Web API actions into custom action so they’re even easier to use.
Required Setup
Configuring a custom integration requires data from the app or tool you’re connecting to. There are two types of information needed throughout the setup process:
- Admin information: This information typically requires being an admin in the app or tool. A Client ID and Client Secret are required and are created in the app you’re connecting to.
- OAuth information: This information is typically in the developer documentation for the app or tool. The exact naming of each field may change between apps.
For the Admin Information, you will need to register PagerDuty Workflow Automation as an OAuth app in your app or tool. As an example of this process, you can see instructions for Microsoft Dynamics in the Dynamics Integration Setup Guide.
💡 Tip: When you set up the OAuth app, use https://security.pushbot.com/oauth as the redirect URI.
Before getting started, make sure you have access to the developer documentation and an admin account for the app or tool.
How to create a custom integration
- Open the
 menu in the top navigation bar, and select Admin.
 - Select Integrations at the bottom of the page.
- Select
 in the top right corner
 -
Select
 in the top right corner.
-
Create a name for the integration, this is how it will appear in the integration list and to other users.
- Select your Authorization Method and fill out the remaining fields. See the subsections below for how to configure different authorization methods.
- To connect and authorize using OAuth2, see Configuring an OAuth2 authorization
- To create an integration with an app or service using Basic or Token authorization, see Configuring a Basic or Token authorization
Configuring an OAuth2 authorization
The OAuth2 authorization method lets you integration with your apps or tools using OAuth2. To authorize the custom integration, PagerDuty Workflow Automation makes an Authorization API call using the OAuth2 information provided.
More details on the API calls and request format
PagerDuty Workflow Automation uses the information provided during custom integration setup to send two requests to your 3rd party app.
The first request is to authorize who PagerDuty Workflow Automation is, the second request is to retrieve the token from the app or tool. This is the standard for basic OAuth flow. See examples of the requests below.
✅ Heads-up: PagerDuty Workflow Automation sends out each request in a standard format, but some apps require custom or proprietary formatting for OAuth request. If your app uses custom formatting it may not be possible to create a connection.
First Request
Type: GET request
URI: {{authorization base url}}
Parameters:
- scope:
{{scopes-joined-by-"+"}} - response_type:
code - client_id:
{{clientID}} - redirect_uri:
https://security.pushbot.com/oauth - state:
{{pagerduty-internal-state}}
Upon successful authorization, the 3rd party app will redirect back to PagerDuty Workflow Automation, at which point PagerDuty Workflow Automation will attempt to retrieve the token that will be used when interacting with the 3rd party app’s API
Second Request
Type: POST request
URI: {{site}}{{tokenPath}}:
Headers:
- Accept:
application/json - Authorization:
Basic [base64]{{clientID}}:{{clientSecret}}
Form Data:
- code:
{{code-from-first-request-response}} - redirect_uri:
https://security.pusbot.com/oauth - grant_type:
authorization_code
If “Use Body Authentication” is turn on (true) when creating the custom integration, the following Form Data is appended to the second request:
- client_id:
{{clientID}}, - client_secret:
{{clientSecret}}},
- Follow the steps above for How to create a custom integration.
-
Select OAuth2 from the Authorization Method drop-down.
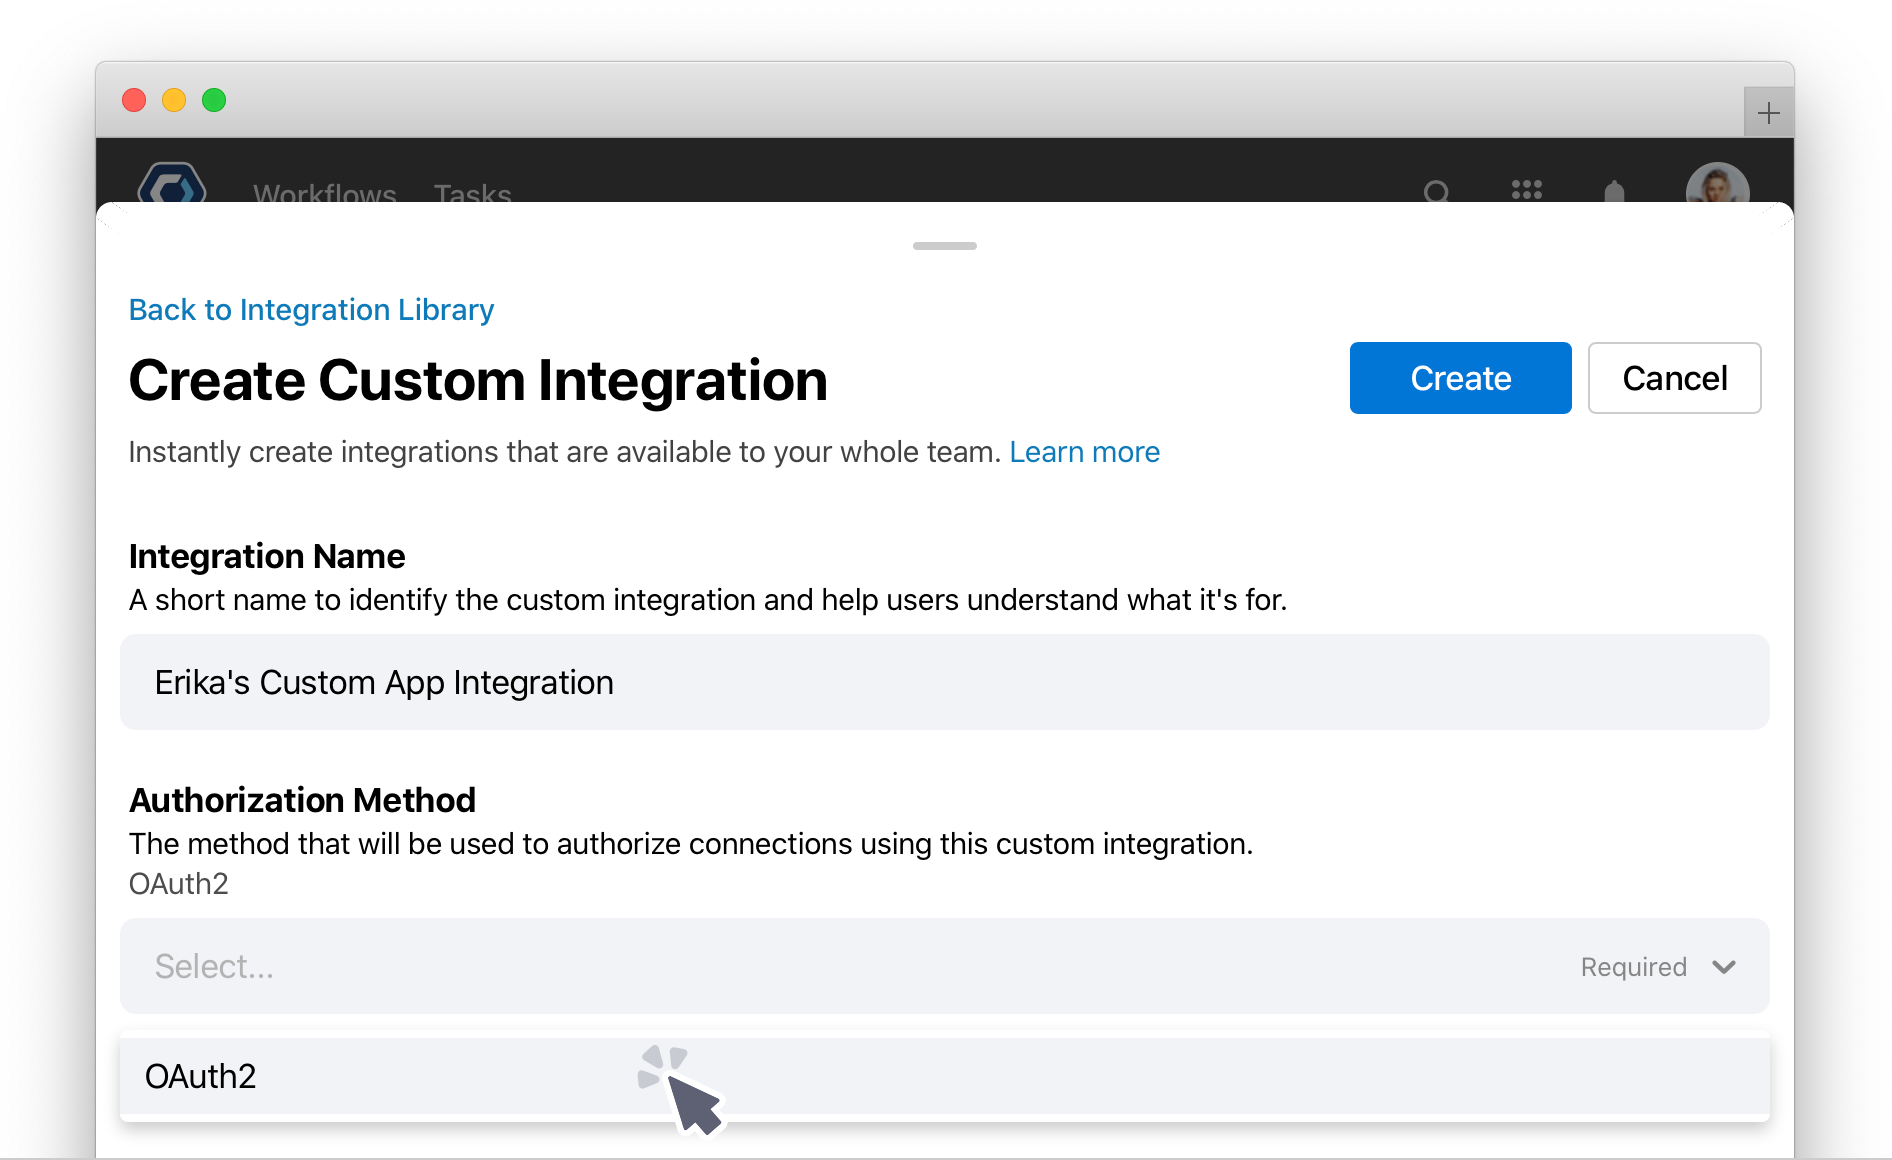
- The remaining fields will populate. To help simplify the process, you can imagine there are two sections: Admin information and OAuth information.
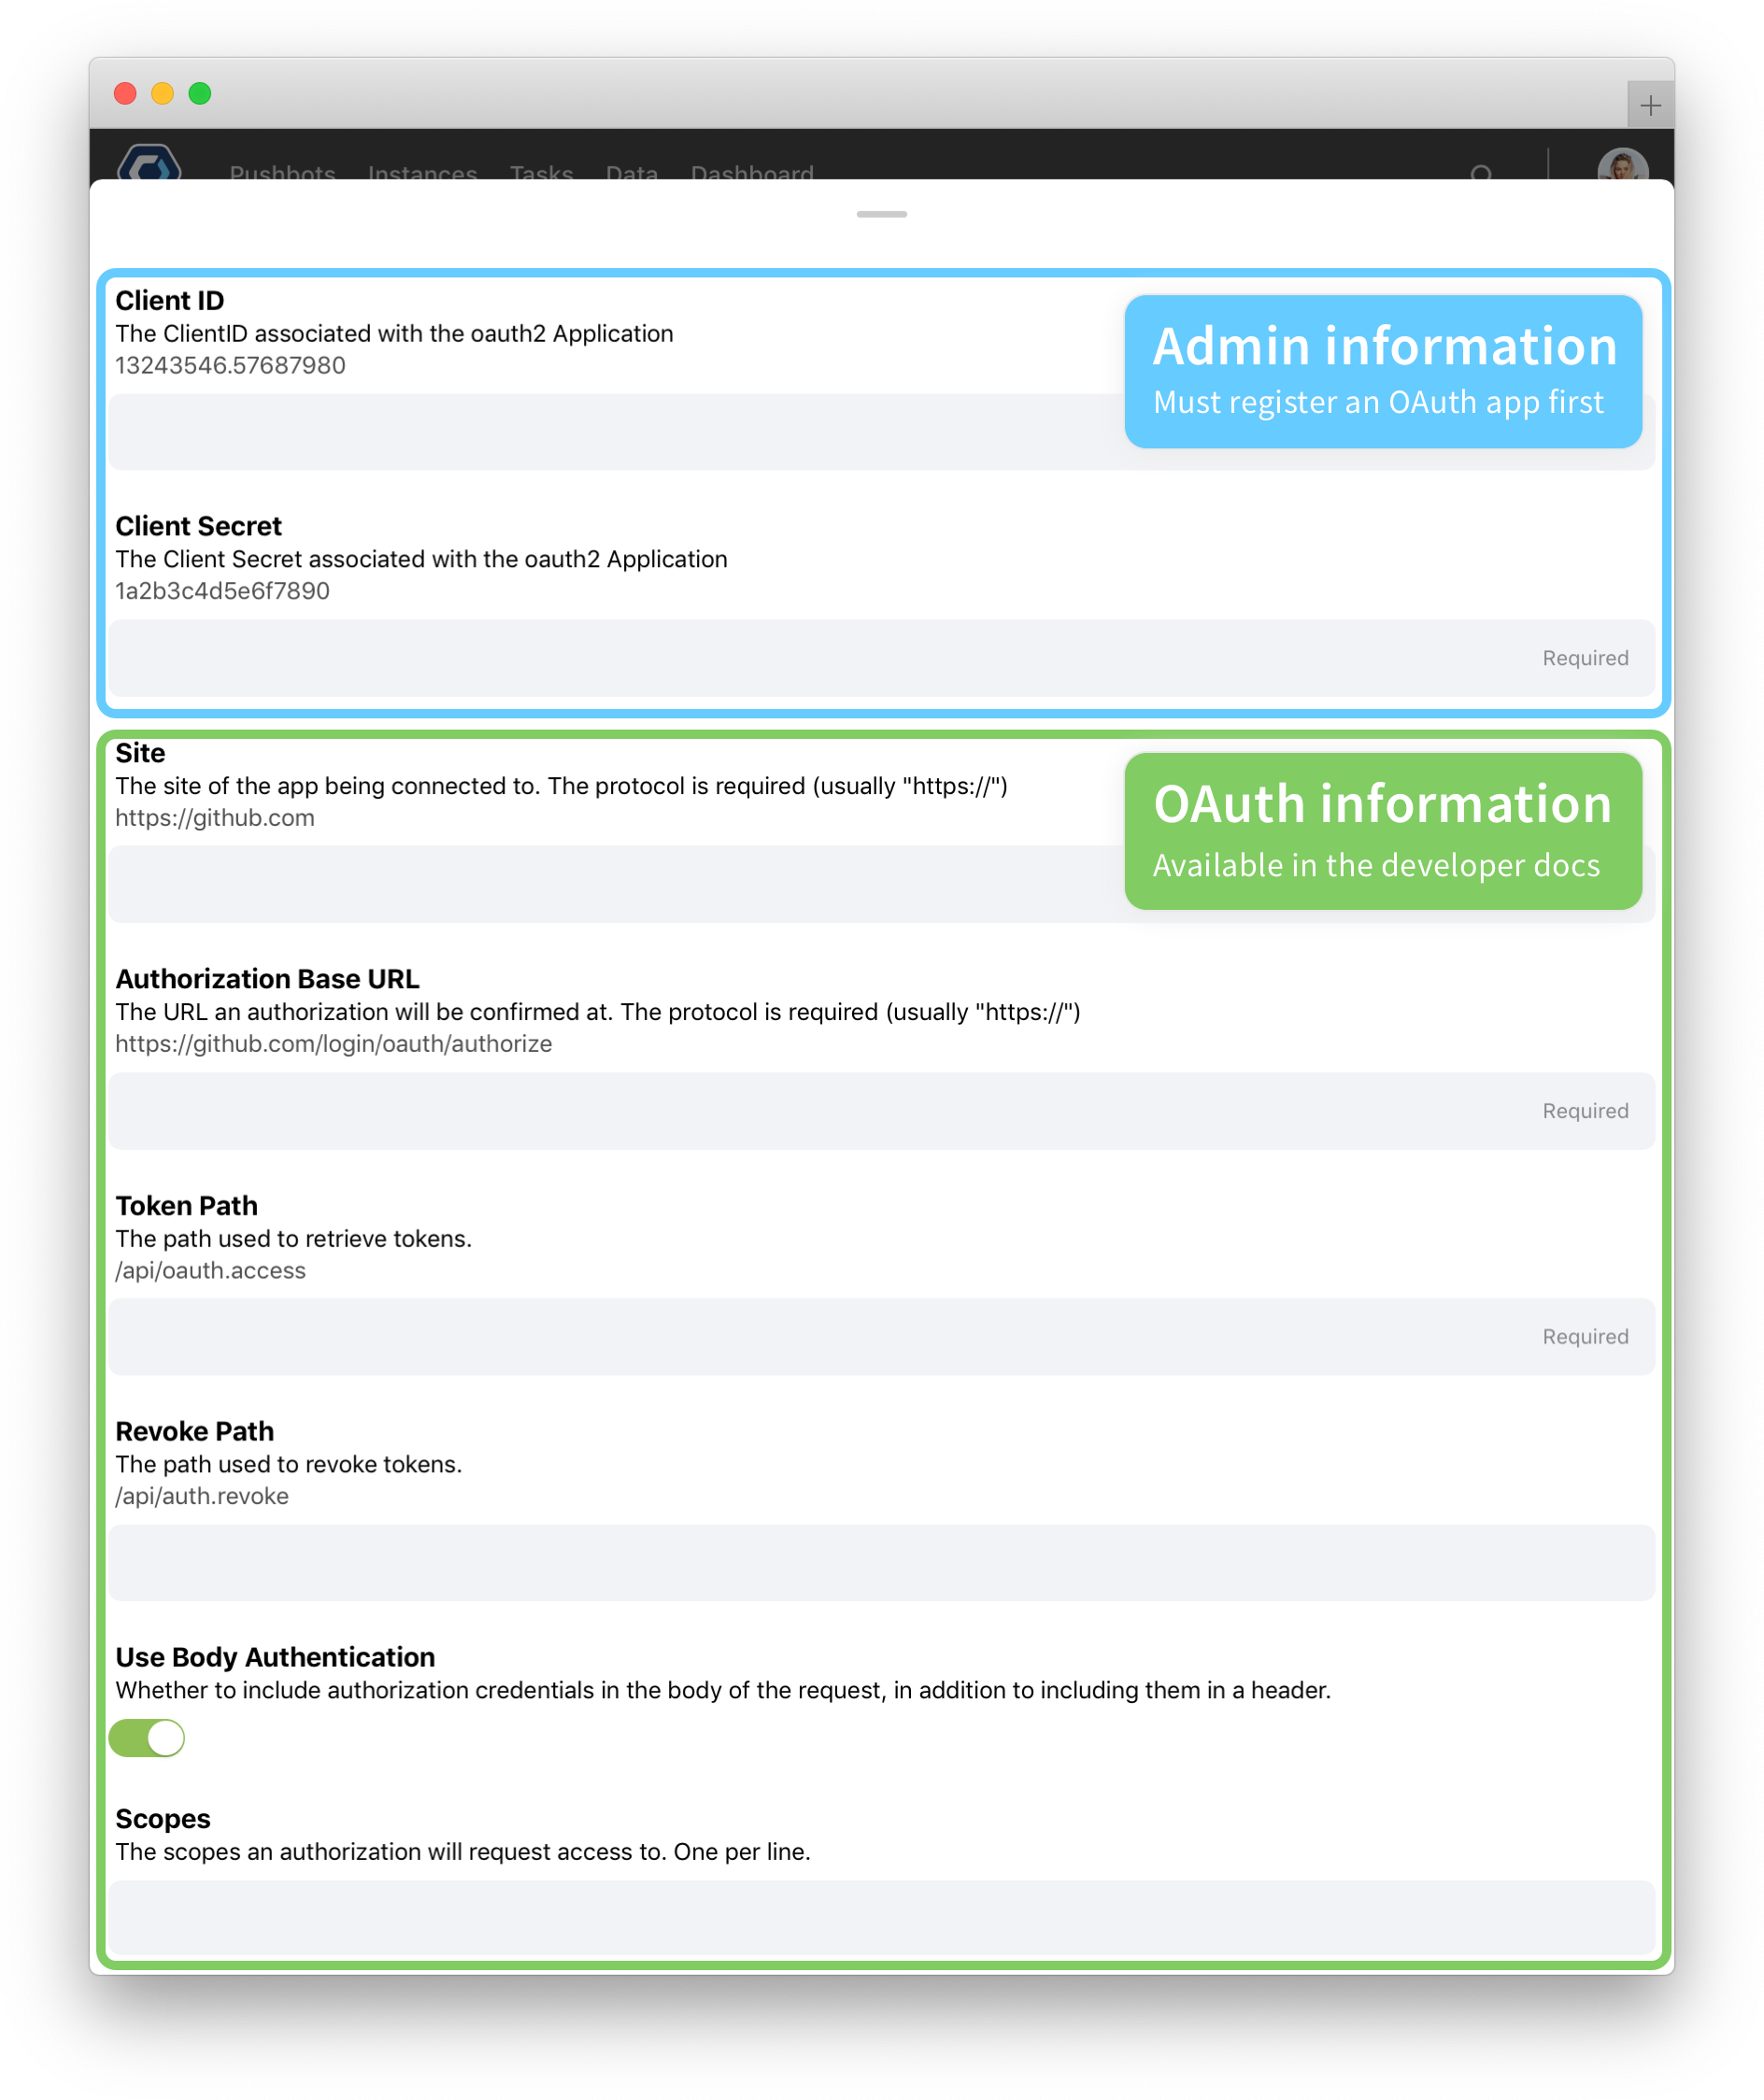
Adding the admin information
The Client ID and Client Secret are special codes provided by the app or tool. You must create these yourself in your app—this process varies significantly between apps, so you will need to refer to your app’s documentation for how to create them.
💡 Tip: Try searching the web for “your-app-or-tool OAuth flow” to find documentation on this for your app.
Once you’ve found the information, fill out the Client ID and Client Secret fields.
Adding the OAuth information
The remaining information is typically available in developer documentation. To help know what to look for, here is an example of Github’s developer documentation.
-
Site: This is the base domain for the token or revoke path. Enter just the URL up to the
.com. So if the token path ishttps://yourapp.com/login/oauth/access_token, the site is justhttps://yourapp.com. -
Authorization Base URL: This is the full URL where your app or tool accepts incoming requests. In your documentation, it may be written as an API call like
GET https://yourapp.com/login/oauth/authorize. In this case, the Authorization Base URL is justhttps://yourapp.com/login/oauth/authorize. -
Token Path: This is likely written in the developer docs as an API call like
POST https://yourapp.com/login/oauth/access_token. Enter the token path without the domain, such as/login/oauth/authorize. -
Revoke Path: Similar to the Token Path, this is likely written as an API call. Do not include the domain in the path. This field is not required.
-
Use Body Authentication: Keep this off to use header authentication. Turn this on to user header and body authentication. At this time, it is not possible to use just body authentication.
-
Scopes: This lets you set the exactly level of access for the integration. The format of scopes is unique to each app or tool, but usually look like
write:postsorread:topics. Here is an example of Github’s scope documentation. Add each scope on a new line.
Select  to create the custom integration.
Configuring a Basic or Token authorization
A basic or token authorized integration is set up a bit differently than custom integrations at this time.
Configured integrations connect to a dedicated user account within your app or tool using basic login or Token authorization, not OAuth2. Configured integrations require a user account.
If OAuth2 isn’t an option, you can connect with Basic or Token authorization by following the steps and examples in the ServiceNow configured integration setup guide article. Follow the steps in Required Setup and in Download all assets in ServiceNow.
How to create a new connection for a custom integration
Adding a connection to a custom integration is identical to adding one to other integrations.
- Open the menu in the top navigation bar, and select Admin.
- Select Integrations at the bottom of the page.
- Select the custom integration you wish to add a new connection to.
- In the Add a Connection section at the bottom of the next page, select
 .
. - Fill out the connection details, and set the integration permissions if necessary.
- Select
 .
. - You’ll be redirected to a login page for the app. This is the OAuth page and is an industry standard for connecting systems.
✅ Heads-up: When logging in, make sure the account has the correct permissions based on what you’re trying to do. If you want this integration to do admin work, log in with an admin. If it’s just basic reading or viewing, a regular user will work.
Here’s an example of that process:

Get help with a problem or question
If something’s not working as expected, or you’re looking for suggestions, check through the options below.
I made the custom integration and am being asked to log in to the app, what account do I use?
The specific account does not matter so long as the account has the correct permissions. For example, if you set the Scopes to have full read/write privileges, the account you log in with must also have those privileges.
I received an error: “There was a problem adding the integration. Please try again”
If you are returned to PagerDuty Workflow Automation and receive this error after adding a connection and logging in, the issue is almost always with the Token Path.
The token path should not include the site domain, it should just be the portion of the URL after the site. For example, if the site is https://yourapp.com the token path would be something like /login/oauth/access_token, not https://yourapp.com/login/oauth/access_token
In some cases, the issue may be your app or tool expects the token request to be formatted differently than we format it. For example, if the app requires an additional parameter, or expects the code parameter to be named something else. You can see how we format our requests in Technical details on the request format.
I added a custom integration, now what?
After you add the integration, now add a connection. See How to create a new connection for an existing integration for more details.
After you’ve created a connection, you are now ready to use any Web API actions.
I created the integration and logged in, but got stuck at “security.pushbot.com”
This generally indicates that your company or OAuth provider may be using odd or arbitrary formatting in its backend, or is unintentionally mishandling the request. If this happens, contact PagerDuty Support.
Thanks for your feedback
We update the Help Center daily, so expect changes soon.
Link Copied
Paste this URL anywhere to link straight to the section.