 Approval Workflow Starter Template
Get started with the Approval Workflow Starter Template to create an approval loop where requests can be accepted or rejected.
How to configure this template 
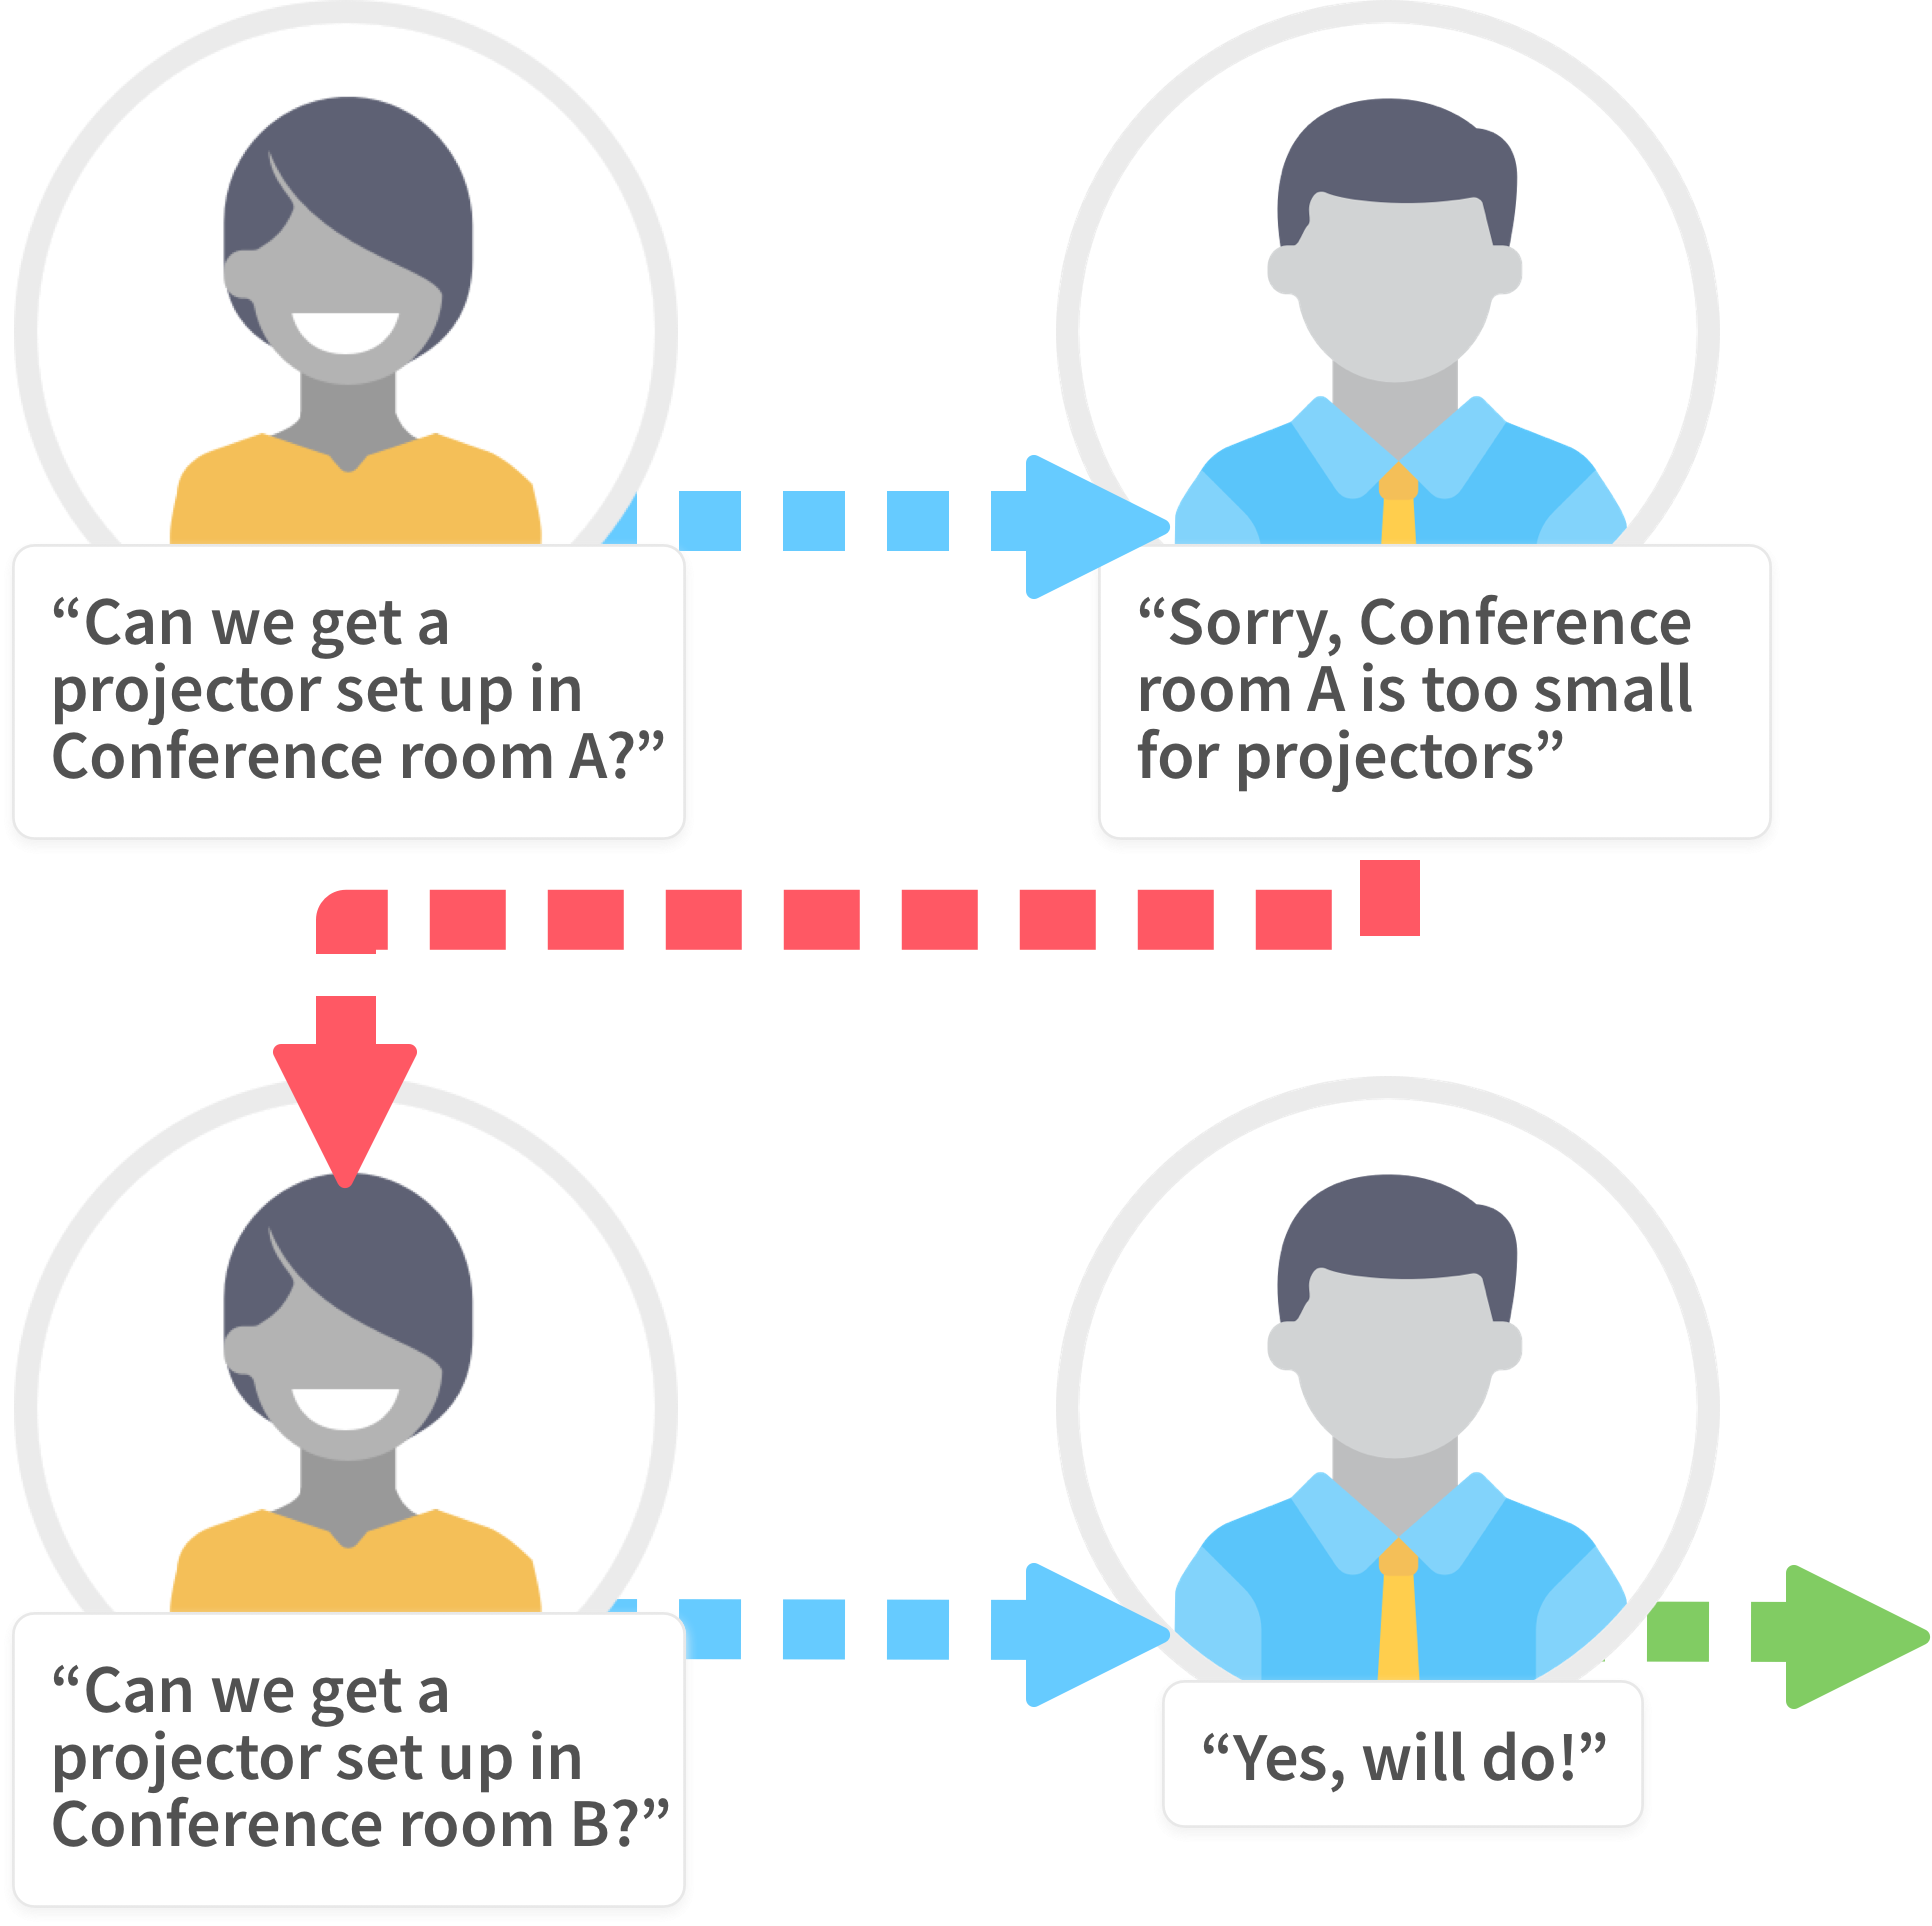
In this template, you’ll customize an approval workflow—User A submits a request, and User B accepts or rejects it. If the request is rejected, User A is asked to resubmit a new request. This repeats until the request is approved.
When you import the template, you become the owner of the process. You’ll be considered the “approver” and will receive all approval tasks for this process.
Add the Workflow from the showcase
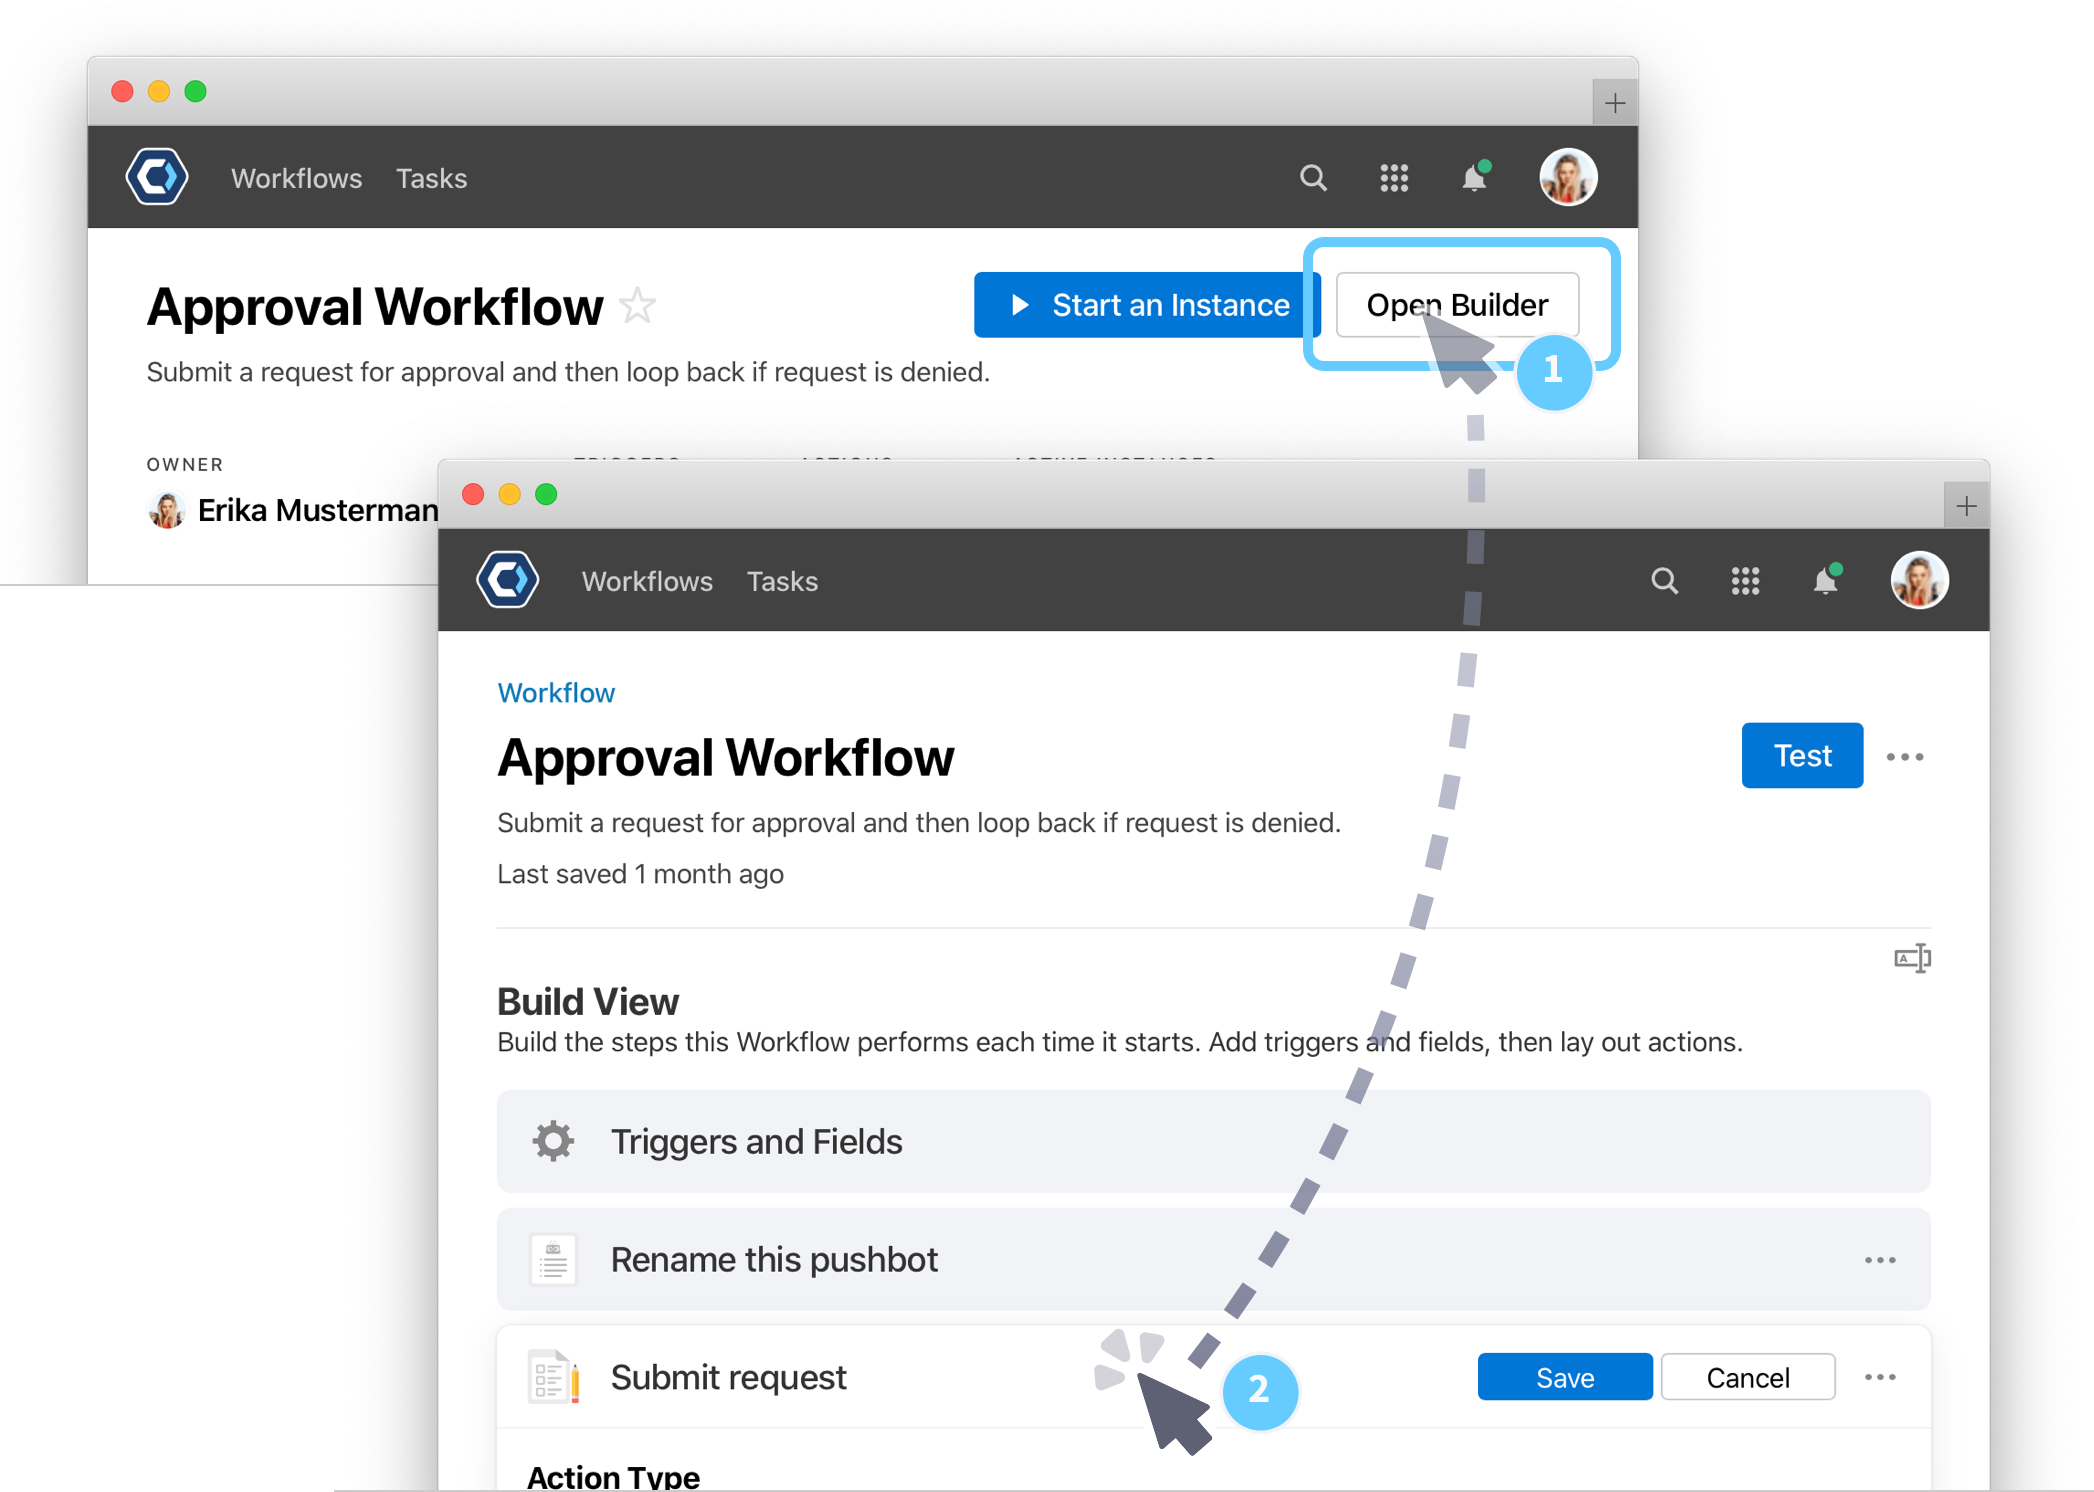
To get started with a template, first create a new Workflow, then import the template from the showcase.
-
Select Workflows from the top navigation bar, then select


- Select Approval Workflow from the Showcase Templates section.
- Select

Congratulations! Because you imported the template, most of the Workflow configuration is already complete. We only have a few more steps before your process is good to go. After importing the template, you’ll land on the Workflow Builder page.
Configure the submit request task
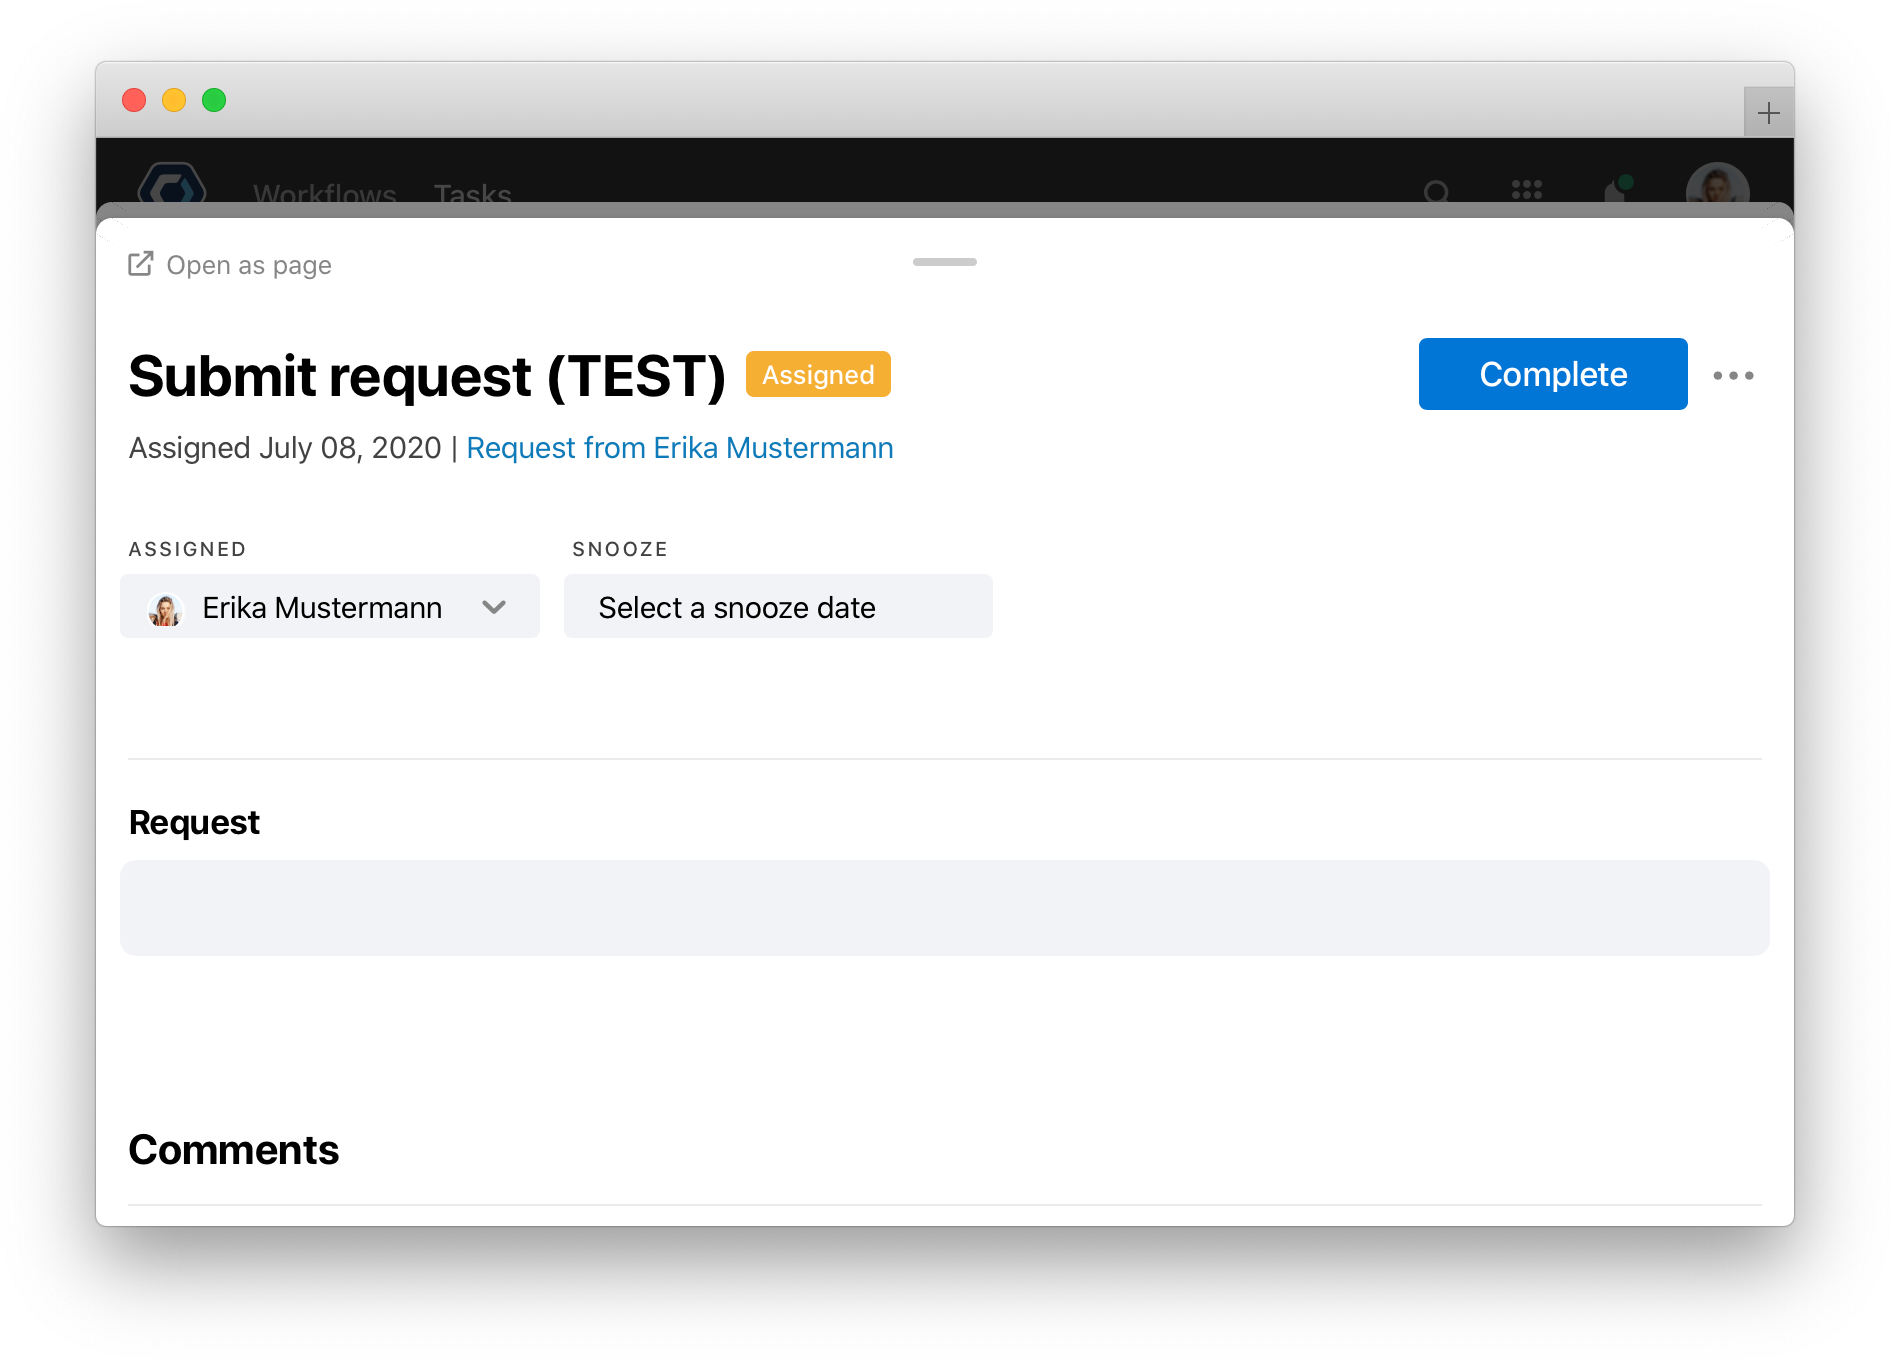
In this template, the process starts with a manual task where a user can enter in a request. The task has a text type field for the user to enter the request—it is one of many different field types—like multiple choice, integer, and more. It looks like this:
When you customize this template for any of your use cases, you can add other fields to include in the request.
Let’s start configuring. For this example, let’s add instructions and an “Urgent” field so the user can mark the request as urgent.
-
Welcome to Builder! A lot of the magic happens right here. For now, click Submit request to open the first task.
-
You’re now looking at the configuration for the Submit request step, which is an Assign a task to a person action. From here, you can set all the parameters for the action.
Let’s take a quick detour to look at how the configuration of this action will change what the user sees when they submit a request:

The request field is added to the form field section, which appears as a text box to the user. The other field is hidden unless they're resubmitting a request. -
Let’s leave this configured as is, but make two small changes.
- Let’s add instructions, so we can see how they change the task’s appearance. Here are some example instructions, but you could add your own if you’d like.
Please submit a request for review. If your request is not approved, you'll have a chance to submit a revised request. Mark as urgent if this requires immediate attention.. - Let’s also add a new field. To configure a new field, select Add a field from the Form Fields section of the action. We’ll set this field up in the next step.
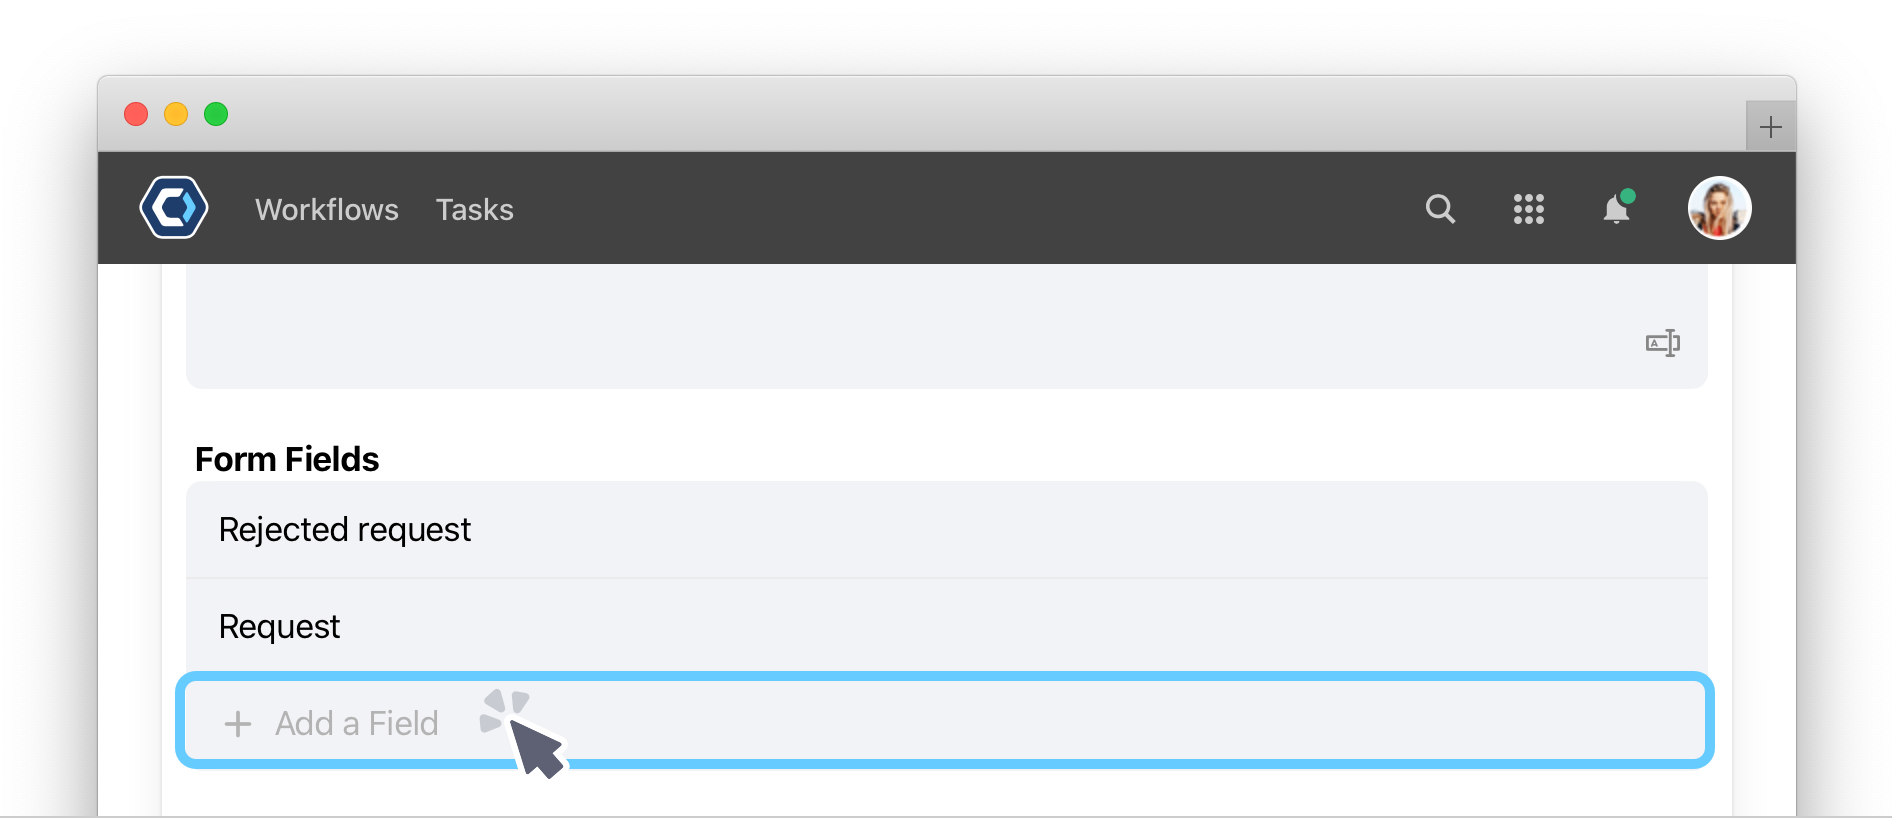
- Let’s add instructions, so we can see how they change the task’s appearance. Here are some example instructions, but you could add your own if you’d like.
Add an “Urgent” option to the request
Let’s give users a way to mark the request as urgent, and learn more about configuring fields in tasks. For reference, you can see an image of the fully configured action below:
Fully configured field example
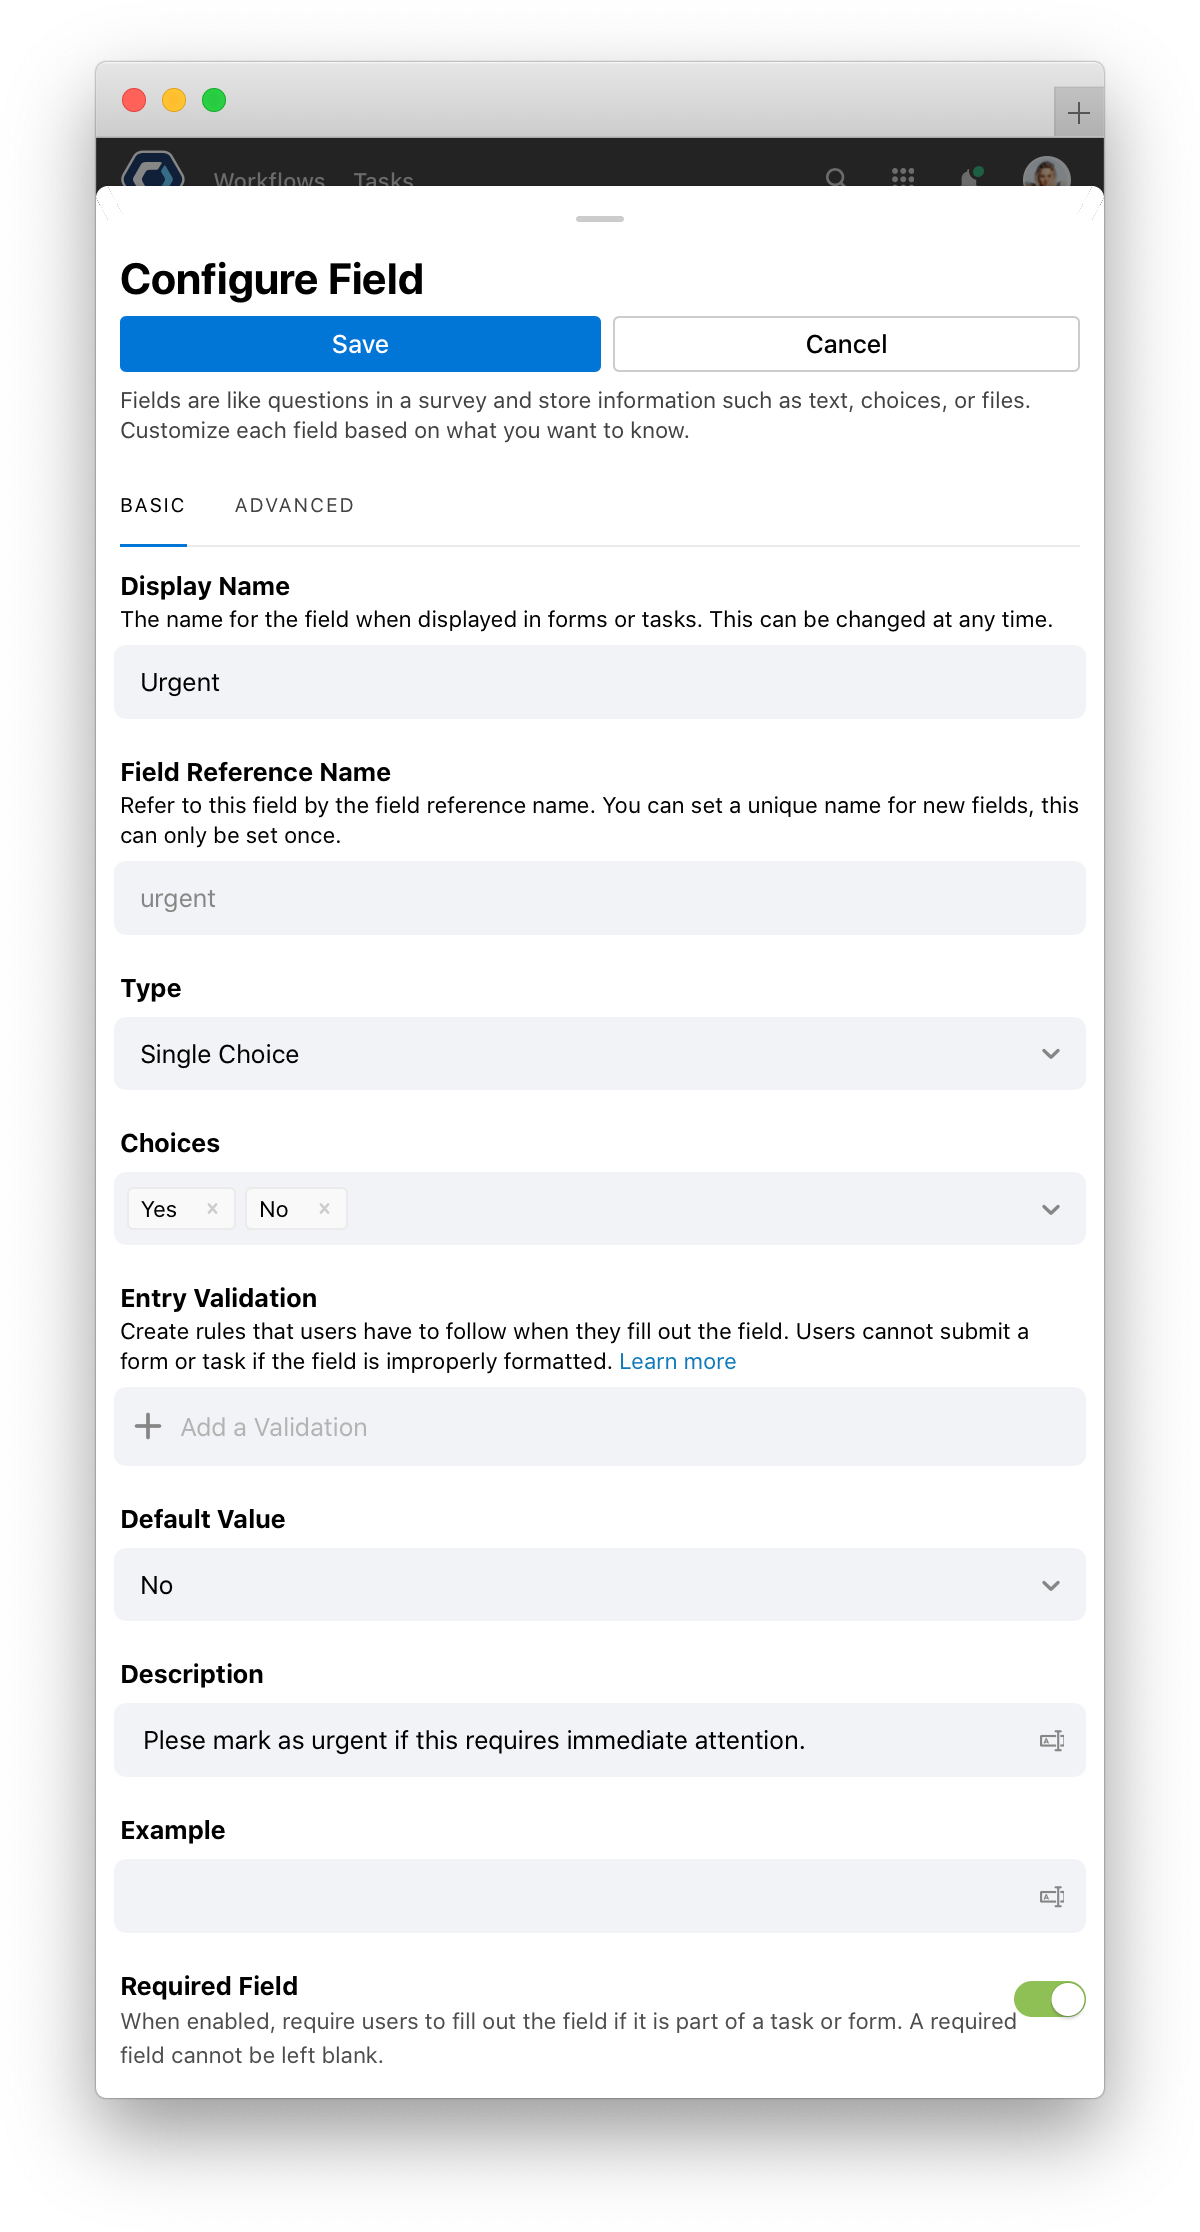
- Set the Display name to
Urgent. The display name is what the “title” of the field is on the task. - Set the Type to
Single Choice. Once you select Single Choice, a new Choices field appears for configuration. - In the Choices field, type in
Yes, and hit enter. Then type inNo, and hit enter. - To improve the experience, we can set the default value for this field. Click the Default value field and select
No. - Add a description, for example
Plese mark as urgent if this requires immediate attention. - Finally, mark the field as required by clicking the
 for Required Field.
 - Scroll to the top of the page and select
 to save the changes to the field.
💡 Tip: If you’re interested in more details on task configuration, you can see an overview of basic field configuration below.
Overview of basic field configuration
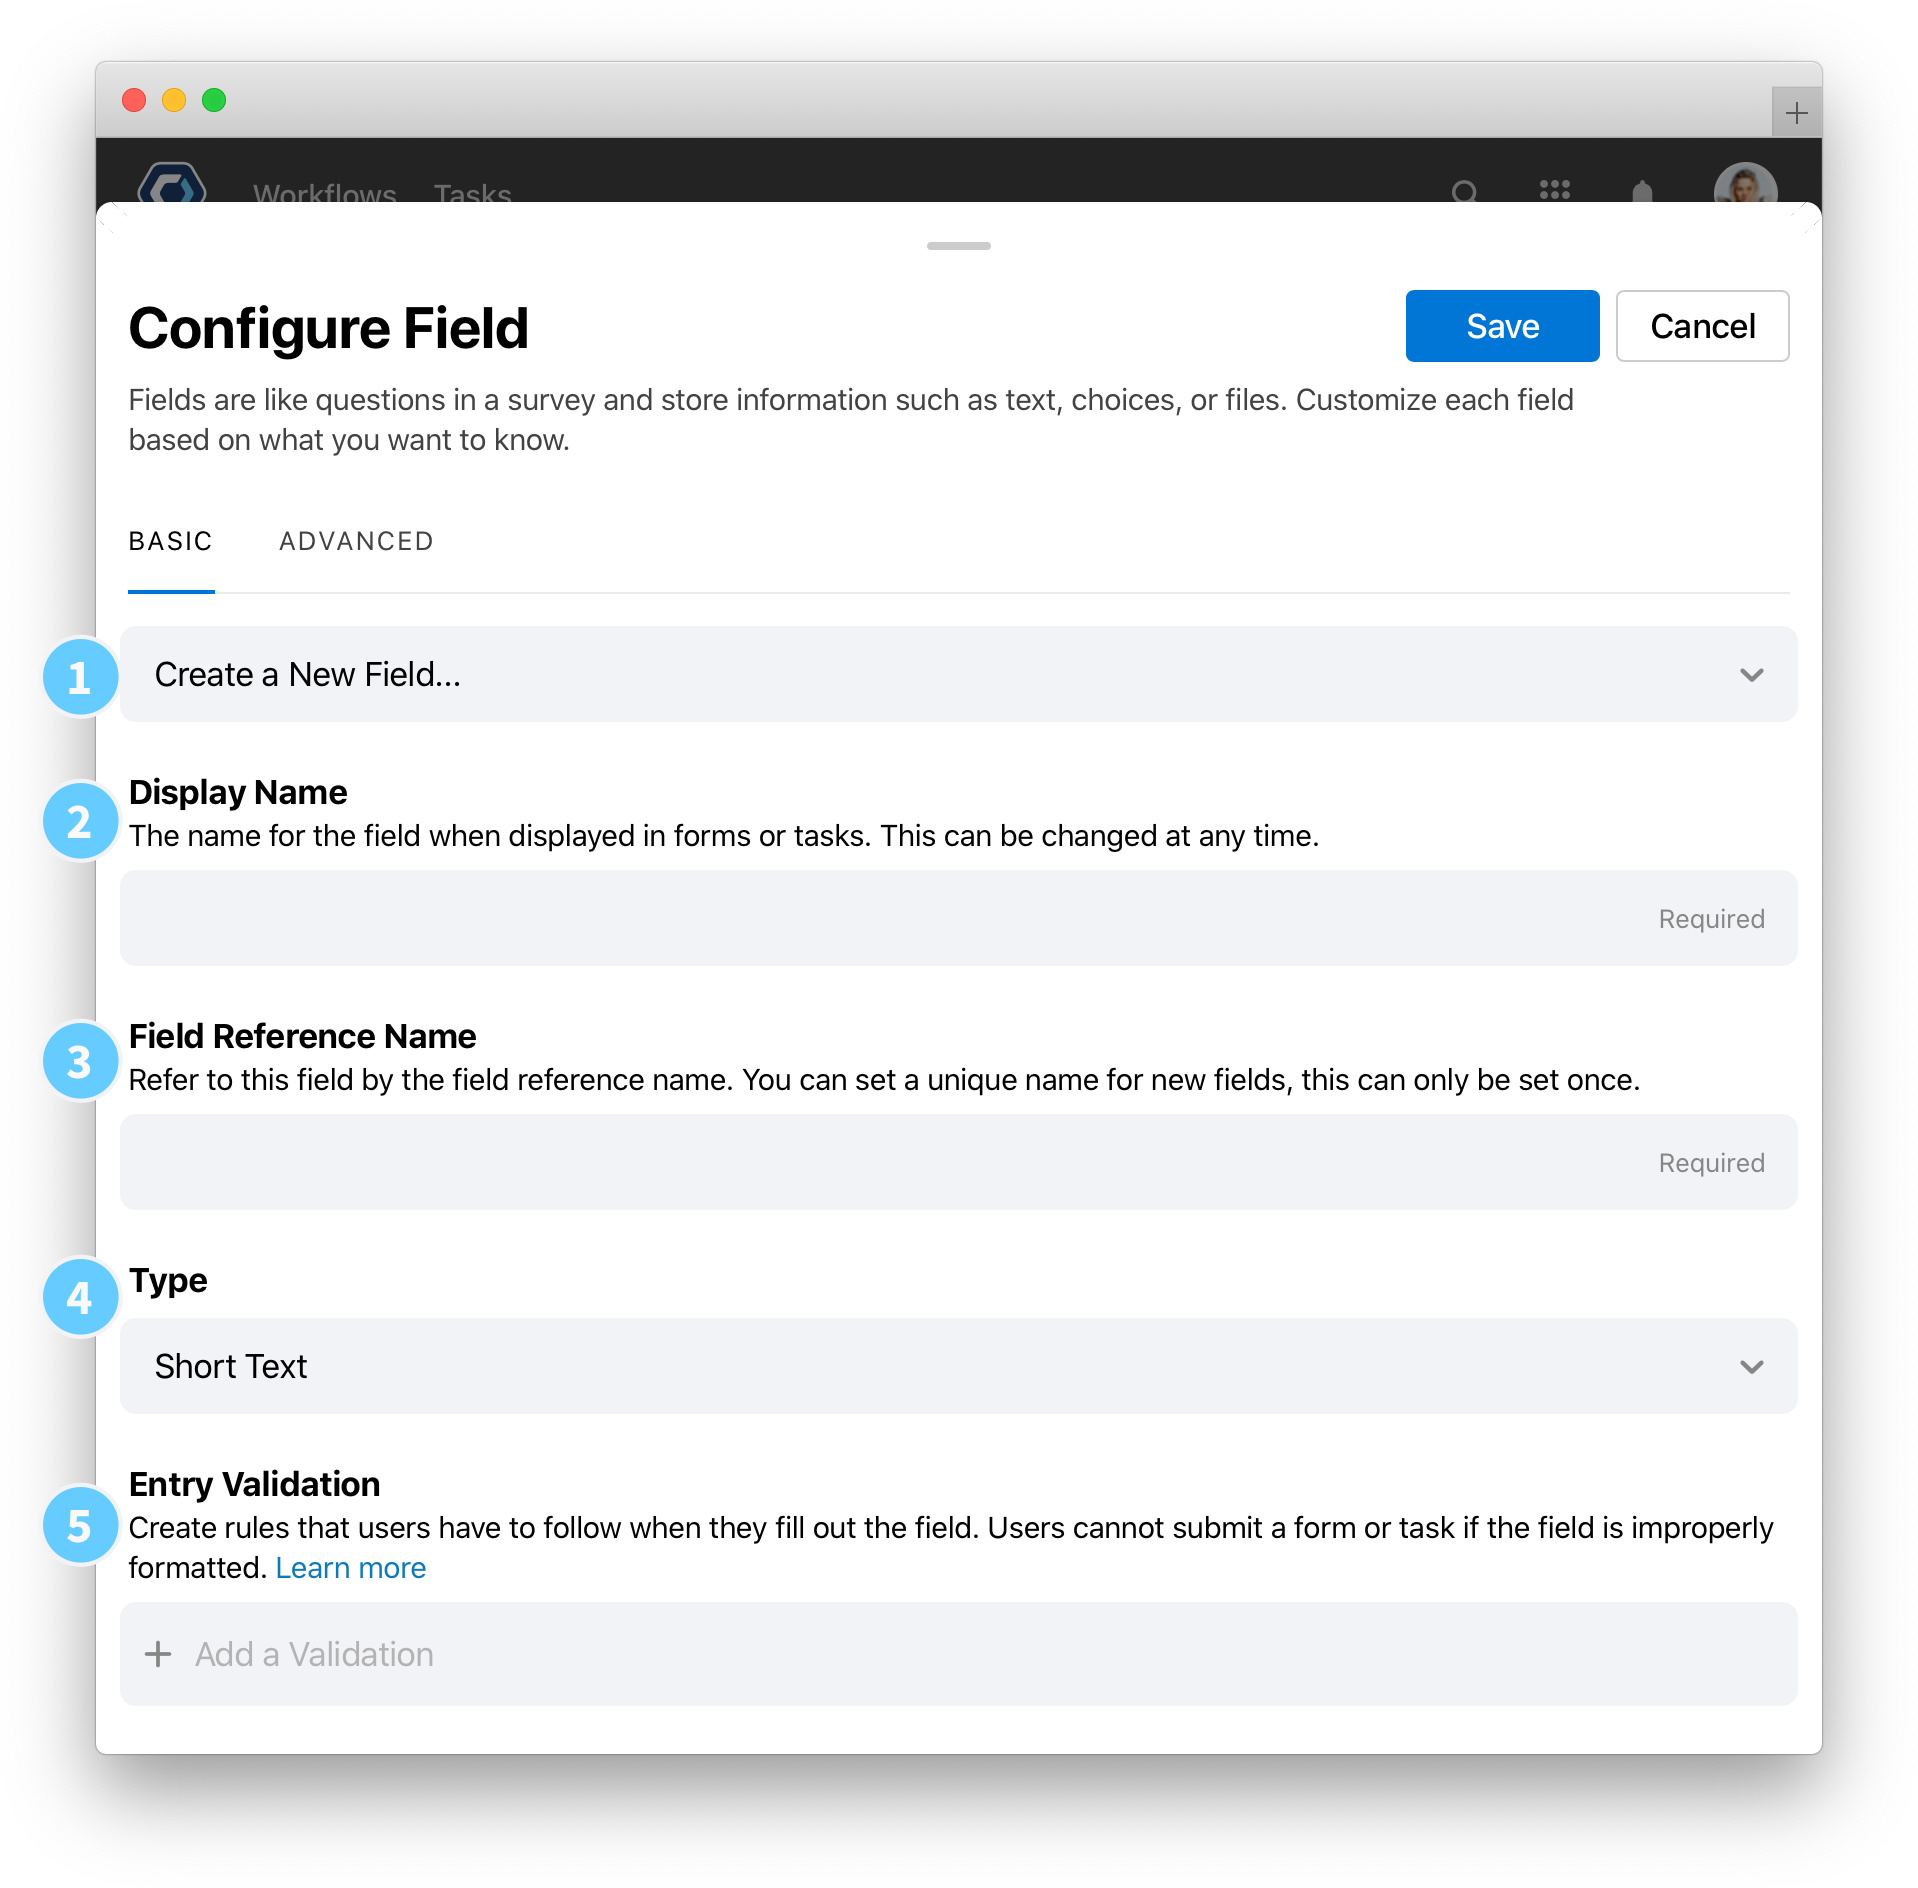
- Create a New Field, or Select an Existing Field: By default, adding a field will create a new field. Alternatively, use Select an Existing Field to pick an existing field from anywhere in the process, and add it as a form field. See the section on Select an existing field
- Display Name: Change the field name that is displayed to people. Note that the display name is cosmetic and can be changed at any time—it is the field reference name that is used to reference the field value.
- Field Reference Name: Refer to the field by this field reference name. You can set a unique name for this field, but only when the field is first created.
- Type: Select the field type, such as Text, Decimal, Integer, or Date. See the field types article for more information on each type.
-
Default Value: Set the default value of the field that users can choose to leave as is or change. For example in a true or false field, setting the default value to “True” will mean true will be preselected.
- Description: Appears above the field, directly below the display name, providing guidance to the user. Description fields do not support Markdown. To add more detailed instructions, see the Instruction field type.
-
Example: Appears directly below the description field, and is useful to provide an example or typical value for a field.
- Required Field: By setting a field to required, the user must add a value before completing a task or submitting a web form.
Entry validation for text, integer, and decimal fields
Text, integer, and decimal fields support entry validation, which prevents or restricts a user from submitting a form or task when a field has incorrect data. The Entry validation and Error message fields are used to set a custom validation. Check out Apply entry validation to fields to learn more.
With the request configured, let’s update the approval task to include info on the task urgency.
Configure the approve request task
We want the approver to know if the task is urgent, so we need a way to show the results of the Urgent field we added earlier—we can do this with field references. Field references are a way to dynamically reference data from other parts of the process.
-
From the Builder screen, select the Approve request action.

- Add the following to the end of the instructions:
**Is this an urgent request?**. -
Let’s add the field reference next. PagerDuty Workflow Automation has a built in field picker to help you find the right field to include. Type in
{{, then start typing in the field name:Urgent. Select the option that pops up.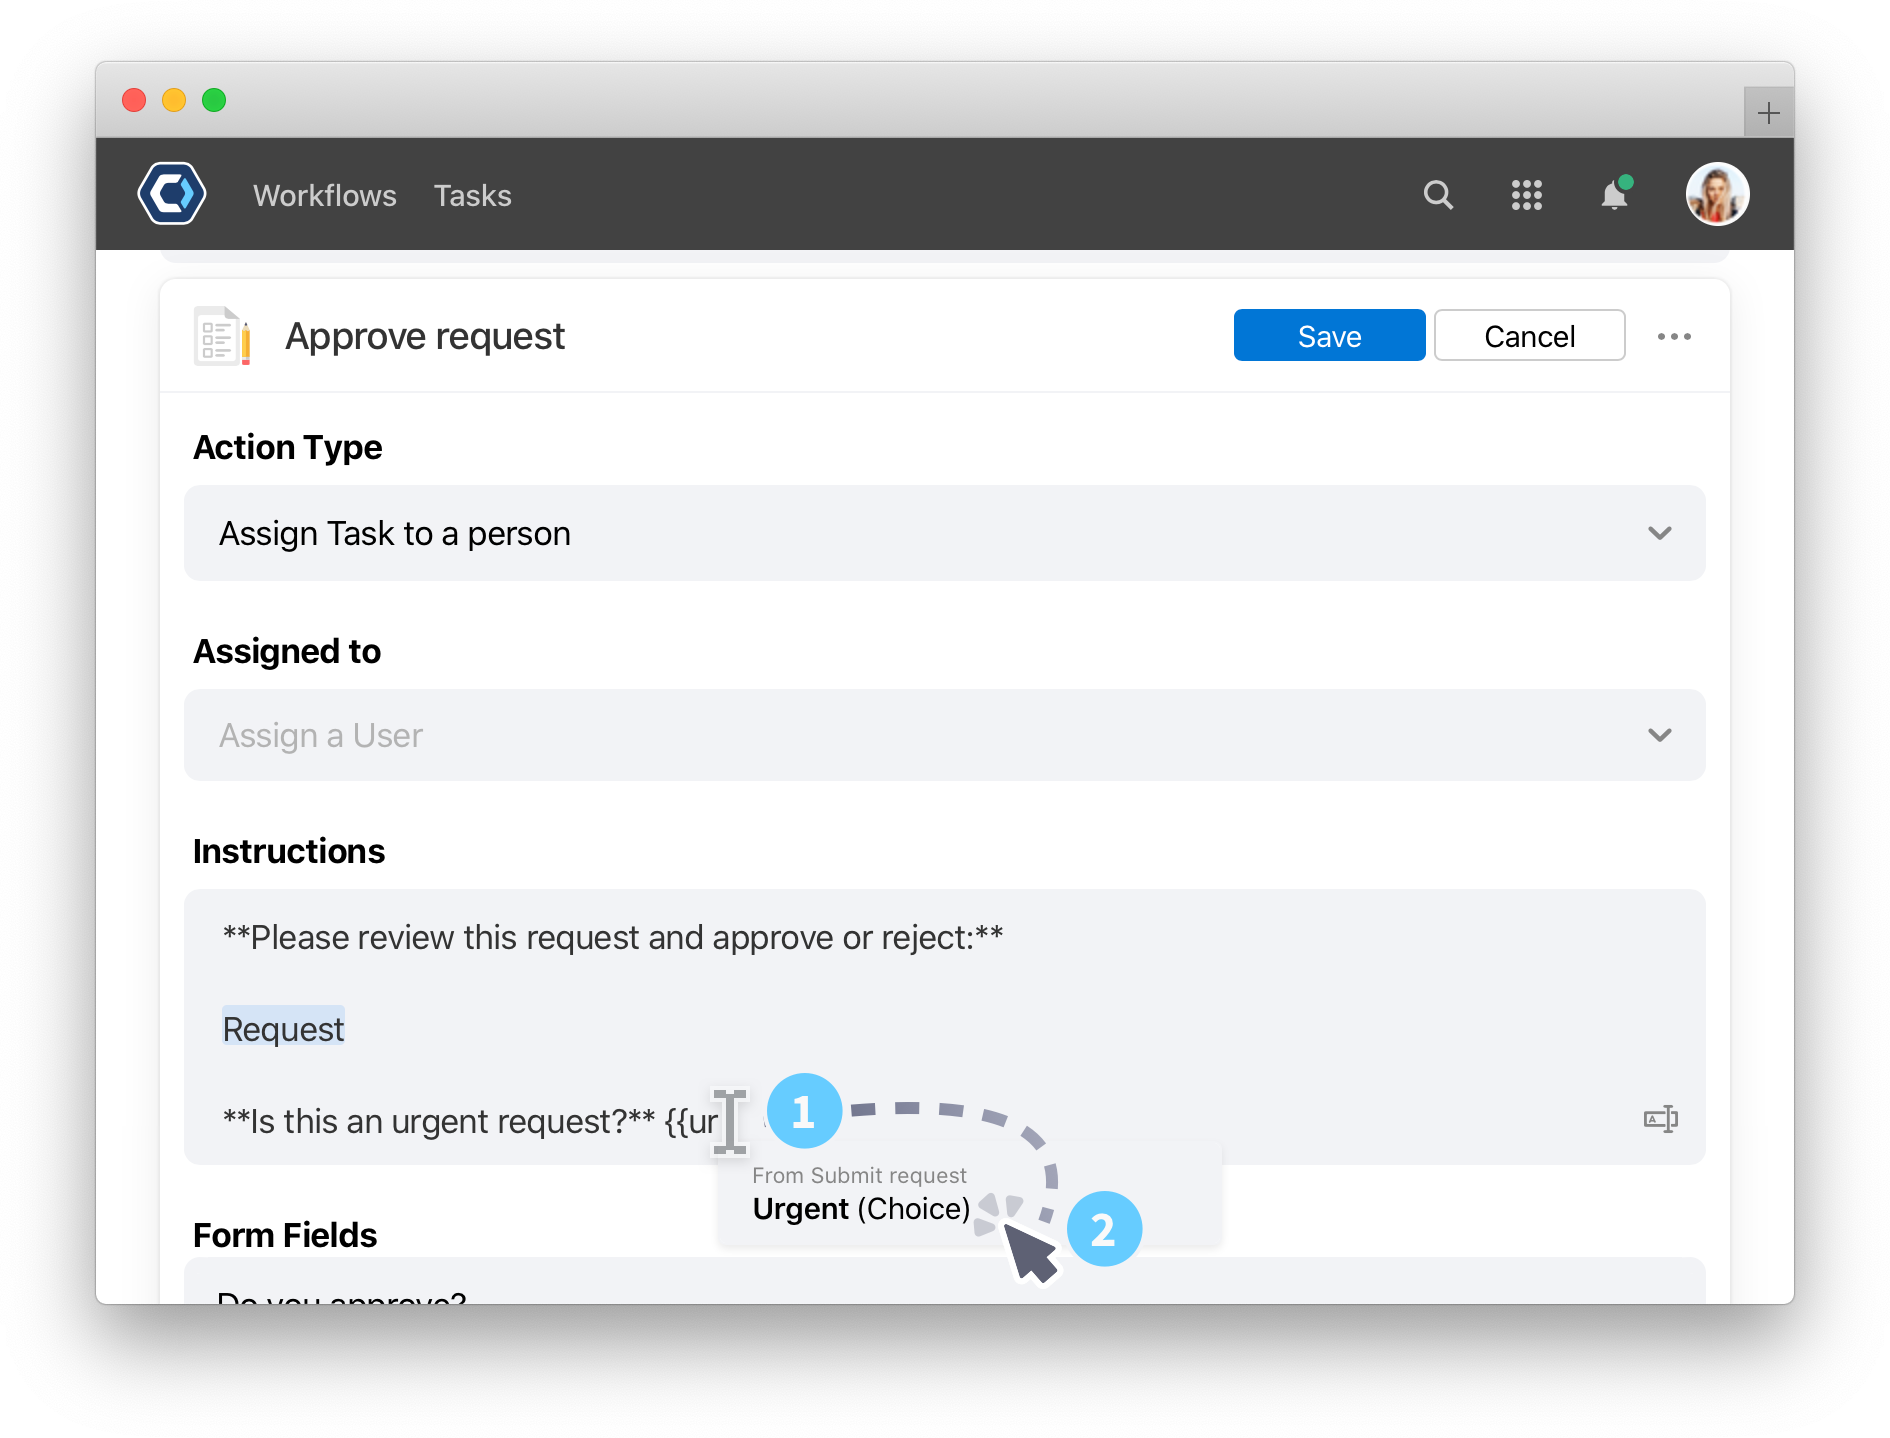
- Scroll to the top of the action and select to save the changes to the action.
Now when the approve request task is assigned, it will display Yes or No based on the choice made in the earlier task.
💡 Tip: Also, if you’re curious why we added ** around the **Is this an urgent request?** above, that’s because instruction fields support Markdown, which lets you customize the style of text. See the markdown article for more info.
Test out the template
You can test a Workflow at any time, and by doing so regularly, you can spot and fix problems while you’re building. A lot of builders say they test their Workflow every time they configure a new task; we recommend that!
When you test the Workflow, you’re able to quickly and privately see how your configuration is working without making any changes or edits to the team or workplace.
-
From the top of the Workflow Builder page, select
 .
.
- Select the
 button.
 - The instance will begin, and you will redirect to it. Scroll down to see the assigned and pending tasks. This is called the Instance detail page.
- The first task is ready to test. Since you’re testing, all the tasks are assigned to you. Open the Submit request task, enter a request, choose the urgency level, and select
 .
. - Right away, the Approve request task will be ready. You should see all your choices, ready for approval! Feel free to play around with approving or rejecting the request.
Extend this template
Now that you’ve finished, you can go ahead and customize and edit this template to act as an approval workflow in any situation. A great next step is to add more tasks to the process that only start if the request is approved.
If you’re looking for more next steps, you could also try:
-
Add a webform to the process so users can submit a request from a publicly available URL—this is a great way to loop in customers or clients into your automation. You can learn about web forms in the Create a web form and route inquiries guide. Also be sure to check out the Email: Send a form and the general web form article.
-
Set a limit to the number of approval cycles, so a request can only be submitted for approval X number of times. To get you started, try setting the limit as an integer Instance Field, then set conditions on your approve request task to start only when a condition is met.
-
Set a task to update a table or system when an approval is granted. Use conditions to start a task only if the request is approved, then follow up with actions like Tables: Update a row to log the approval to a ledger.
Thanks for your feedback
We update the Help Center daily, so expect changes soon.
Link Copied
Paste this URL anywhere to link straight to the section.